Maintenance8752−1/A1
Winterthur Gas & Diesel Ltd.
10/ 11
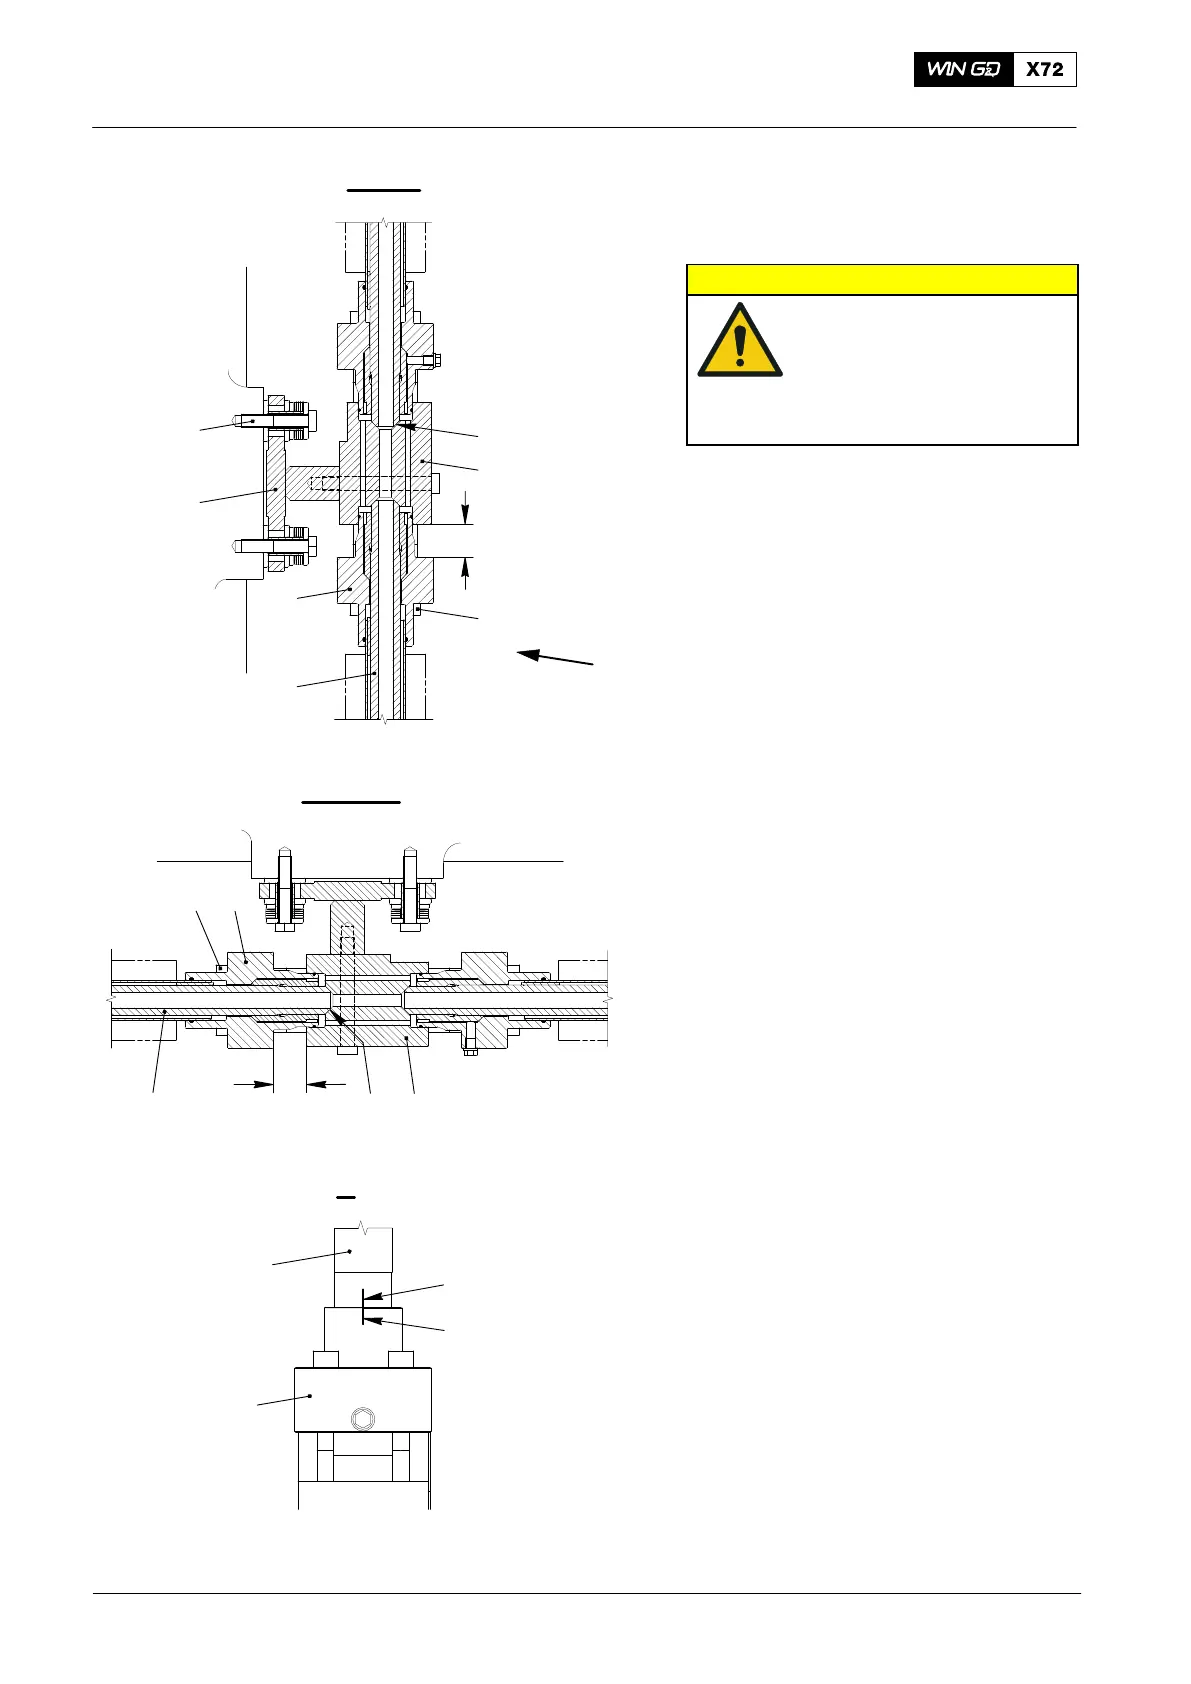
13) Loosen the screws (6, Fig. 14) on the
support (5) of the intermediate
piece (1).
CAUTION
Injury Hazard: The weight
of the HP fuel pipe is
approximately 32 kg. Use
approved equipment or
sufficient personnel to lift
and move the HP fuel pipe.
14) Carefully put the HP fuel pipe (3) in
position in the intermediate piece (1)
and the intermediate piece (7).
15) Make sure that the HP fuel pipe (3) is in
the correct position. Align the
marks (MA) on the HP fuel pipe (3) with
the marks (MA) on the flange (4).
16) Torque the screws (2, 8) as follows:
a) Torque symmetrically the four
screws (2, 8) to 30 Nm.
b) Make sure that the flanges (4, 9)
are not tilted and in the correct
position.
c) Torque symmetrically the four
screws (2, 8) to 55 Nm.
d) Torque symmetrically the four
screws (2, 8) to 80 Nm.
17) Make sure that there is a distance of
39.5 mm between the flange (4) and
the intermediate piece (1).
18) Make sure that there is a distance of
39.5 mm between the flange (9) and
the intermediate piece (7).
2015
HP Fuel Pipe: Removal, Grind the Sealing Faces and Installation
II - II
1
5
SF
6
WCH02293
39.5 mm
III - III
7SF
WCH02293
39.5 mm
3
9
8
MA
MA
V
Fig. 14
V
2
4
3
4
3
WCH02293
 Loading...


