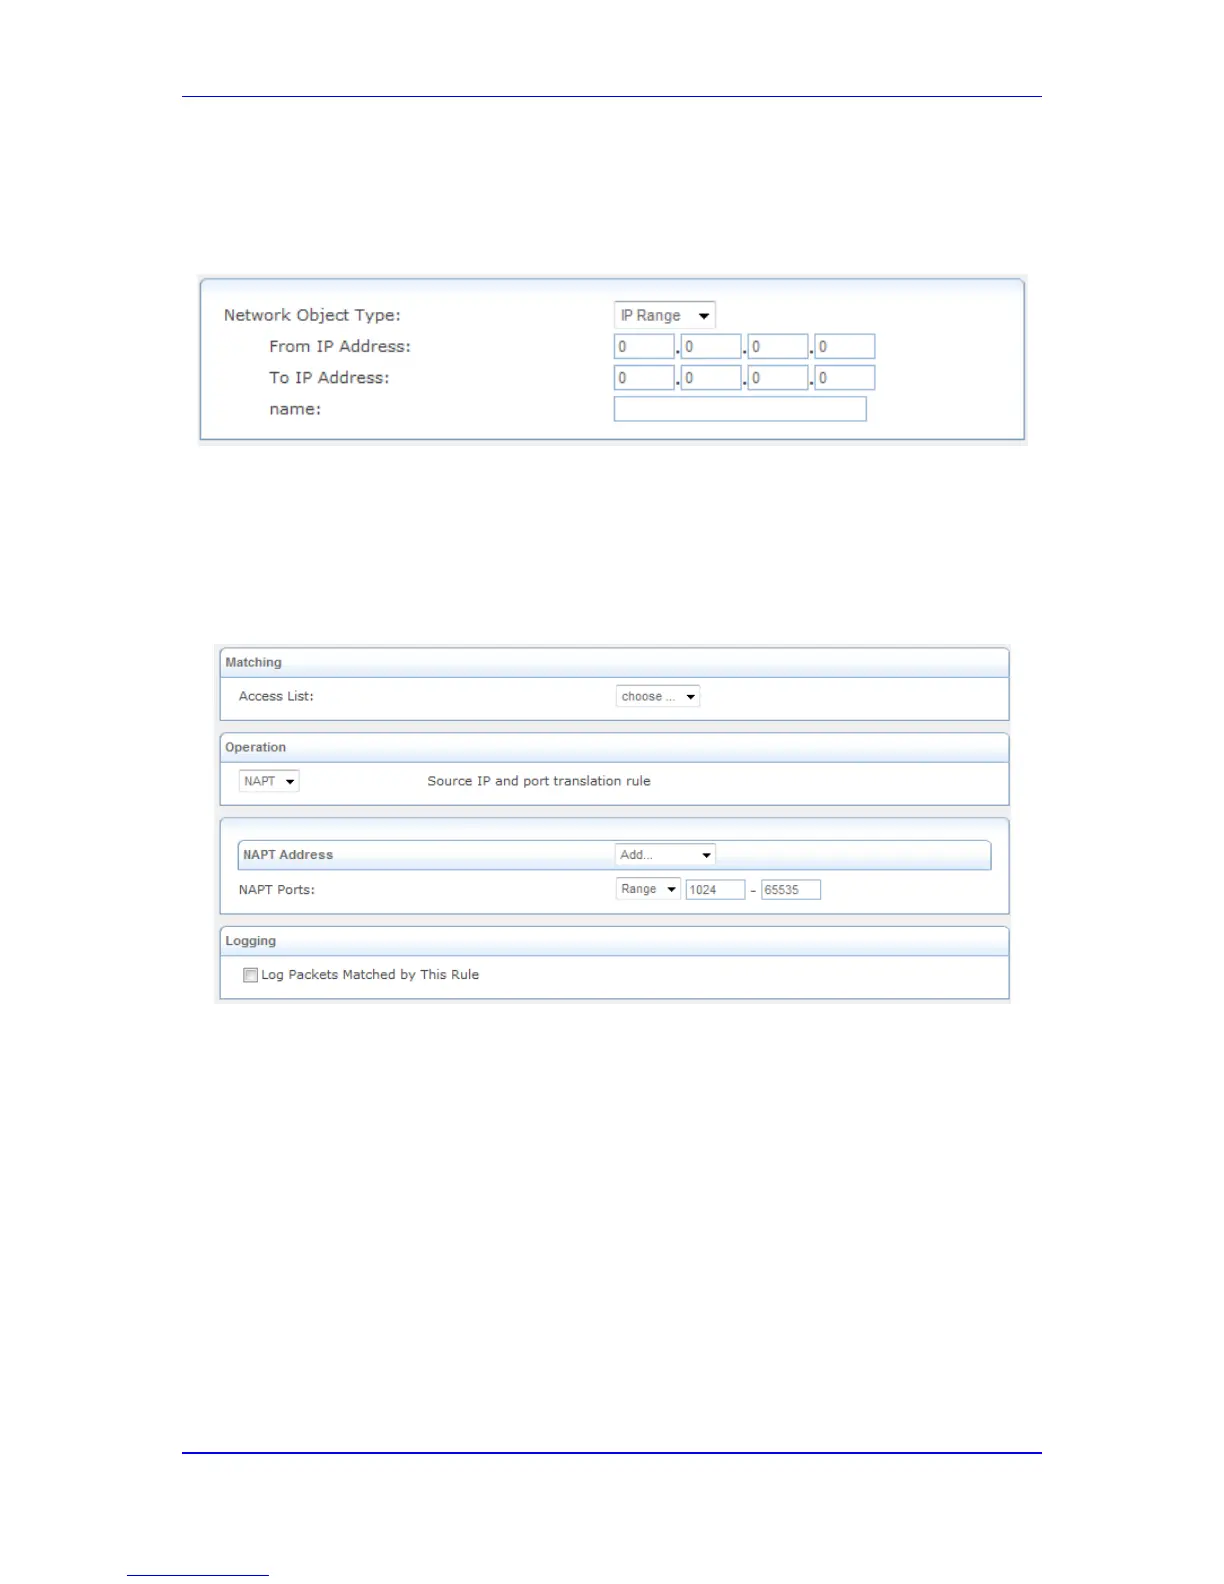
3. Defines a NAT LAN IP address pool:
a. Under the 'NAT LAN IP Address Pool' group, click the New IP Pool link; the
following page appears:
Figure 41-8: NAT LAN IP Address Pool
b. From the 'Network Object Type' drop-down list, select between 'IP Range' or 'IP
Subnet', and then enter the information respectively.
c. Click OK to save the settings; you are returned to the main page.
4. Define a new NAT/NAPT rule:
a. Under the 'NAT/NAPT Rule Sets' group, click the New Entry link; the following
page appears:
Figure 41-9: Defining NAT/NAPT Rule
This page is divided into two main groups: 'Matching' and 'Operation'. The Matching'
group defines the LAN addresses to be translated to the external addresses, which
are defined in the 'Operation' group.
5. Configure the 'Matching' group parameters to define characteristics of the packets
matching the rule.
b. Access list: choose the matching Access List rule, if configured (see 'Configuring
the Access List' on page 548).
6. Configure the 'Operation' group parameters to define the operation that will be applied
to the IP addresses matching the criteria defined above. The operations available are
NAT or NAPT:
• NAT: The NAT address into which the original IP address is translated. The drop-
down list displays all of your available NAT addresses/ranges, from which you
can select an entry. If you want to add a single address or a sub-range from the
given pool/range, select User Defined to add a new Network Object representing
the new host (see 'Configuring Network Objects' on page 580).
 Loading...