3. Select the Point-to-Point Protocol over Ethernet (PPPoE) option, and then click
Next.
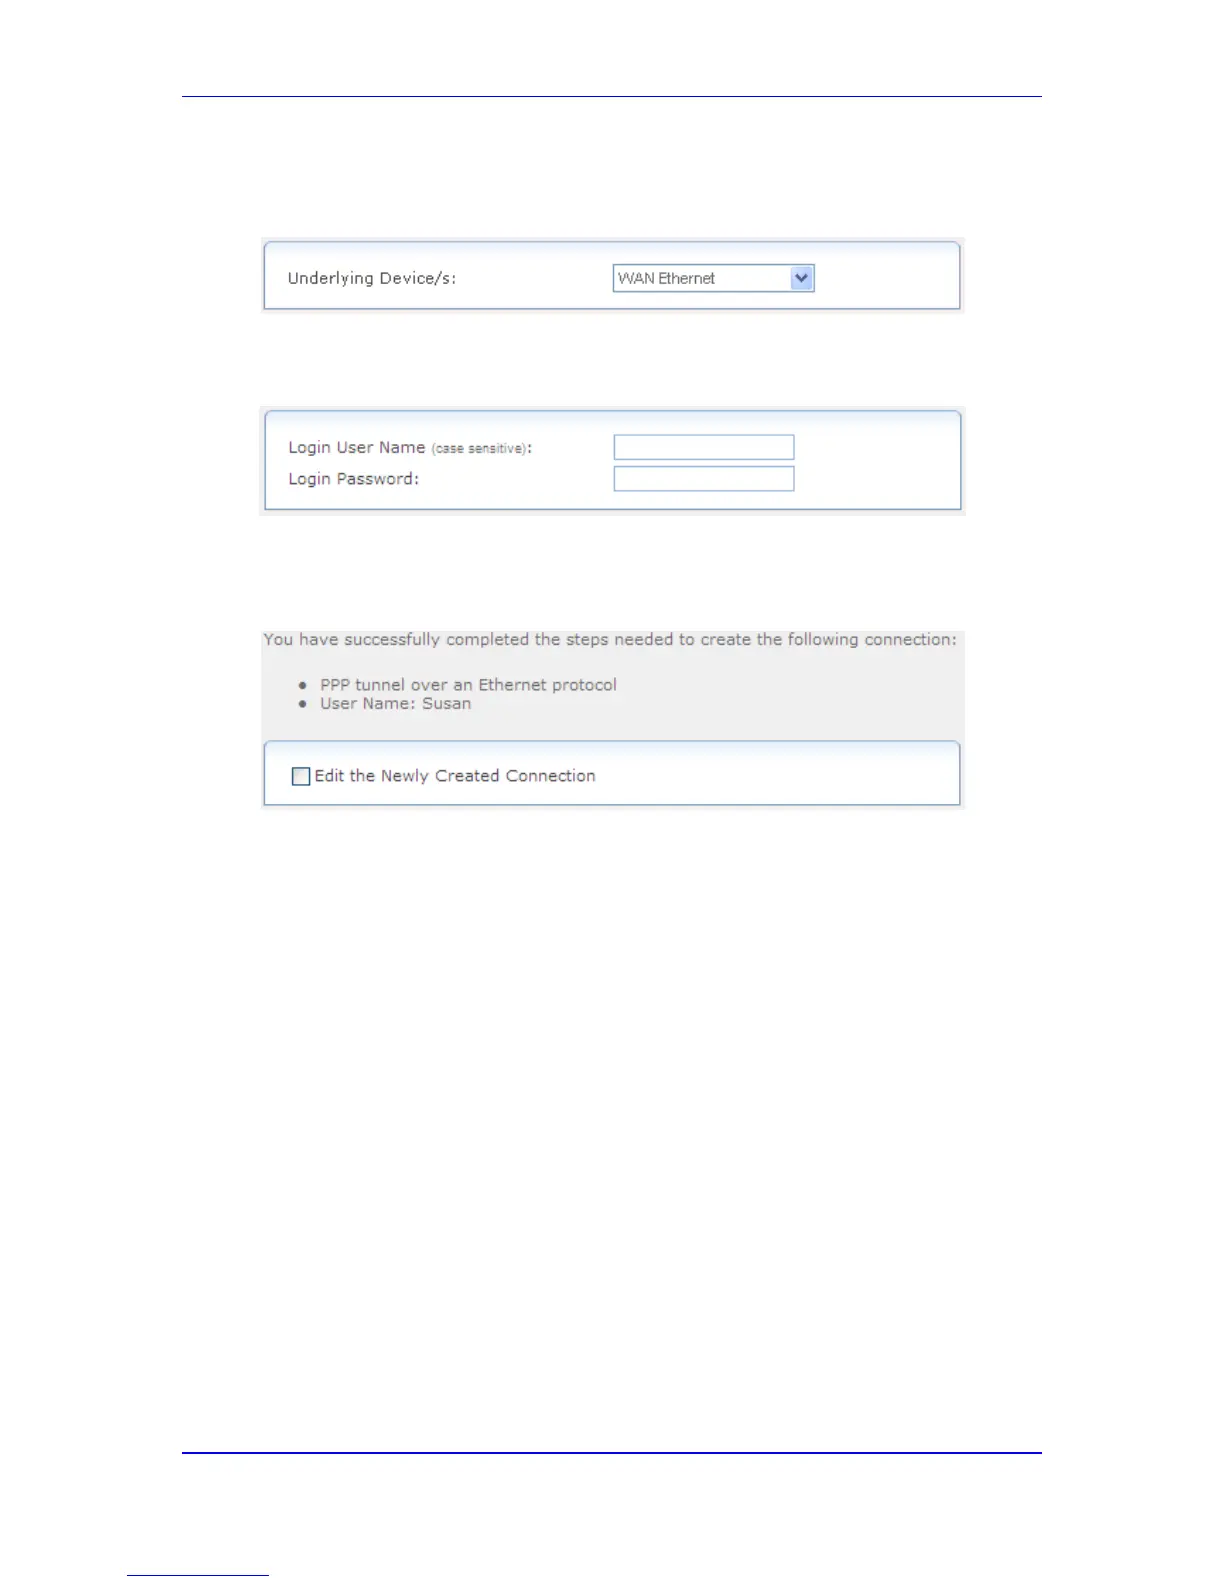
Figure 47-18: Selecting Underlying Device
4. Select the underlying device for which you want to create the connection, and then
click Next.
Figure 47-19: Defining PPPoE Properties
5. In the 'Login User Name' and 'Login Password' fields, enter the PPPoE username and
password provided by your ISP, and then click Next; the following is displayed if
successfully configured:
Figure 47-20: PPPoE Connection Added Successfully
6. Select the 'Edit the Newly Created Connection' check box if you want to edit the new
connection after clicking Finish.
7. Click Finish to save the settings; the new PPPoE connection is added to the network
connections list.
For editing the PPPoE connection, follow the procedure below:
To edit the PPPoE connection:
1. In the Connections page, click the WAN PPPoE link; the General tab appears
displaying general properties.
2. Select the Settings tab to edit various settings (see 'Editing Existing Connections' on
page 614).
3. Select the Routing tab to edit the routing parameters (see 'Editing Existing
Connections' on page 614).
4. Select the PPP tab.
• Service Name: Specify the networking peer's service name, if provided by your
ISP.
• On Demand: Select this check box to initiate the PPP session only when packets
are sent over the Internet.
• Time Between Reconnect Attempts: Specify the duration between PPP
reconnected attempts, as provided by your ISP.
 Loading...