Note: If the created virtual network is intended for VLAN-unaware hosts, it is
recommended that you select the 'Untagged' option.
7. In the 'VLAN Ports' group, select the LAN bridge ports on which you want to enable
the VLAN.
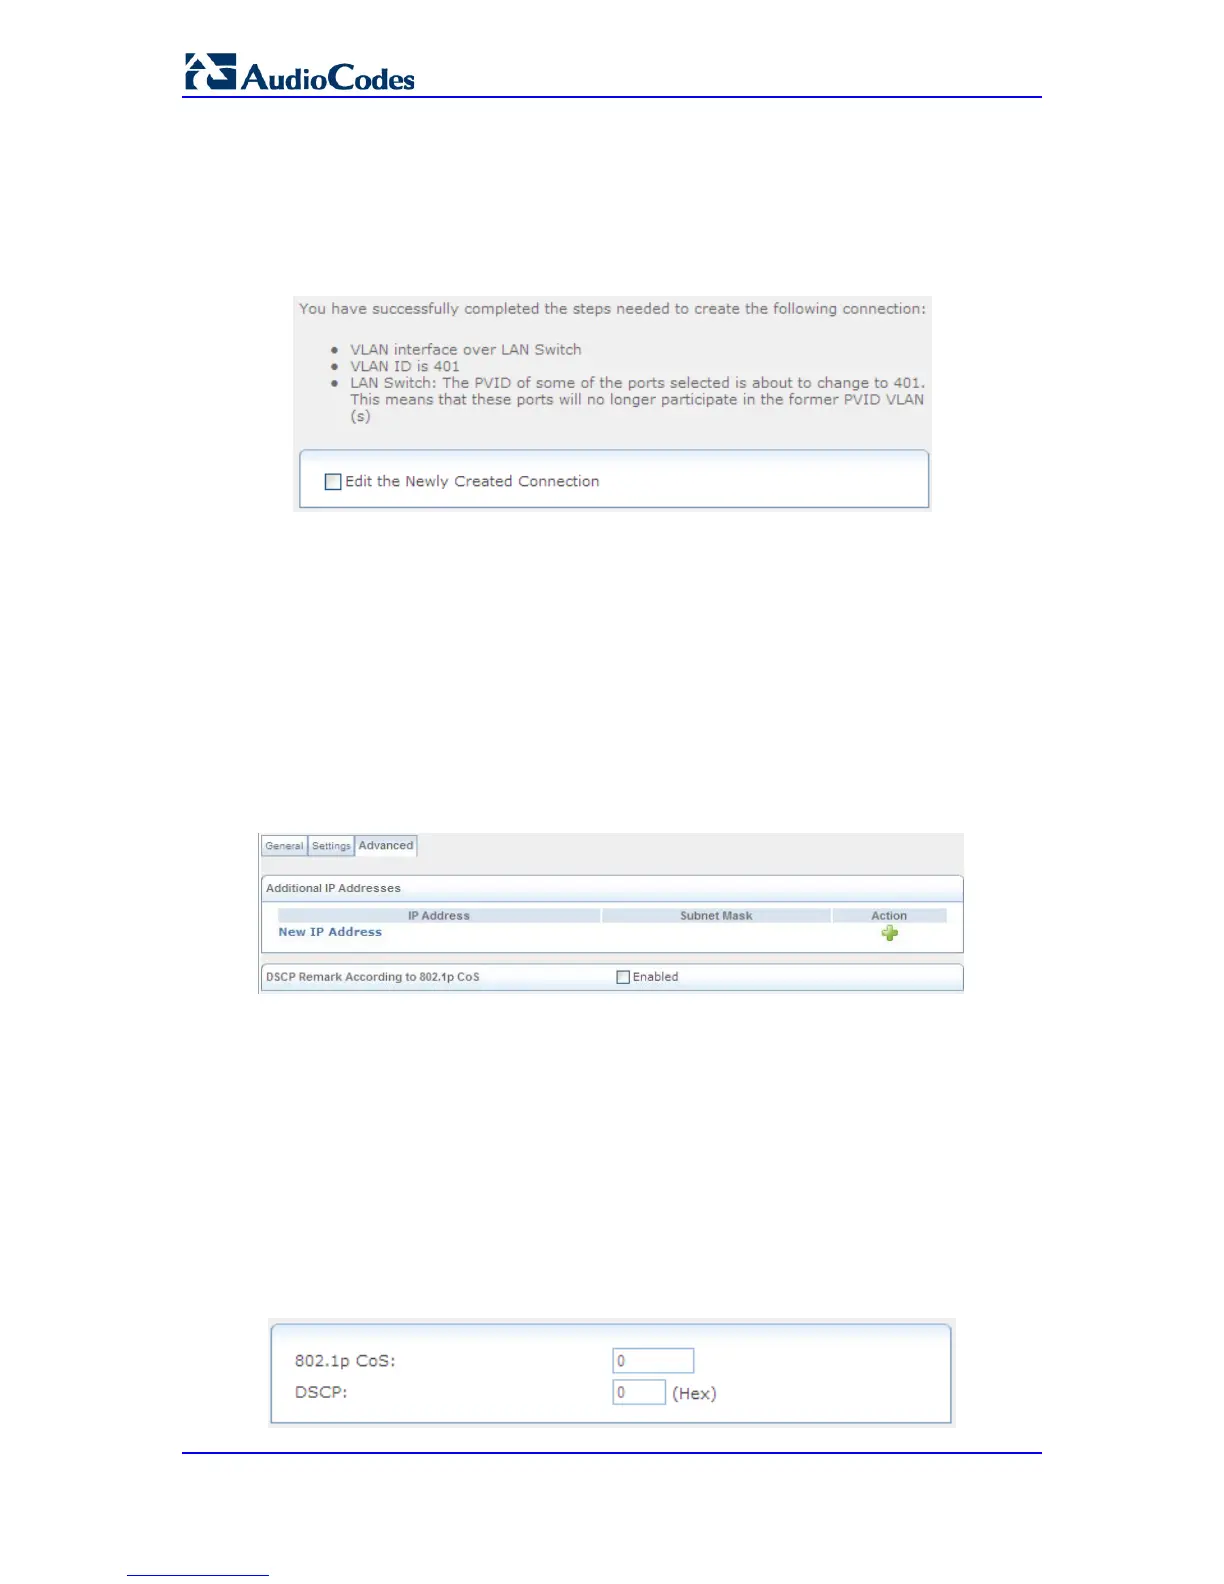
8. Click Next; a summary of the VLAN configuration is displayed.
Figure 47-26: VLAN Added Successfully
9. Select the 'Edit the Newly Created Connection' check box if you want to edit the new
connection after clicking Finish.
10. Click Finish to save the settings; the new VLAN interface is added to the network
connections list.
To edit the VLAN interface connection:
1. In the Connections page, click the VLAN link (e.g., "LAN Switch VLAN 401"); the
General tab appears displaying general properties.
2. Select the Settings tab to edit various settings (see 'Editing Existing Connections' on
page 614).
3. Select the Advanced tab.
Figure 47-27: VLAN Interface Advanced Tab
a. If your VLAN interface is over WAN, then you can enable the firewall for this
network connection by selecting the 'Internet Connection Firewall' check box.
b. You can add alias names (additional IP addresses) to the device by clicking
under the 'Additional IP Addresses' group the New IP Address link. This enables
you to access the device using these aliases in addition to the device's defined IP
address.
c. When creating a VLAN interface over a LAN connection, it is possible to
determine the IP header's Differentiated Services Code Point (DSCP) priority
value according to the VLAN header's 802.1p Class of Service (CoS) tag. The
DSCP value can then be used for Quality of Service (Qos) traffic prioritization.
a. Select the 'Enabled' check box.
b. Click the New DSCP Remark link; the following page appears:
Figure 47-28: Defining DSCP Remarkings
 Loading...