2-107
Confidential
Black band
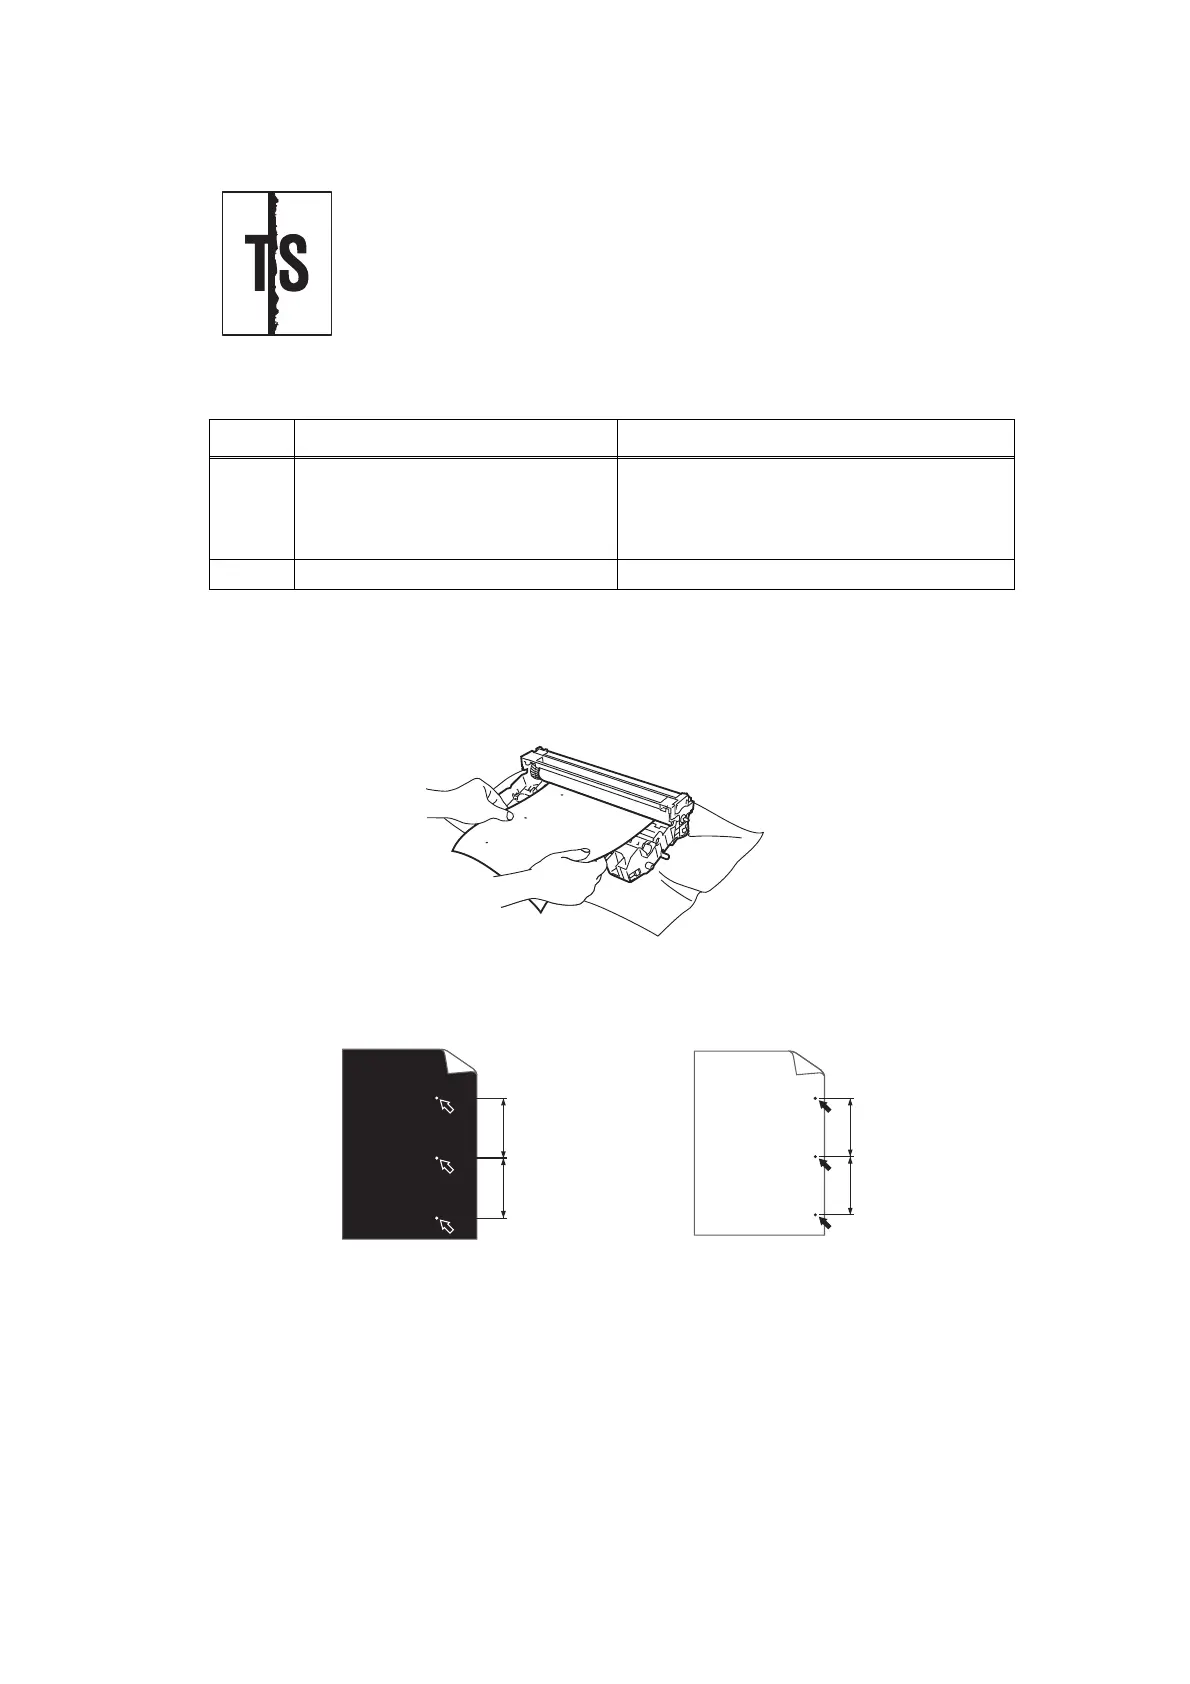
<How to clean the drum unit (the shape of the drum is different from the actual one)>
(1) Remove the toner cartridge from the drum unit. Check where the image distortion occurs
by placing the print sample in front of the drum unit.
Fig. 2-13
Fig. 2-14
Refer to the table <Pitch appears in the image and rollers> for what represents the
value A.
<User Check>
- Clean the corona wire of the drum unit.
- Return the corona wire cleaning tab to the "▲" position.
- This problem may disappear after printing multiple sheets of paper.
- Refer to <How to clean the drum unit> to remove the dirt from the
exposure drum using a cotton applicator.
- Replace the drum unit with a new one.
- Replace the toner cartridge with a new one.
Step Cause Remedy
1
FG harnesses or FG plate
attachment failure (not grounded
correctly)
Retighten the screws to secure the FG
harnesses or FG plate.
Fix the bent tray ground spring of the paper
tray. (Refer to Fig. 2-12.)
2 Laser unit failure Replace the laser unit.
A mm
A mm
A mm
A mm
White dots repeat in A mm distance on
the black page with printed images.
Black dots repeat in A mm distance
on the page.
< Examples of image distortion >
 Loading...