3-168
Confidential
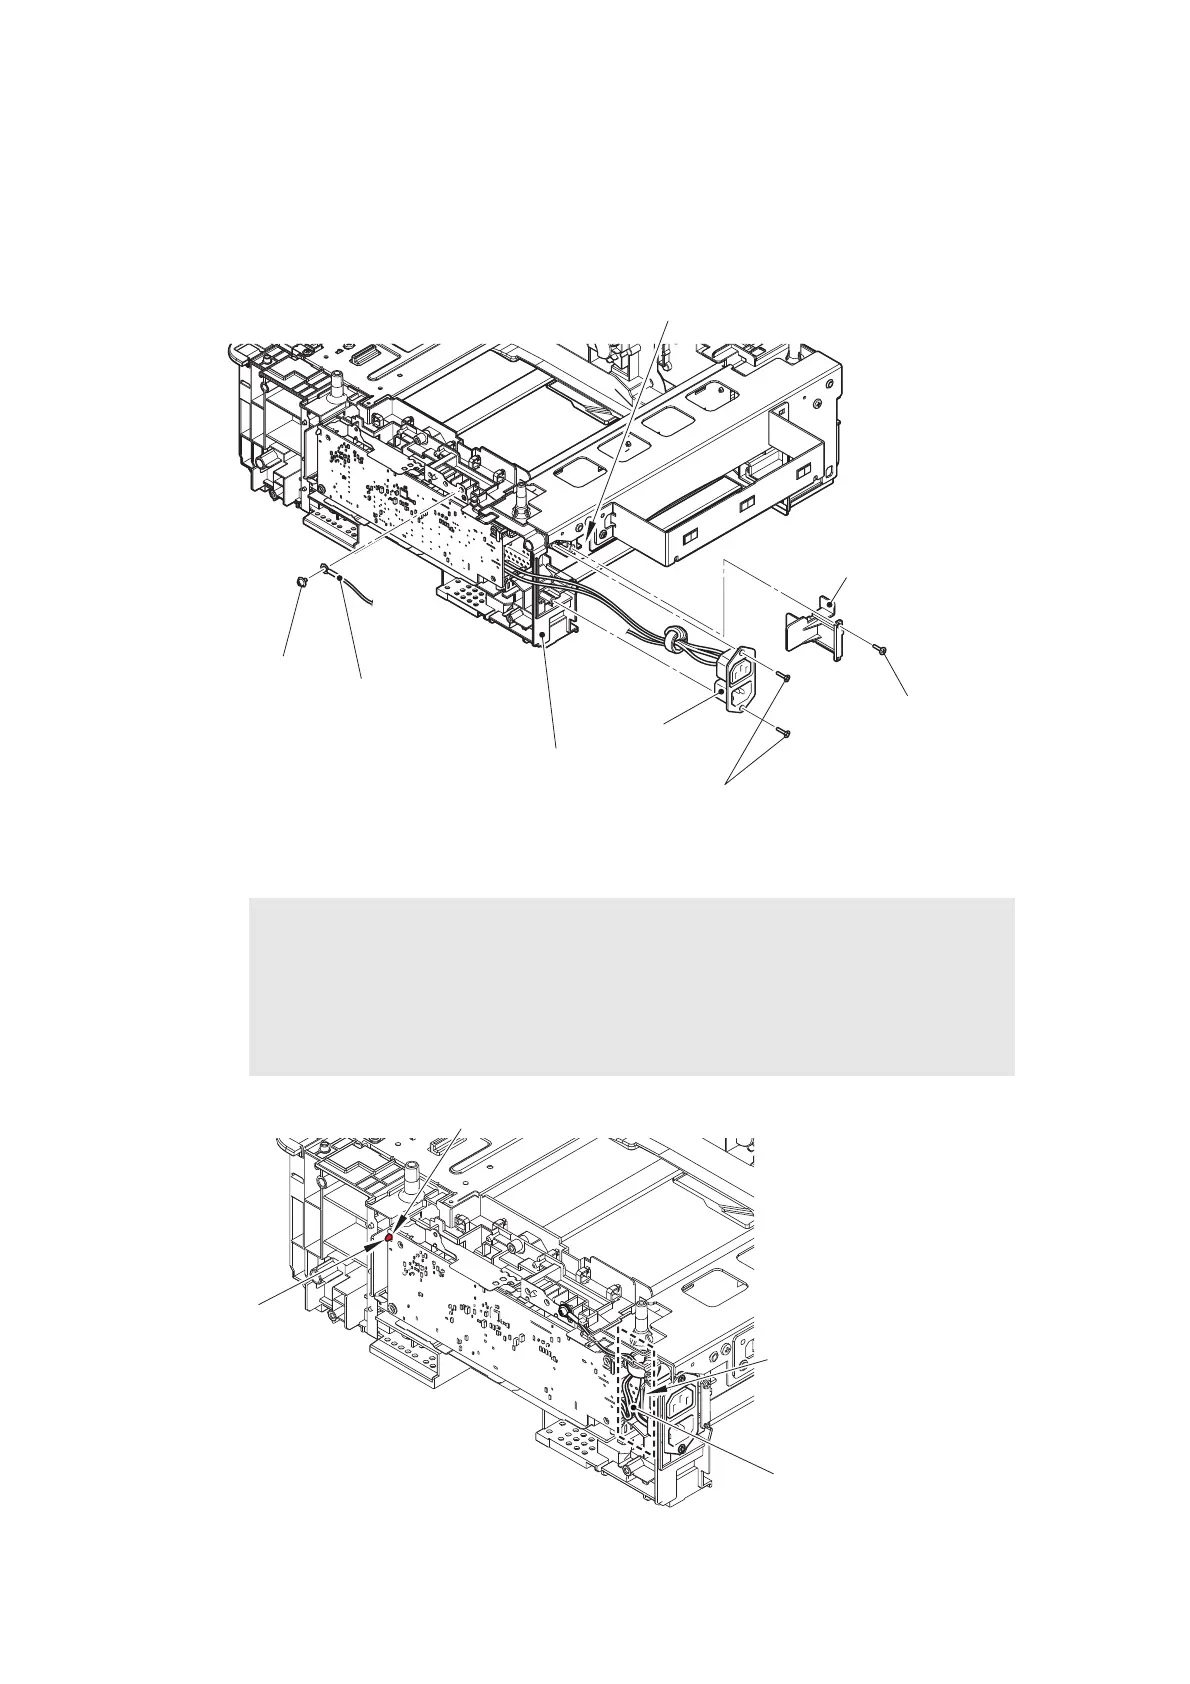
(3) Remove the screw pan (S/P washer) M3.5x6 screw to disconnect the ground harness.
(4) Remove the two taptite flat B M3x10 screws from the inlet.
(5) Remove the taptite bind B M3x10 screw to remove the inlet cover by pulling the inlet
forwards.
(6) Pull out the inlet through the TT unit hole.
Fig. 3-164
Harness routing: Refer to “14. Upper right of the TT”, “16. T3TT unit”.
Fig. 3-165
Assembling Note:
• When assembling the low-voltage power supply PCB ASSY, engage the notch of
the low-voltage power supply PCB ASSY with the hook.
• Check that the inlet harness is housed in the frame R as shown in the illustration
below. Otherwise the harness may be caught in some sections of the machine,
and may catch fire.
Inlet cover
Taptite flat B M3x10
Inlet
Taptite bind B M3x10
Hole
TT unit
Screw pan (S/P
washer) M3.5x6
Ground harness
Notch
Hook
Inside of frame R
Inlet harness
 Loading...