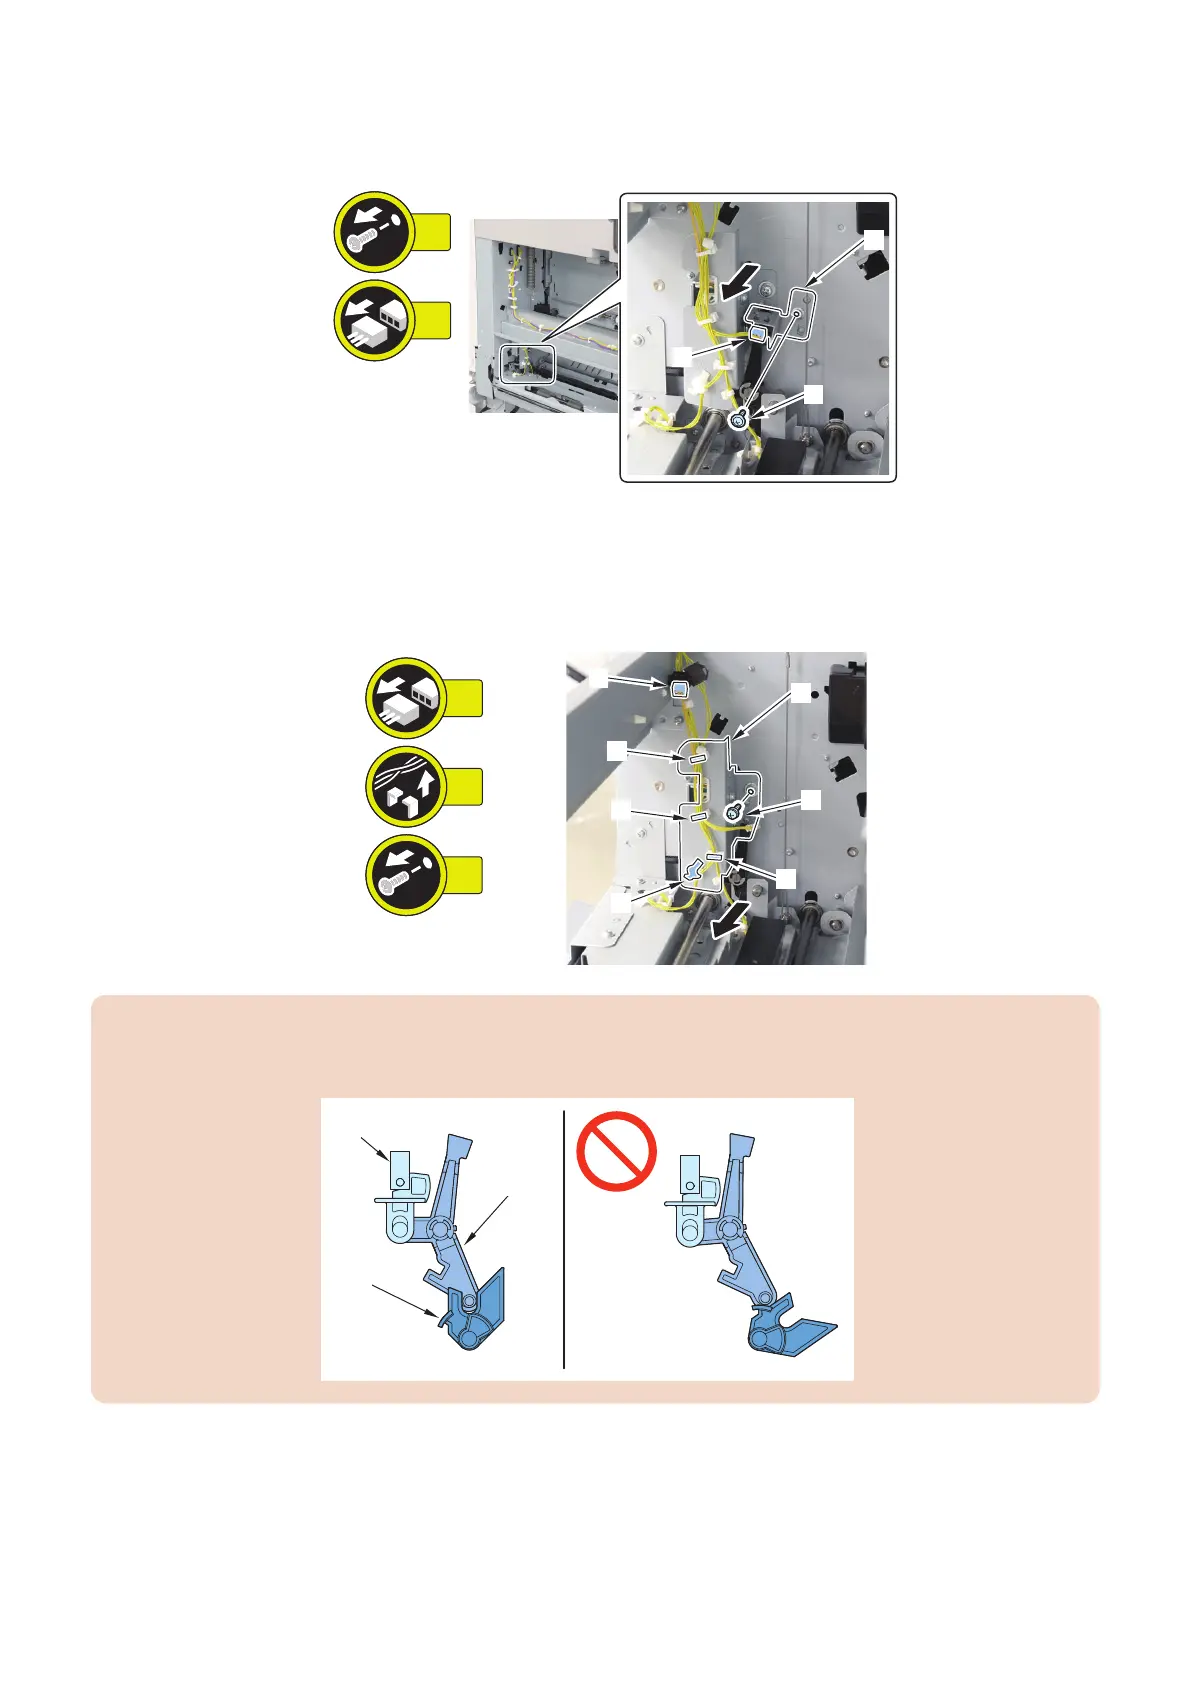
3. Remove the Flapper HP Sensor [1].
• 1 Screw [2]
• 1 Connector [3]
4. Remove the Escape Flapper Solenoid [1].
• 1 Connector [2]
• 3 Wire Saddles [3]
• 1 Reuse Band [4]
• 1 Screw [5]
1x
1x
4x
[1]
[2]
[5]
[4]
[3]
[3]
[3]
CAUTION:
When installing the Escape Flapper Solenoid [1], make sure that the Sensor Flag [2] and the Flapper Cam [3] are positioned
properly, as shown in the figure below.
4. Parts Replacement and Cleaning
123