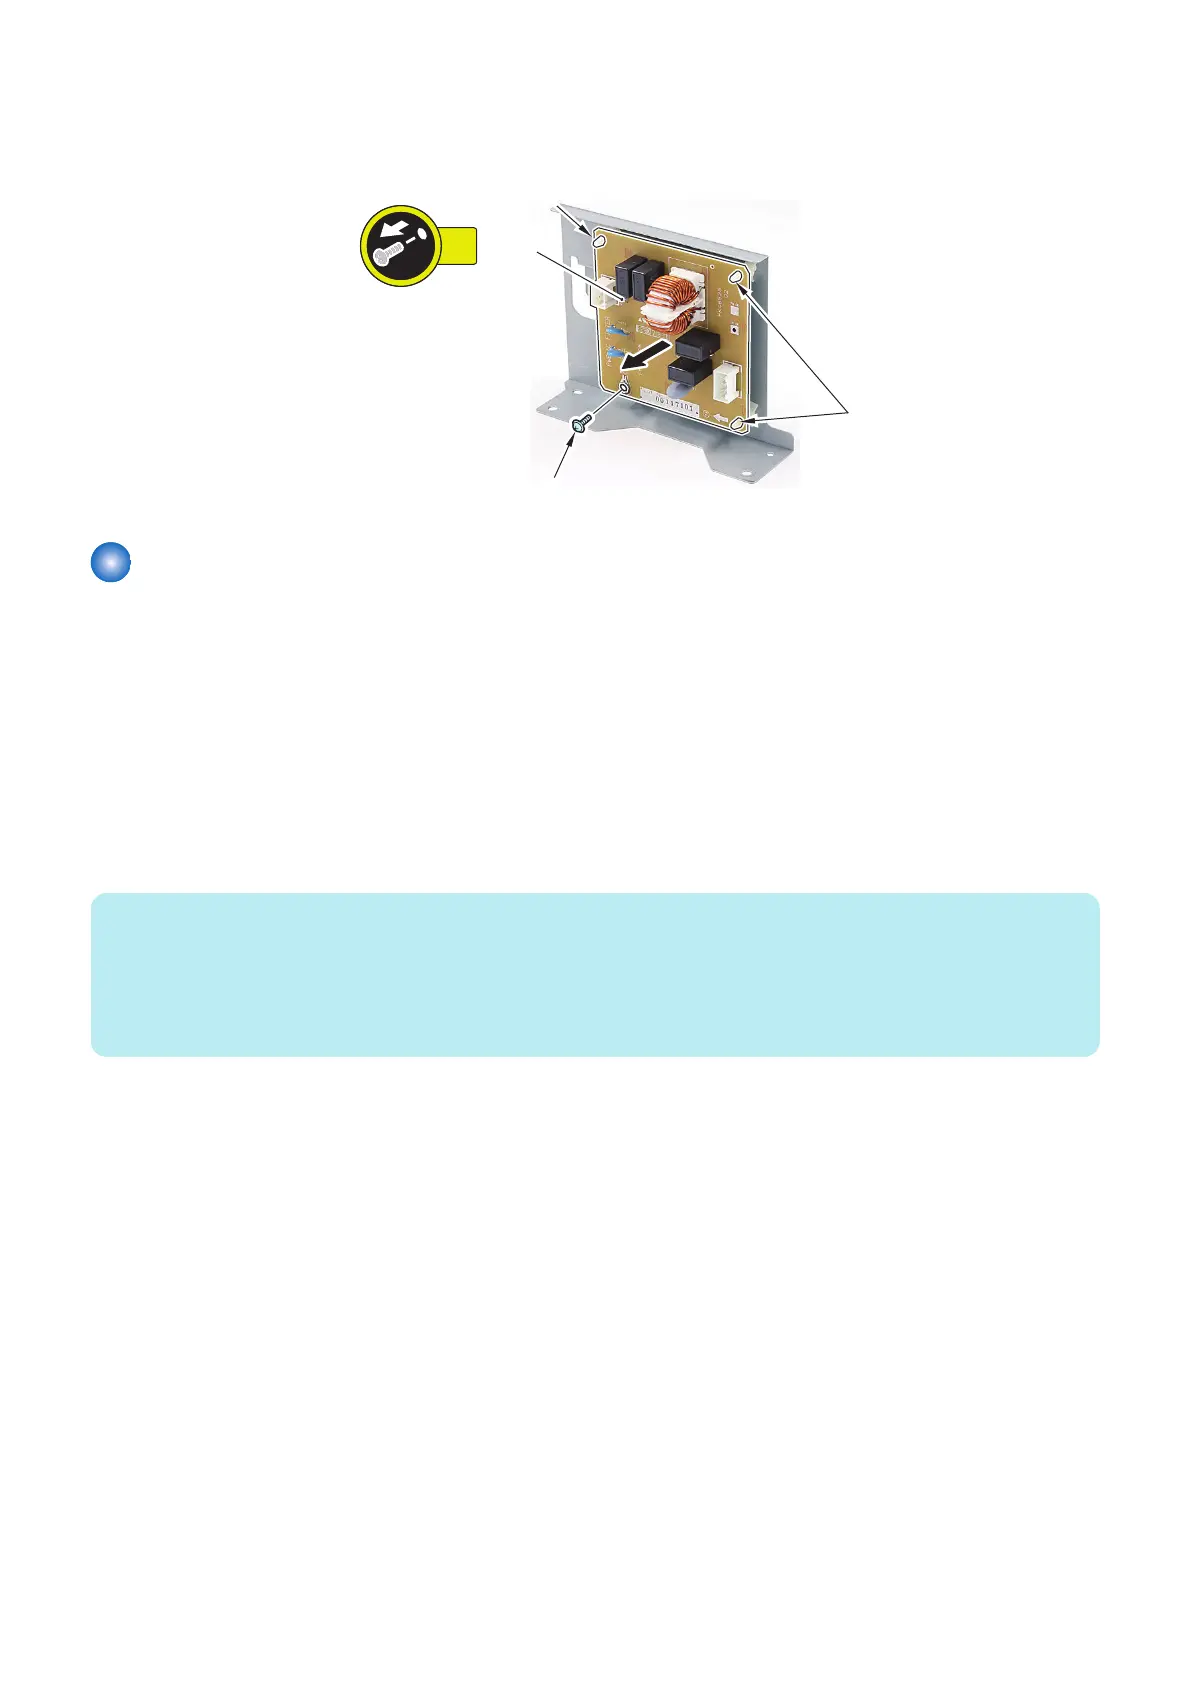
2. Remove the Noise Filter PCB [1].
• 1 Screw [2]
• 3 Locking Supports [3]
Removing the Deck Size Detection PCB (PCB101/201/301)
■ Preparation
1. Release the lock to open the target Deck.“Releasing the Deck” on page 77
2. Remove all paper from the Deck.
3. Close the Deck.
4. Remove the Rear Cover of the target Deck. “Removing the Deck Rear Upper Cover” on page 79, “Removing the
Deck Rear Middle Cover” on page 79, “Removing the Deck Rear Lower Cover” on page 79
■ Procedure
NOTE:
• The removal procedure of the Deck Size Detection PCB from the Upper Deck is described below. The procedure of the Middle
and Lower Decks is the same.
• In the case of Power OFF, perform step 1 to 4 to manually lift up the Deck Lifter Plate.
• In the case of Power ON, open the deck and remove all paper from the deck, and then close the deck. Deck Lifter Plate can
be automatically lifted up without performing step 1 to 4.
1. Turn the Timing Belt [1] in the arrow direction to lift up the Deck Lifter Plate [2] to the position of approx. 10mm
lower from the loaded paper higher limit indication [3] while checking it with the deck open/close.
4. Parts Replacement and Cleaning
138