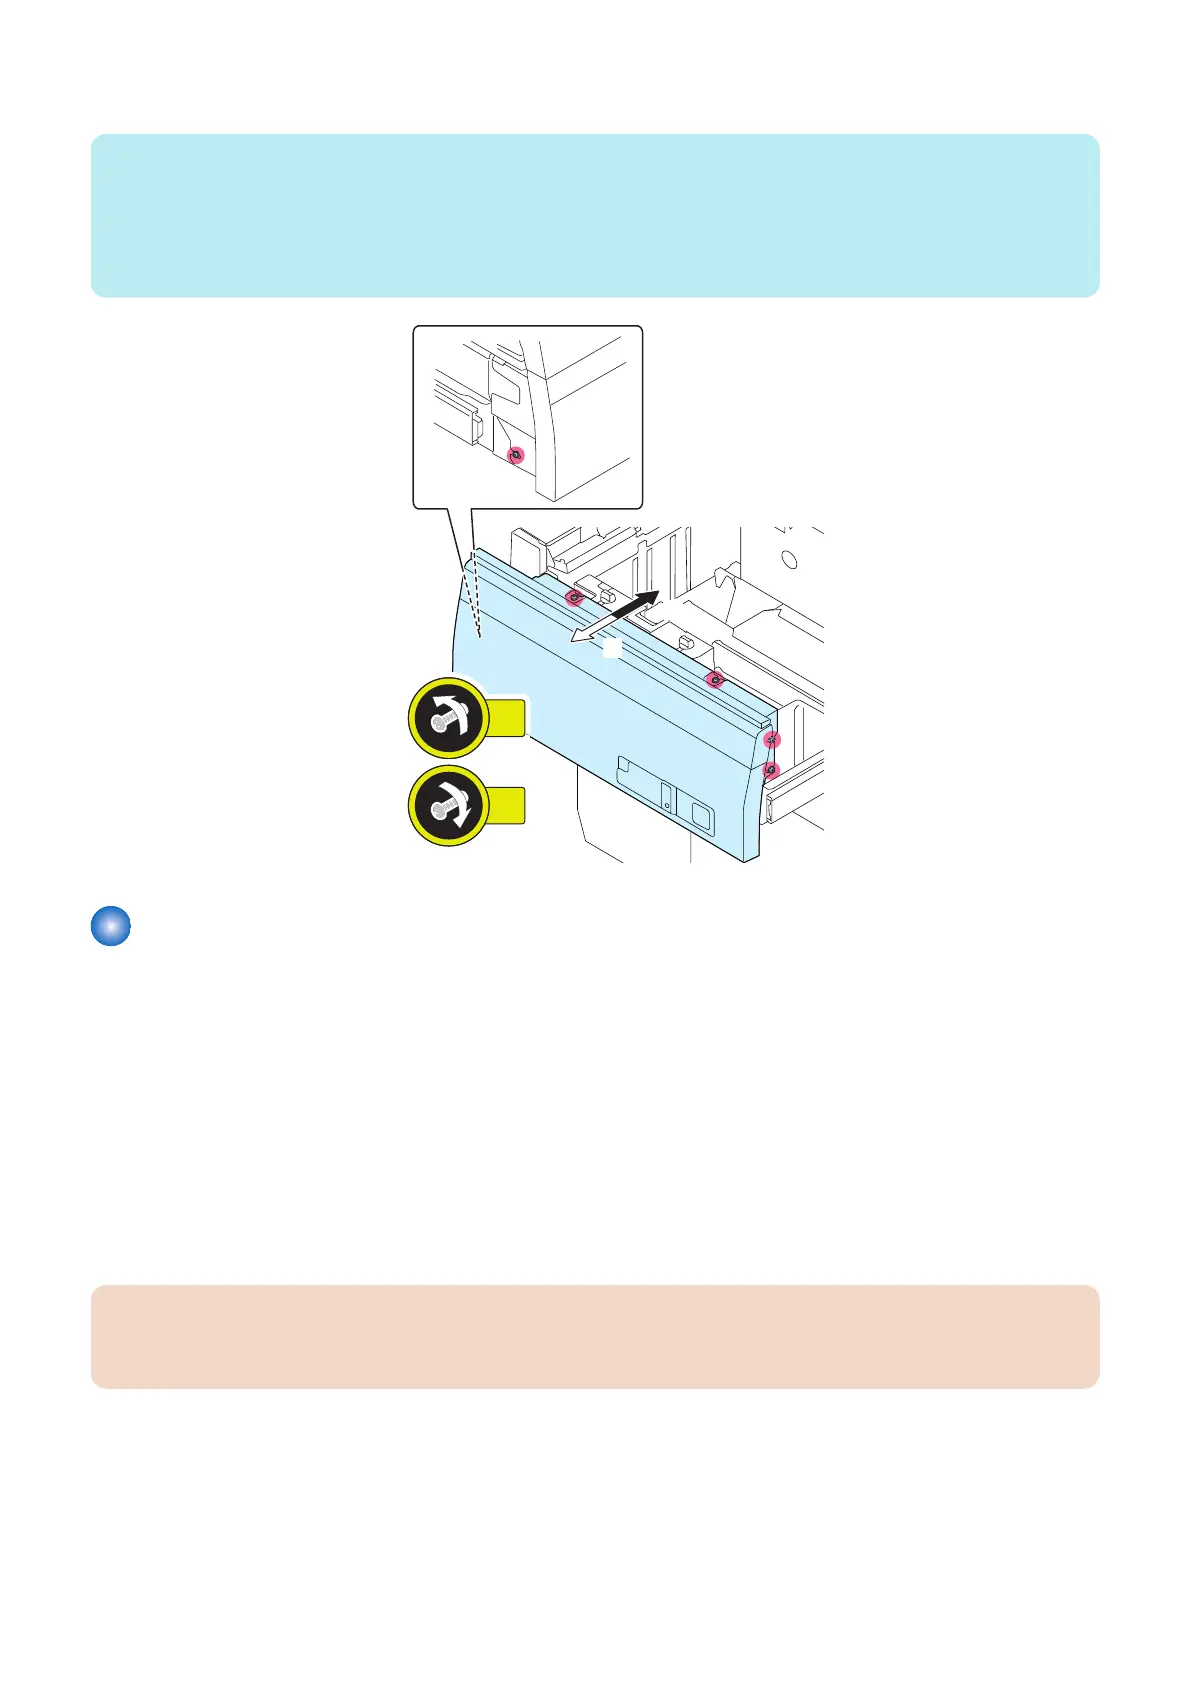
3. Loosen the 5 Screws and adjust the Deck Front Cover, and then tighten the loosened Screws.
NOTE:
• 1 scale = 1 mm.
• When the Lock Bracket (Left/Right) was moved to the [A] direction shown in step 2 of "Adjustment Method", move the Deck
Cover in the [A] direction.
• When the Lock Brackets (Left/Right) was moved to the [B] direction shown in step 2 of "Adjustment Method", move the Deck
Cover in the [B] direction.
Actions when Replacing the Deck Controller PCB (PCB001)
■ Handling before Parts Replacement
1. Before replacing the Deck Controller PCB, back up the counter values of consumable parts and various adjustment
values to the host machine in service mode.
COPIER> FUNCTION> SYSTEM> MD-BK-R (M Deck)
COPIER> FUNCTION> SYSTEM> MD2-BK-R (Sec M Deck)
2. If backing up is not possible, before replacing the Deck Controller PCB, output P-PRINT in the host machine's service
mode.
COPIER> FUNCTION> MISC-P> P-PRINT
■ Handling after Parts Replacement
CAUTION:
If the version of this equipment is old by the host machine, a message prompting you to update will appear. If this message
appears, press [Update] to automatically update the version of this equipment.
If backup operation has been performed
1. Write the backup data to the new PCB in the host machine's service mode.
COPIER> FUNCTION> SYSTEM> MD-BK-W (M Deck)
COPIER> FUNCTION> SYSTEM> MD2-BK-W (Sec M Deck)
2. Turn OFF/ON the main power switch of the host machine.
5. Adjustment
174