7. Remove the exhaust pipe assembly.
8. Installation is in the reverse order of removal.
Installation Note:
• Replace the gasket between two pipes.
Muffler
Removal & Installation
WARNING!
The normal operating temperature of the exhaust system is very high. Therefore, never work around or attempt
to service any part of the exhaust system until it has cooled. Special care should be taken when working near
the catalytic converter. The temperature of the converter rises to a high level after a short period of engine oper-
ating time.
1. Raise and support the vehicle.
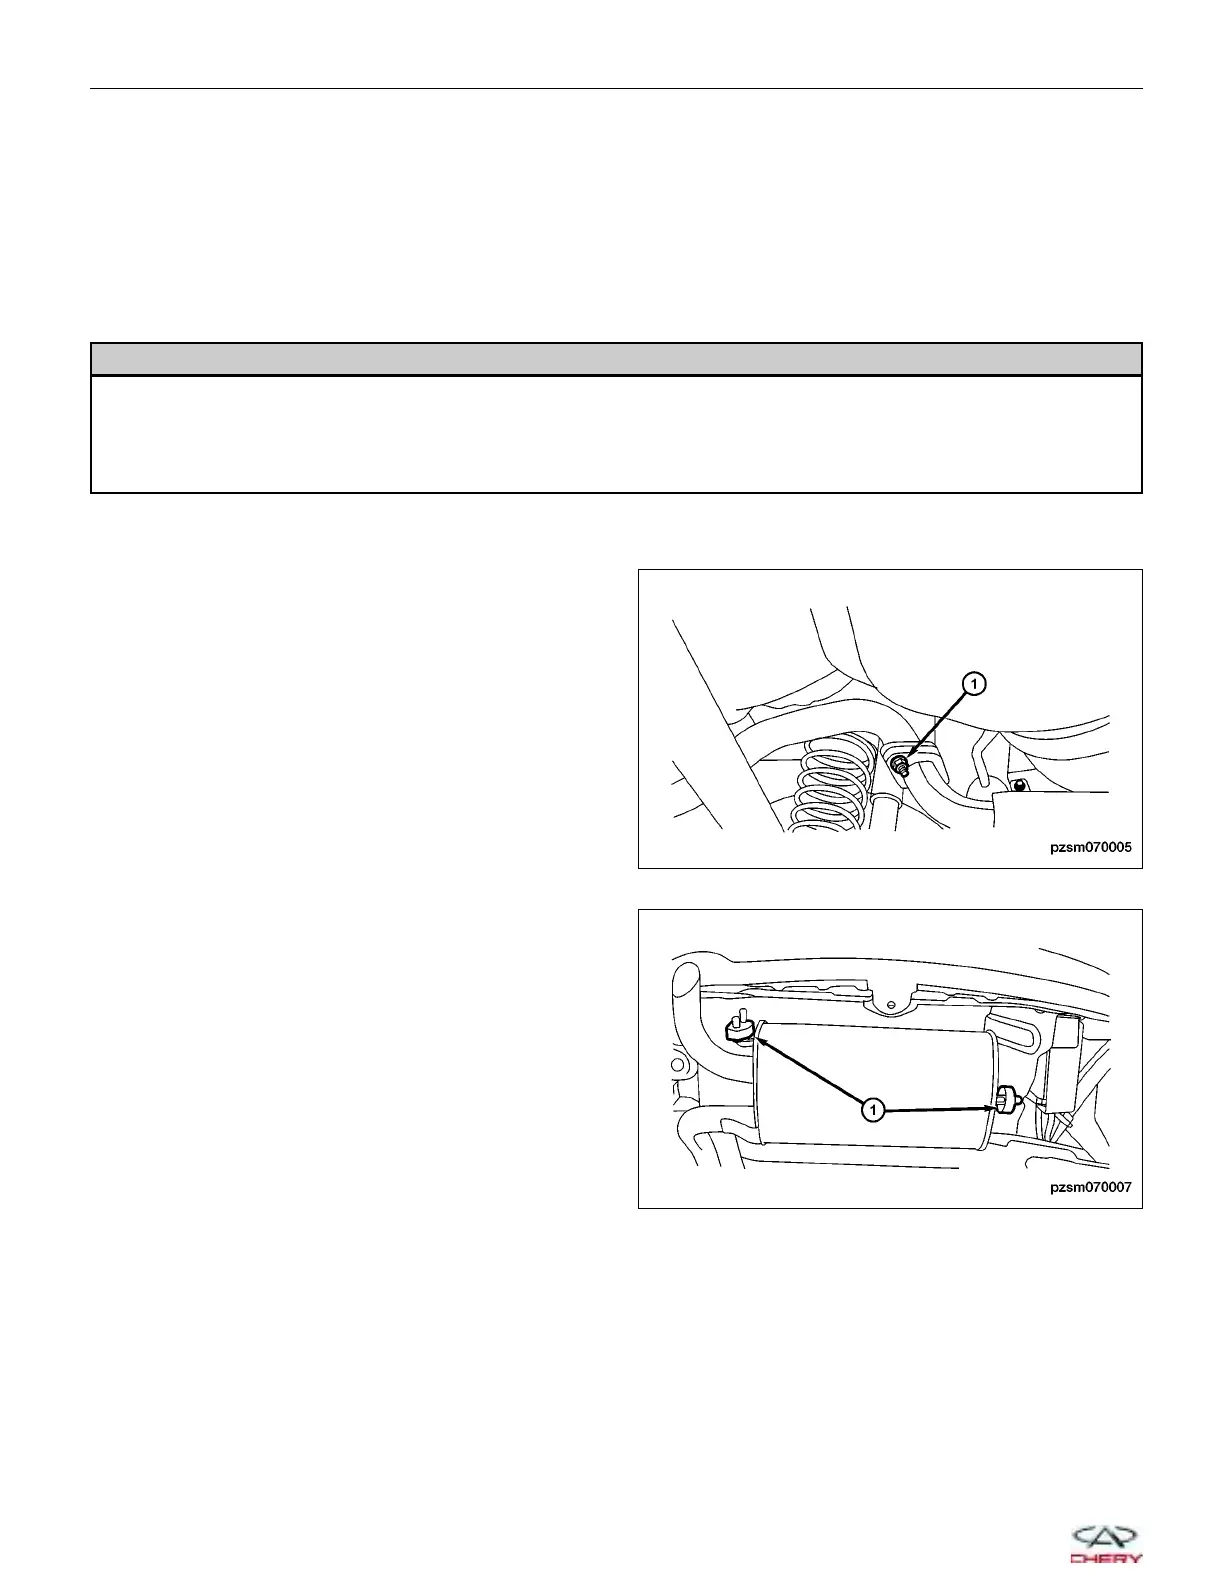
2. Remove the two pipes connecting bolts (1).
(Tighten: Exhaust bolts to 60 ± 5 N·m)
3. Remove the muffler support isolators (1).
4. Remove the muffler.
5. Clean exhaust pipe ends and ensure all exhaust components fit properly.
6. Discard broken or worn isolators, rusted or overused clamps, supports, and attaching parts.
7. Installation is in the reverse order of removal.
Installation Note:
• Replace the gasket between two pipes.
ON-VEHICLE SERVICE
PZSM070005
PZSM070007
07–6
Chery Automobile Co., Ltd.

 Loading...