DIFFERENTIAL UNIT REPAIR
Differential Carrier
Removal & Installation
1. Remove the input shaft assembly, output shaft assembly, 1st-2nd shift fork, 3rd-4th shift fork and 5th-reverse fork
shaft together as a unit. (See Transaxle Assembly Unit Repair in Section 08 Transaxle).
2. Remove the differential assembly.
Disassembly
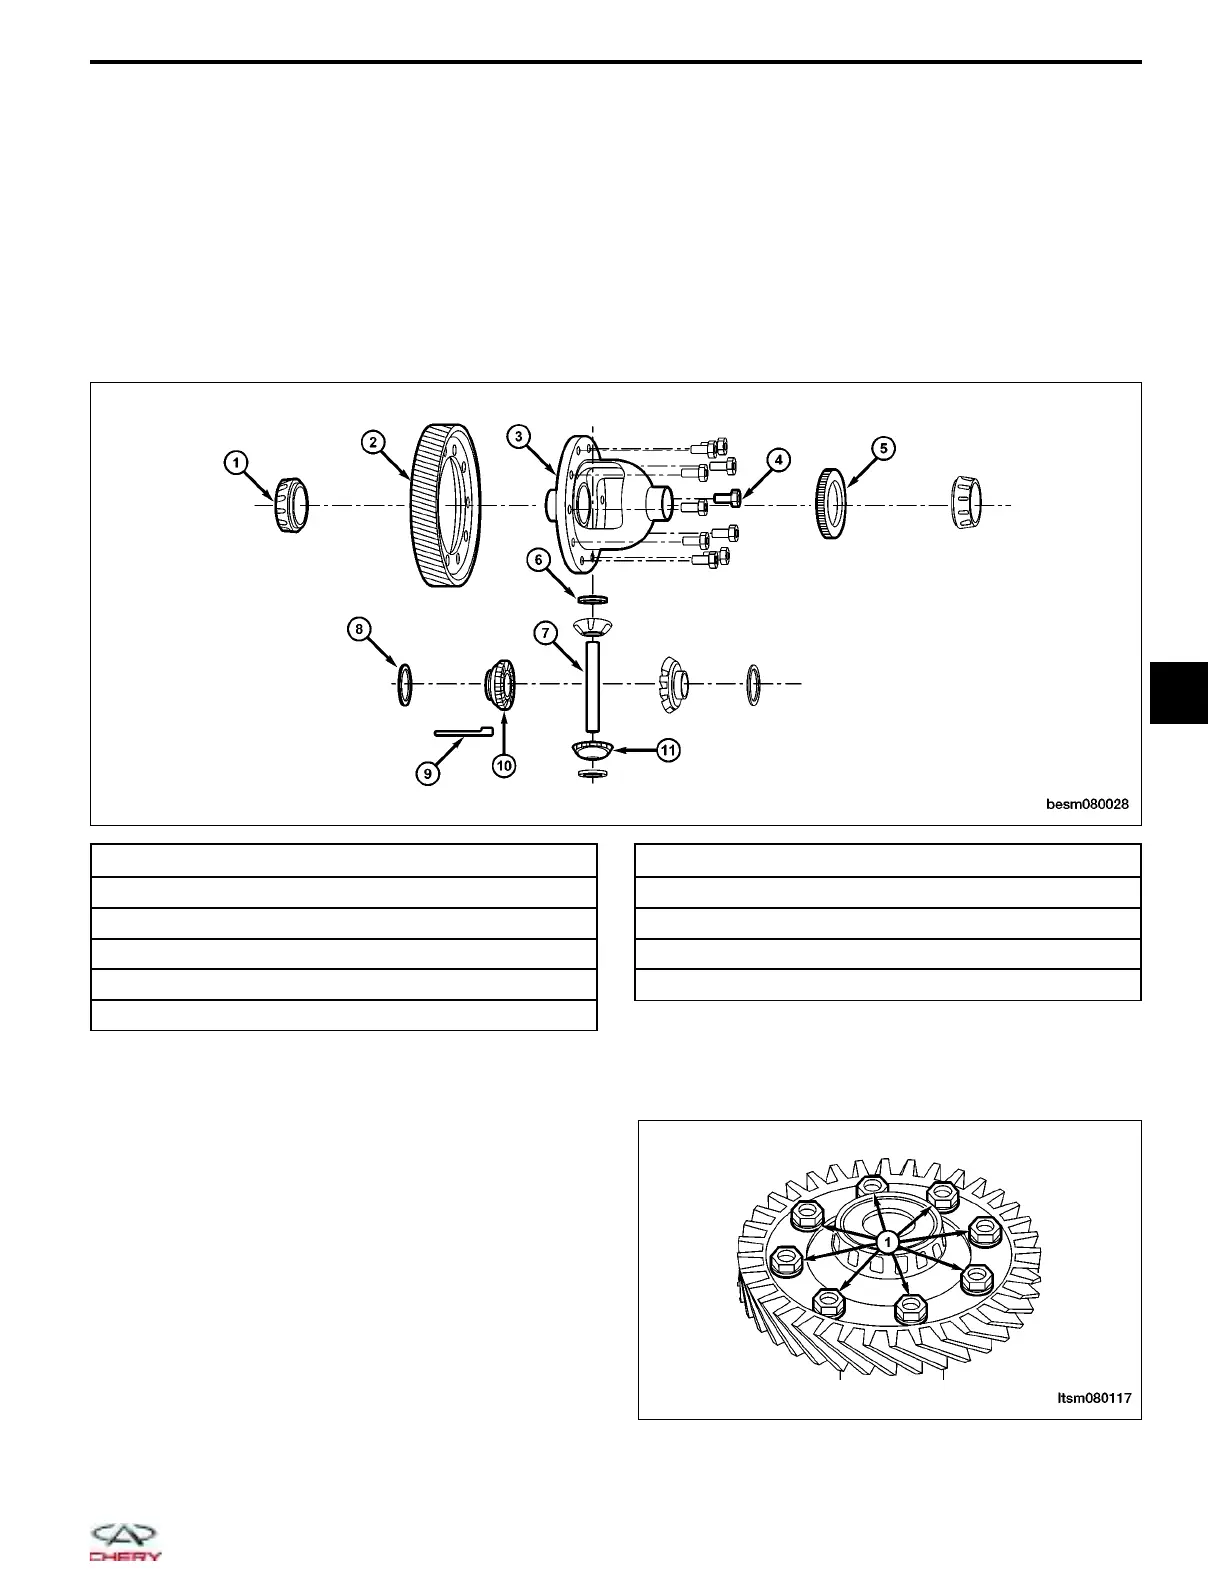
1. Mount the differential in a vice.
2. Remove the eight drive gear bolts (1).
1 – Front/Rear Differential Bearing
2 – Final Drive Driven Gear
3 – Differential Housing
4 – Bolts - Final Drive Driven Gear and Differential Housing
5 – Driving Gear - Odometer
6 – Spherical Washer Planetary Gear
7 – Planetary Gear Shaft
8 – Adjusting Washer - Side Gear
9 – Fixing Pin - Planetary Gear
10 – Side Gear
11 – Planetary Gear
BESM080028
LTSM080117
08
08–39
Chery Automobile Co., Ltd.