Cylinder Head
Removal & Installation
NOTE :
Replacement cylinder head comes complete with valves, seals, springs, retainers, keepers, and camshafts.
1. Remove the engine timing belt (See Engine Timing Belt Removal & Installation in Section 02 Engine).
2. Remove the cylinder head cover (See Cylinder Head Cover Removal & Installation in Section 02 Engine).
3. Remove the camshafts (See Camshaft Removal & Installation in Section 02 Engine).
4. Remove intake manifold (See Intake Manifold Removal & Installation in Section 02 Engine).
5. Remove exhaust manifold (See Exhaust Manifold Removal & Installation in Section 02 Engine).
6. Remove water pipe and thermostat assembly.
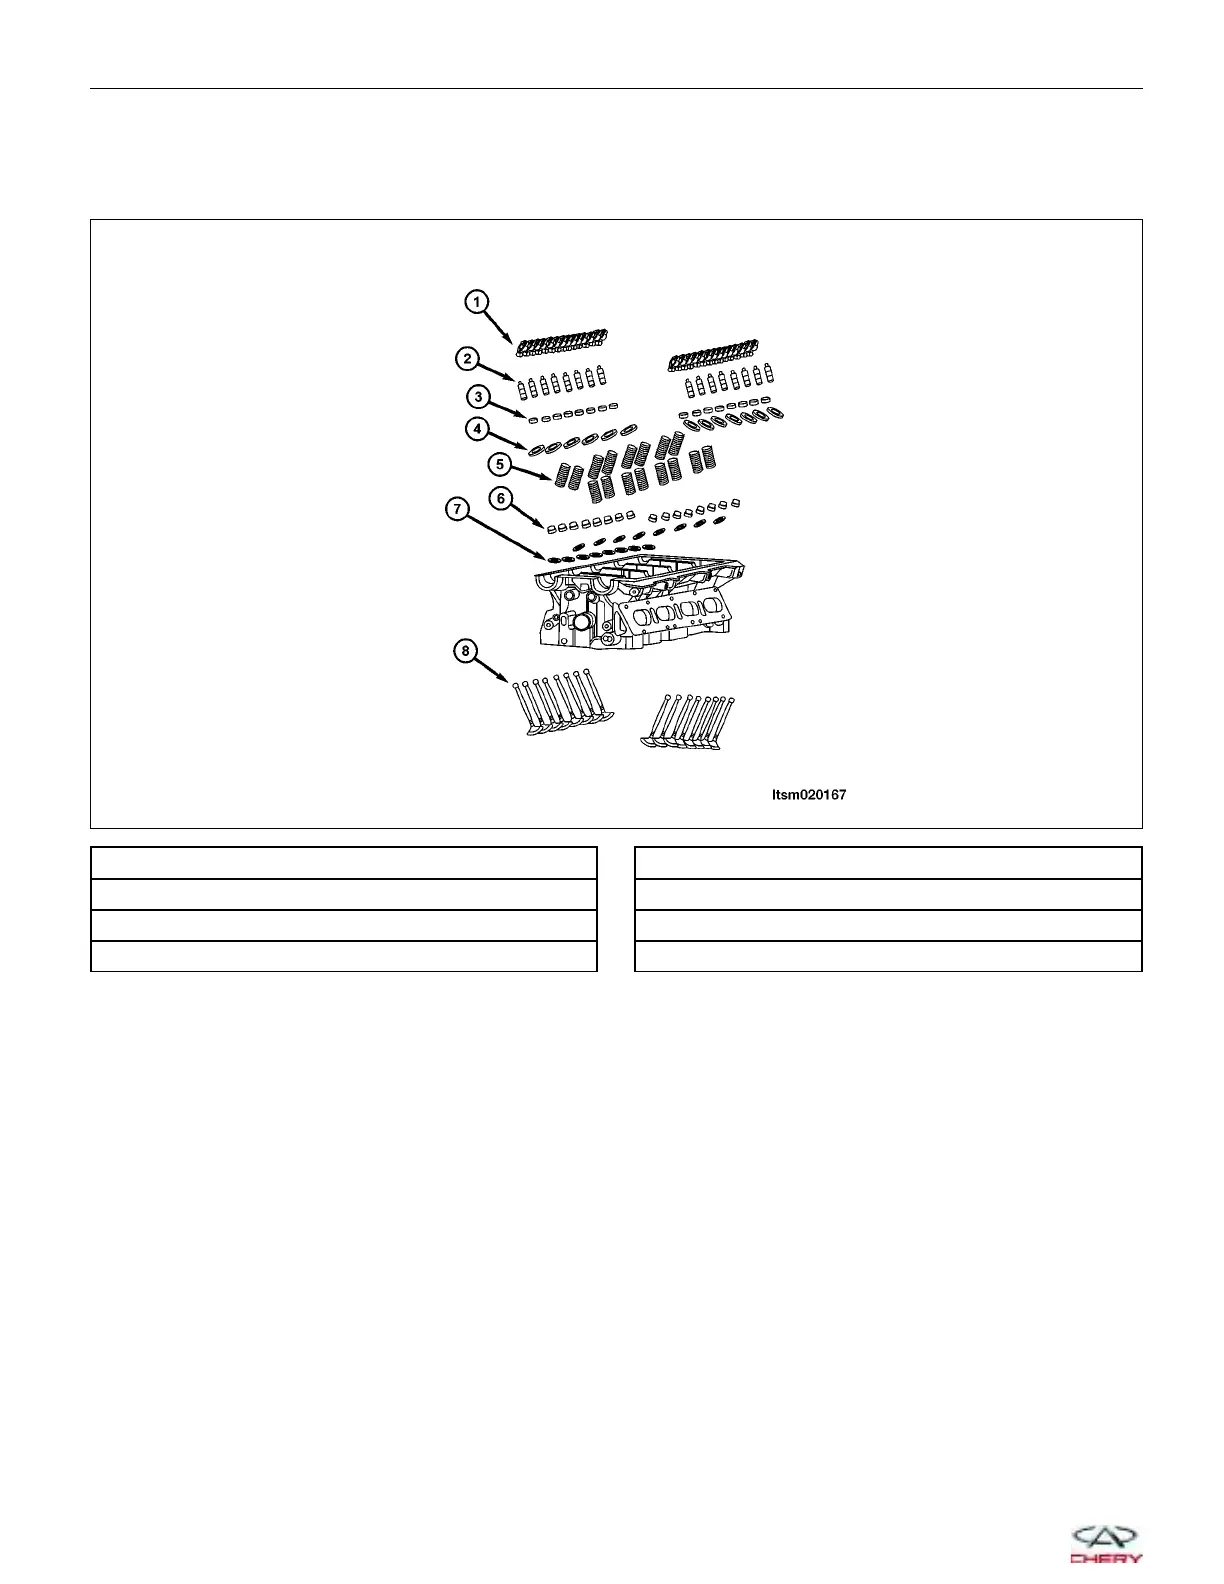
1 - Rocker Arms
2 - Hydraulic Tappets
3 - Valve Keepers
4 - Valve Spring Upper Retainers
5 - Valve Springs
6 - Valve Oil Seals
7 - Valve Spring Lower Retainers
8 - Valves
ON-VEHICLE SERVICE
LTSM020167
02–26
Chery Automobile Co., Ltd.