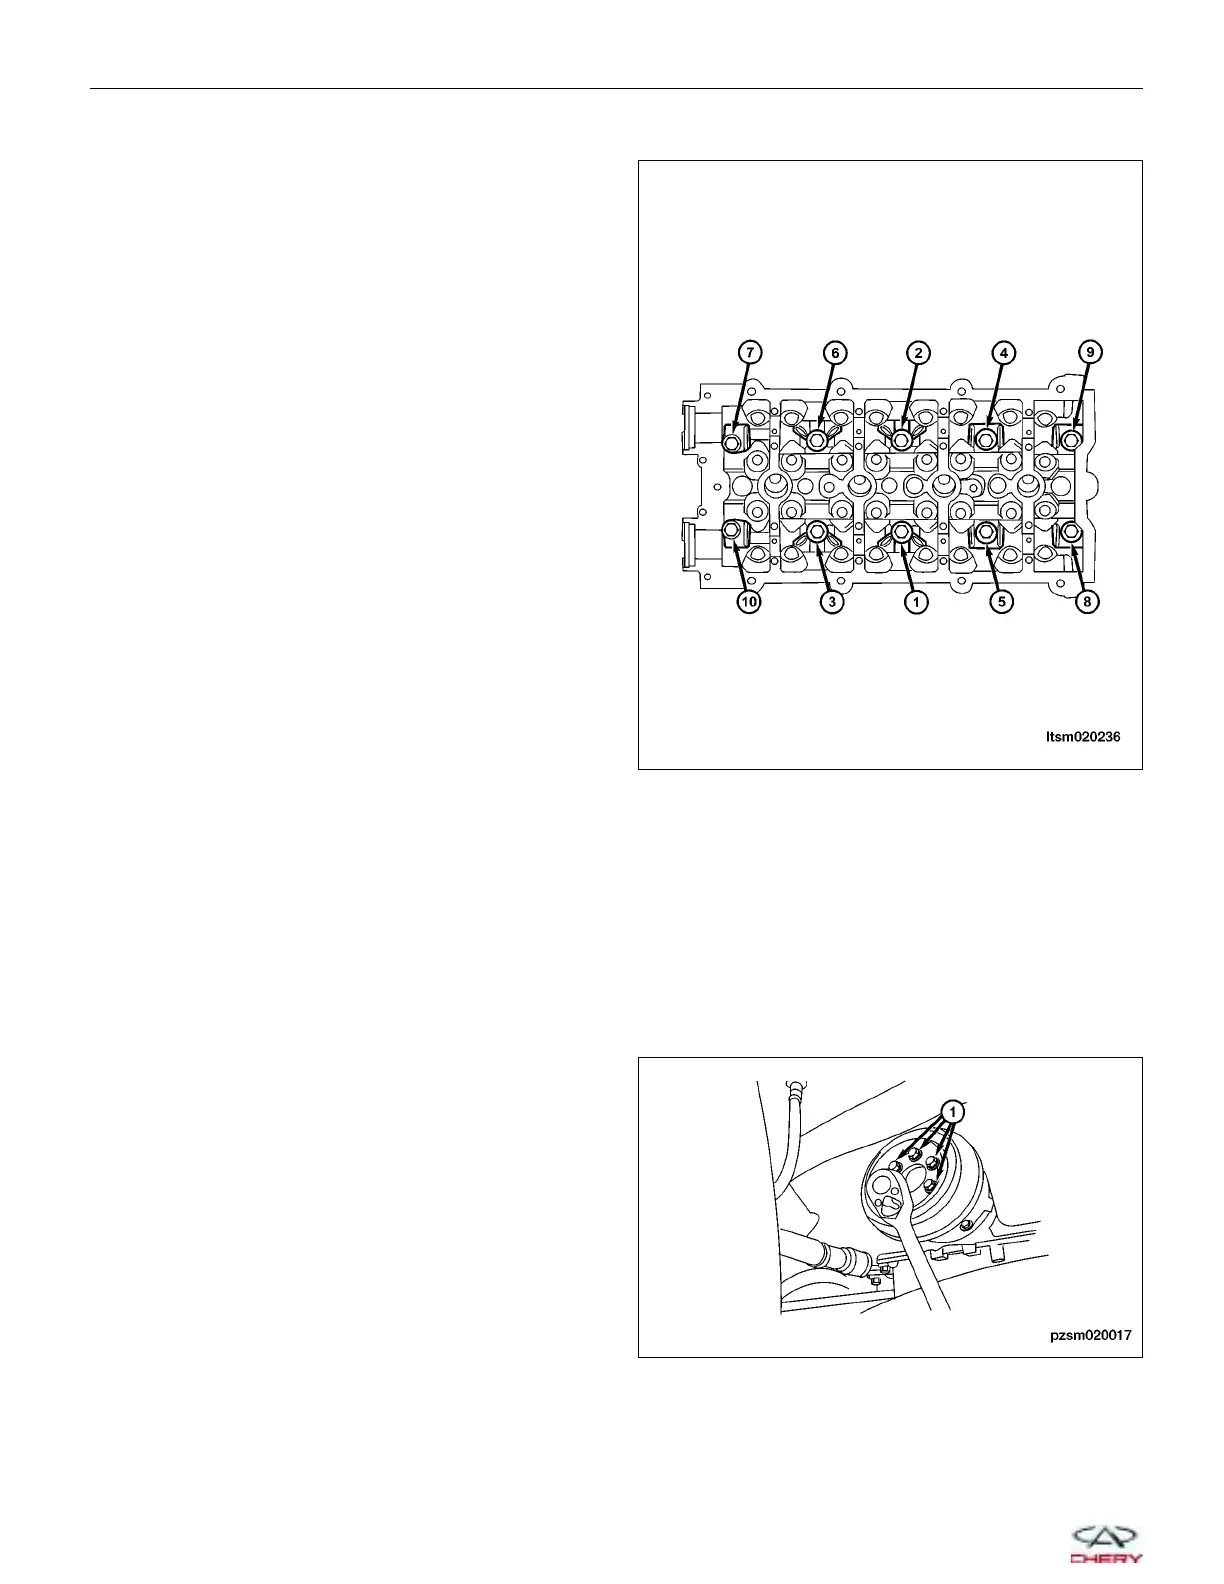
• Install the ten cylinder head bolts in the order shown.
• Torque the cylinder head bolts in the following three
step sequence:
− 1st Step: Tighten the bolt to 50 ± 5 N·m
− 2nd Step: Tighten the bolt an additional
90 ± 5°
− 3rd Step: Tighten the bolt an additional
90 ± 5°
Front Crankshaft Oil Seal
Removal & Installation
NOTE :
The following special tools are required to perform the repair procedure:
• CH-20007 - Front Crankshaft Seal Installer
• CH-20008 - Front Crankshaft Seal Guide
1. Remove the accessory drive belt (See Accessory Drive Belt Removal & Installation in Section 02 Engine).
2. Remove the six crankshaft vibration damper bolts
(1).
(Tighten: Crankshaft vibration damper bolts to 25 ±
5 N·m and an additional 30 ± 5°)
3. Remove the engine timing belt (See Engine Timing Belt Removal & Installation in Section 02 Engine).
ON-VEHICLE SERVICE
LTSM020236
PZSM020017
02–28
Chery Automobile Co., Ltd.