Installation Notes:
• Oil pan sealing surfaces must be free of grease or oil.
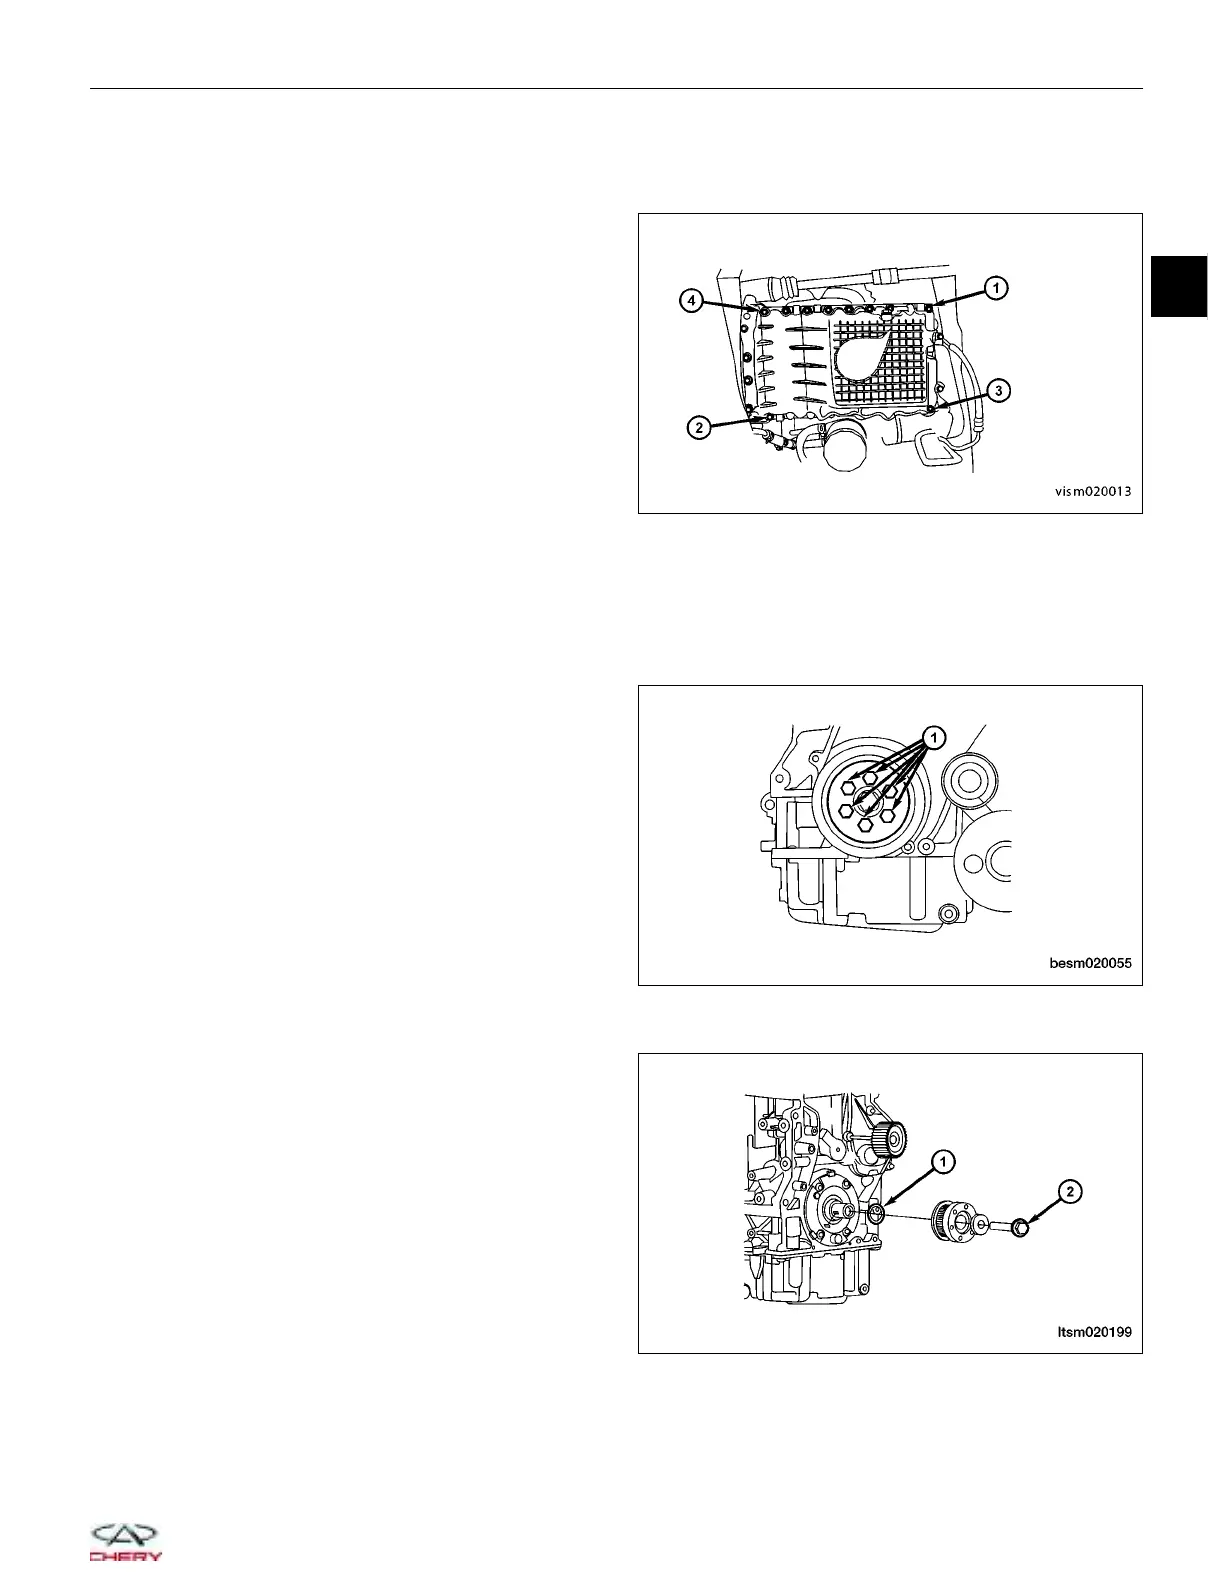
• Install the four oil pan corner bolts in the sequence shown (1-2-3-4).
• Install the remaining oil pan bolts.
• Torque all the oil pan bolts to the proper
specification.
Oil Pump
Removal & Installation
1. Remove the accessory drive belt (See Accessory Drive Belt Removal & Installation in Section 02 Engine).
2. Remove the six crankshaft vibration damper retain-
ing bolts (1).
(Tighten: Crankshaft vibration damper bolts to 25 ±
5 N·m and an additional 30 ± 5°)
3. Remove the engine timing belt (See Engine Timing Belt Removal & Installation in Section 02 Engine).
4. Remove the crankshaft timing belt pulley bolt (2)
from the crankshaft.
(Tighten: Crankshaft timing belt pulley bolt to 130 ±
10 N·m and an additional 65 ± 5°)
5. Remove the key-way from the crankshaft.
6. Use an appropriate tool and remove the front
crankshaft oil seal (1).
ON-VEHICLE SERVICE
VISM020013
BESM020055
LTSM020199
02
02–51
Chery Automobile Co., Ltd.