Engine Mounts
Removal & Installation - Left Mount
NOTE :
The following special tools are required to perform the repair procedure:
• Engine Hoist
1. Disconnect the negative battery cable.
2. Remove the battery (See Battery Removal & Installation in Section 05 Starting & Charging).
3. Remove the air cleaner housing (See Air Cleaner Housing Removal & Installation in Section 02 Engine).
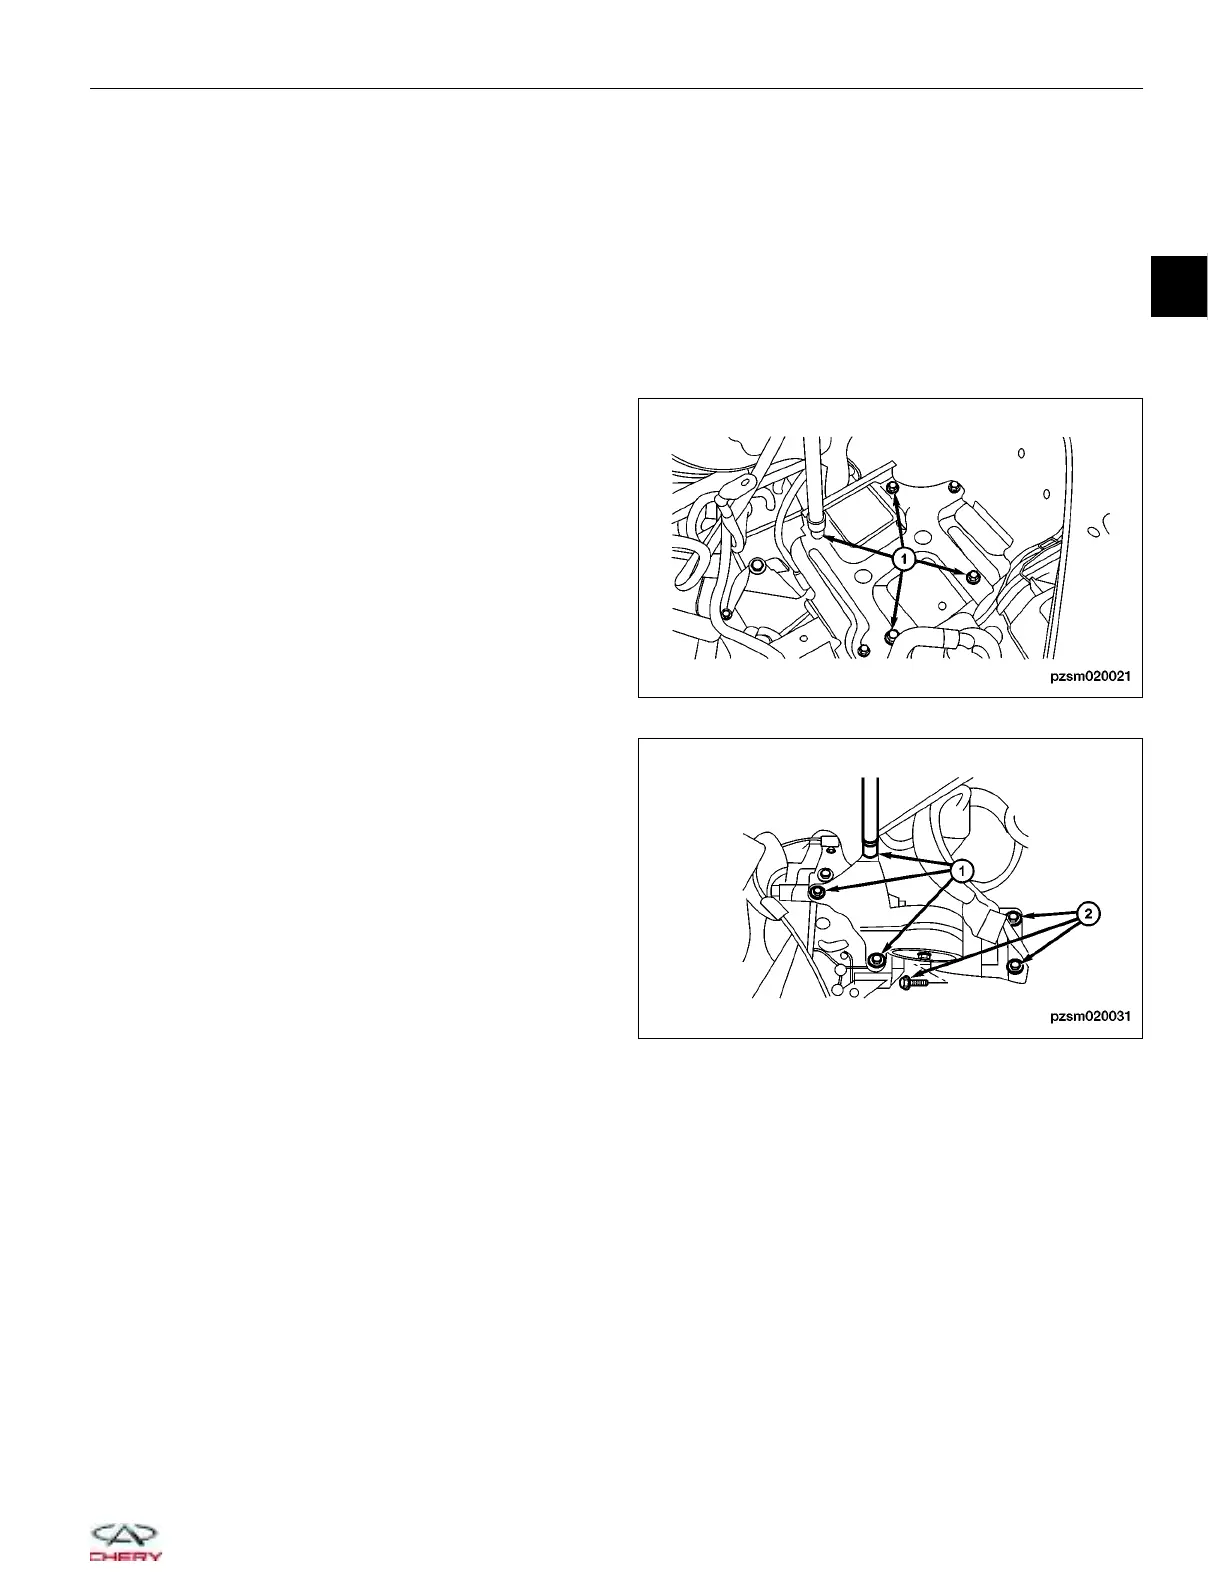
4. Remove the four battery tray retaining bolts (1).
5. Remove the three left transaxle mount bolts (2)
and the three left transaxle mount bracket bolts (1).
(Tighten: Engine left mount bolt to 65 ± 5 N·m)
6. Installation is in the reverse order of removal.
Removal & Installation - Right Mount
NOTE :
The following special tools are required to perform the repair procedure:
• Engine Hoist
1. Use the engine hoist to support the engine.
ON-VEHICLE SERVICE
PZSM020021
PZSM020031
02
02–31
Chery Automobile Co., Ltd.