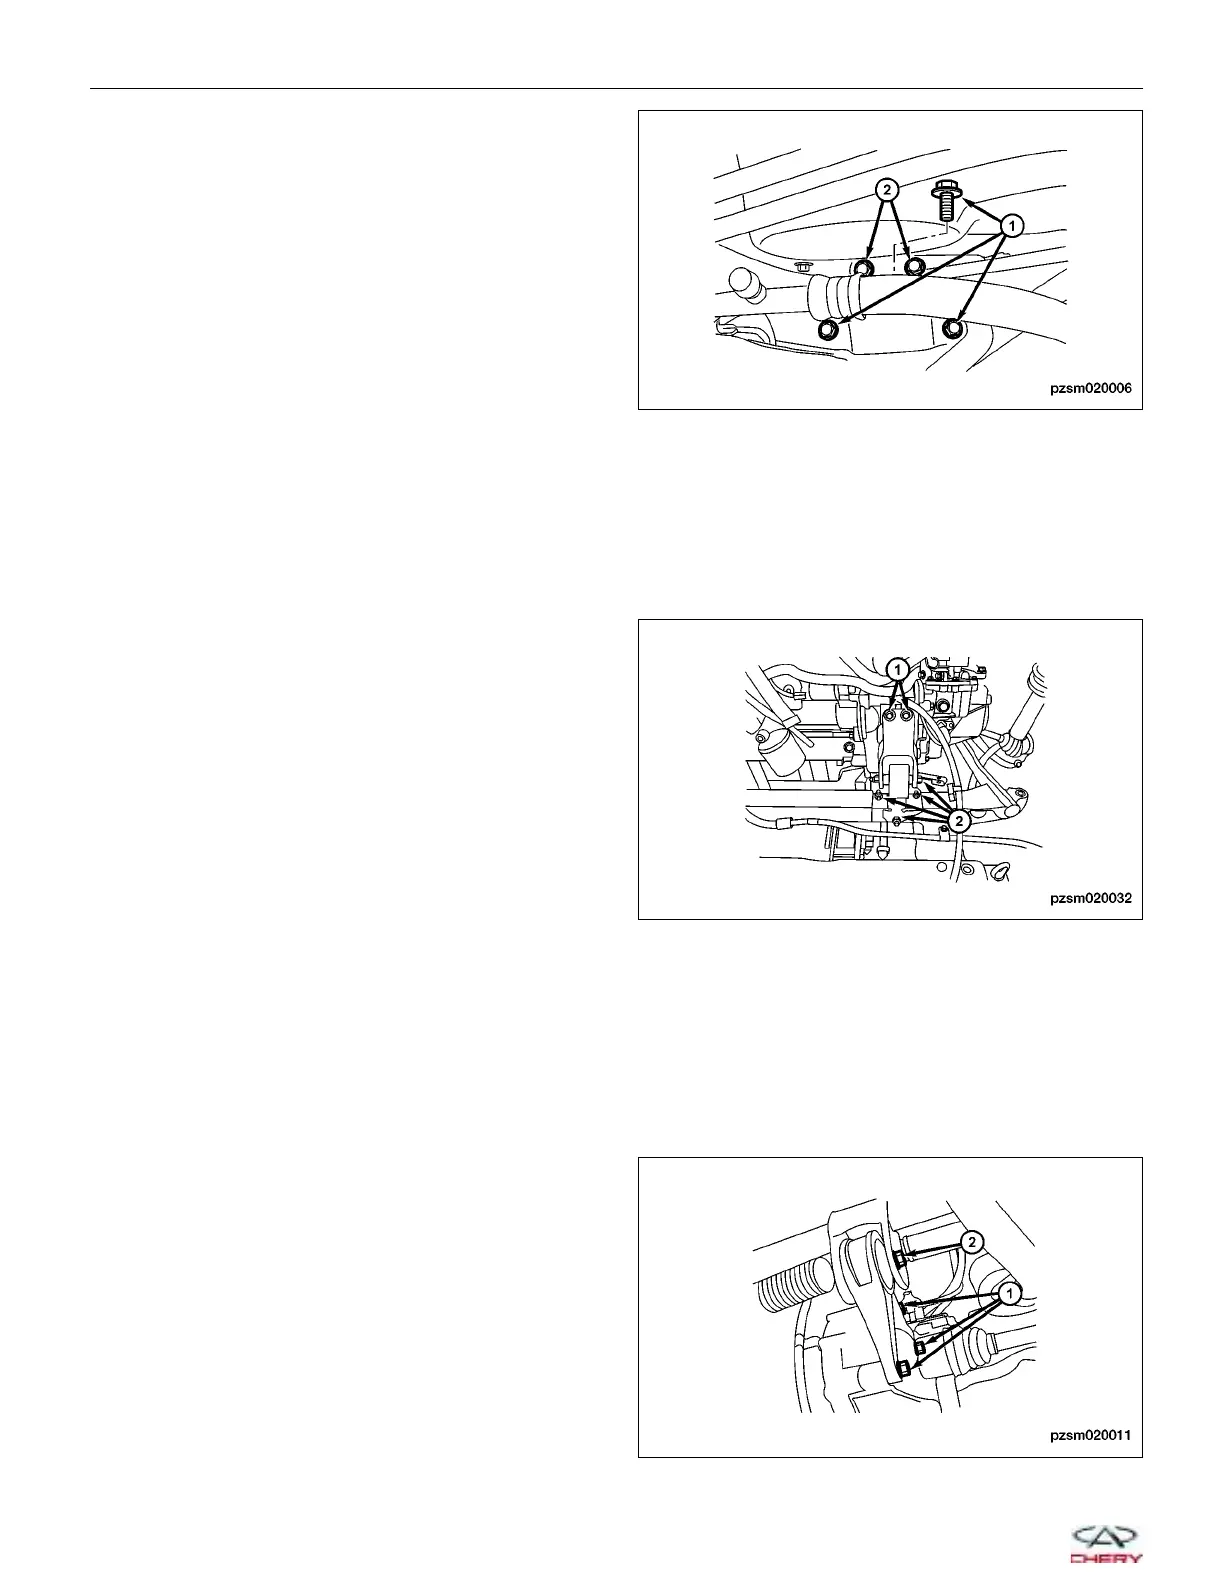
2. Remove the two right engine mount bolts (1) and
the three right engine mount bracket bolts (2).
(Tighten: Engine right mount bolt to 65 ± 5 N·m)
3. Installation is in the reverse order of removal.
Removal & Installation - Front Mount
NOTE :
The following special tools are required to perform the repair procedure:
• Engine Hoist
1. Use the engine hoist to support the engine.
2. Remove the two front engine mount bolts (1) and
the four front engine mount bracket bolts (2).
(Tighten: Engine front mount bolt to 80 ± 5 N·m)
3. Installation is in the reverse order of removal.
Removal & Installation - Rear Mount
NOTE :
The following special tools are required to perform the repair procedure:
• Engine Hoist
1. Raise and support the vehicle.
2. Remove the rear engine mount retaining bolts (2)
and the three rear engine mount bracket bolts (1).
(Tighten: Engine rear mount bolt to 60 ± 5 N·m)
3. Installation is in the reverse order of removal.
ON-VEHICLE SERVICE
PZSM020006
PZSM020032
PZSM020011
02–32
Chery Automobile Co., Ltd.