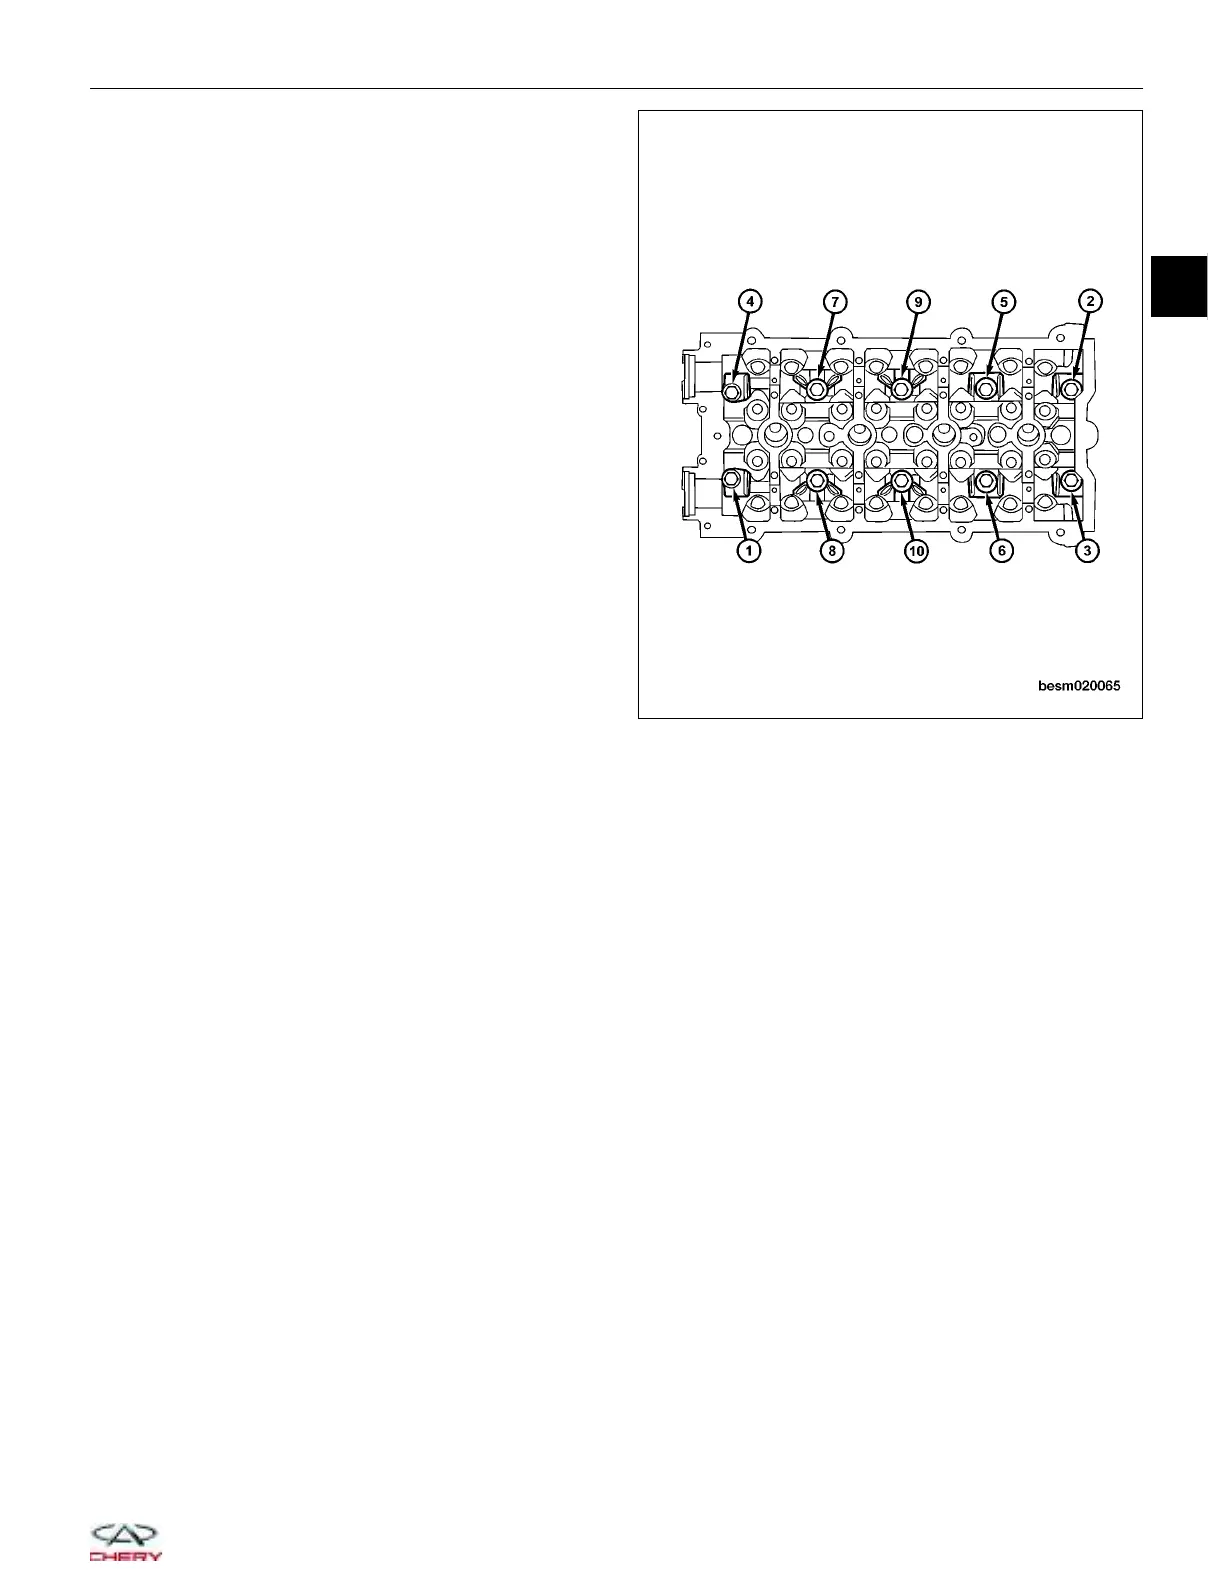
7. Remove the ten cylinder head bolts in the order
shown.
8. Remove cylinder head gasket.
9. Installation is in the reverse order of removal.
Installation Notes:
• Ensure the cylinder head bolt holes in the block are clean, dry (free of residual oil or coolant), and threads are
not damaged.
• The cylinder head bolts should not be reused. The new bolts should be examined before use. If the bolts are
stretched, the bolts should be replaced.
• Position the new cylinder head gasket on the engine block with the part number facing up. Ensure gasket is
seated over the locating dowels in the block.
• Before installing the bolts, the threads should be lightly coated with engine oil.
ON-VEHICLE SERVICE
BESM020065
02
02–27
Chery Automobile Co., Ltd.