6. Remove the sixteen camshaft bearing cap bolts.
(Tighten: Camshaft bearing cap bolts to 9.5 ± 1.5 N·m )
NOTE: Equally loosen camshaft bearing cap bolts
in several steps.
7. Remove the camshaft bearing caps and place
them in proper order.
NOTE: The camshaft bearing caps are marked for
identification.
8. Remove the camshafts and then remove the cam-
shaft seals.
9. Installation is in the reverse order of removal.
Installation Notes:
• Identify and separate the intake camshaft and the exhaust camshaft (the intake camshaft is identified by the
gear on the end of the camshaft).
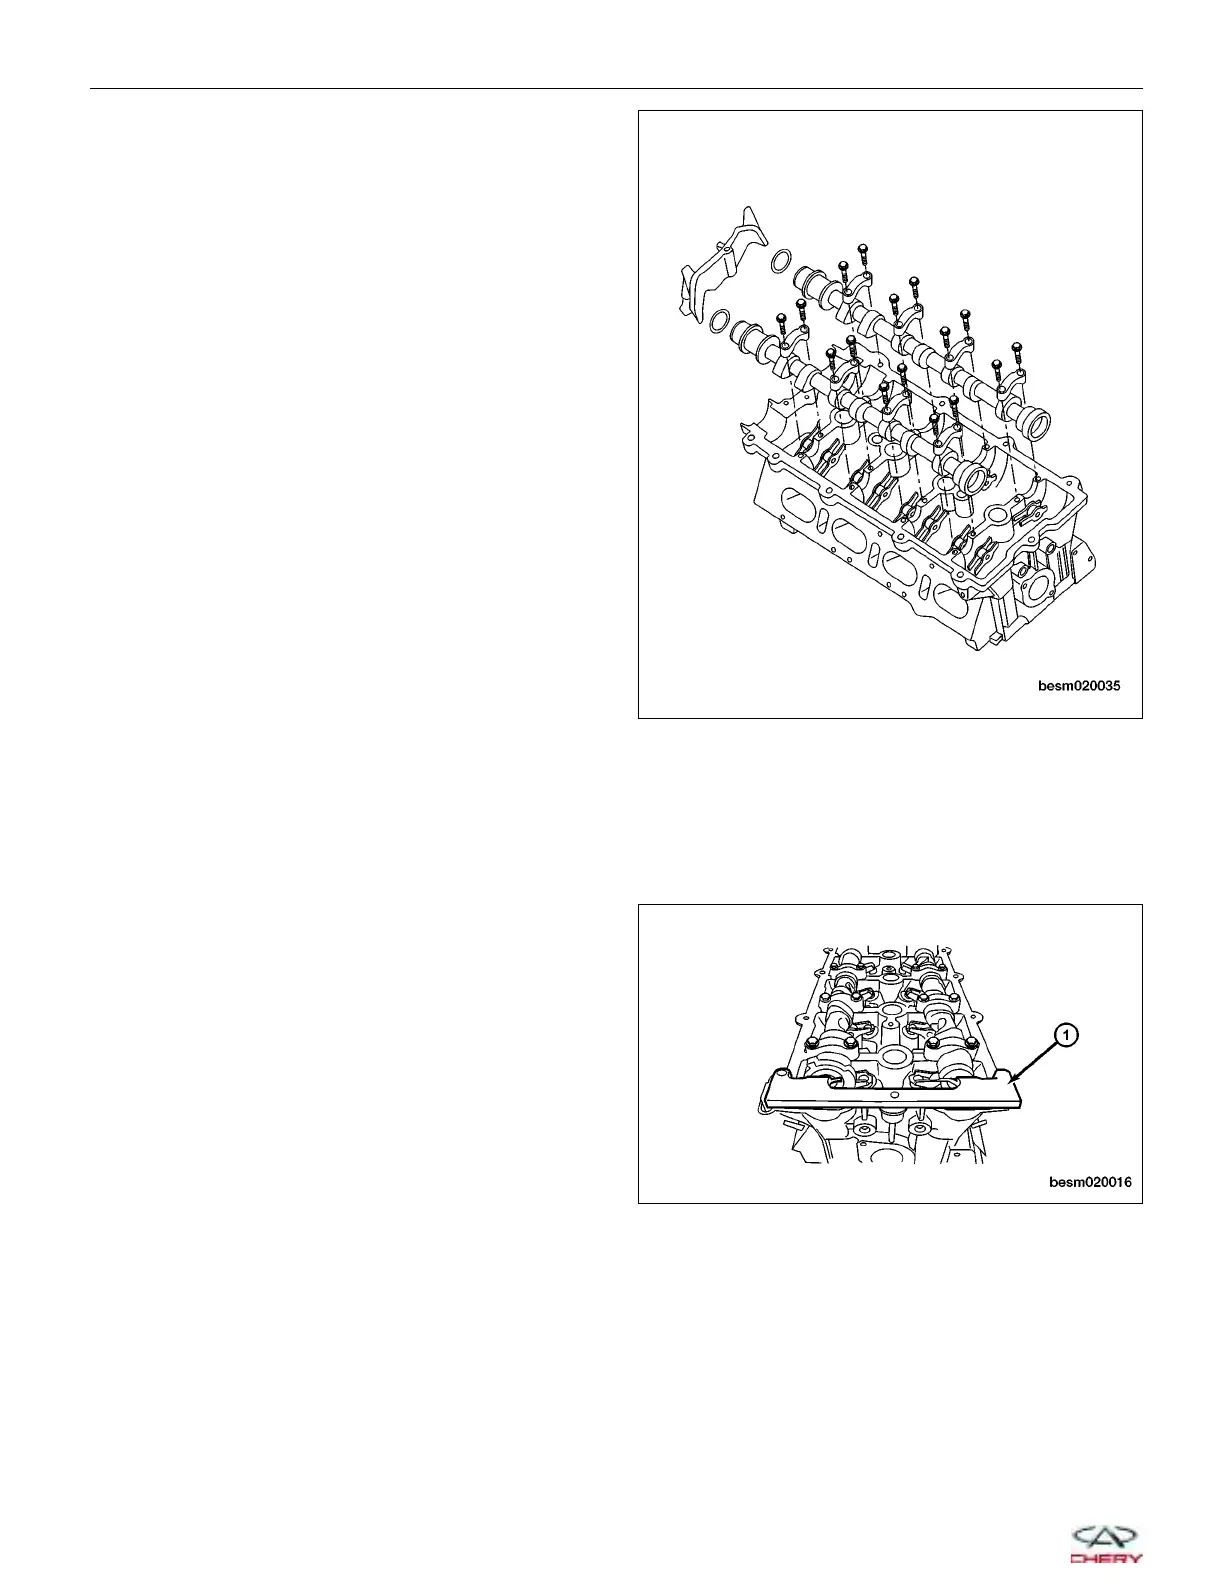
• Pay attention to the division mark of the camshaft shell cover.
• Use special tool CH-20010 (1), and install the cam-
shaft holder to hold the camshafts in place.
NOTE :
The camshaft holder will prevent the camshafts from
rotating in either direction.
ON-VEHICLE SERVICE
BESM020035
BESM020016
02–24
Chery Automobile Co., Ltd.