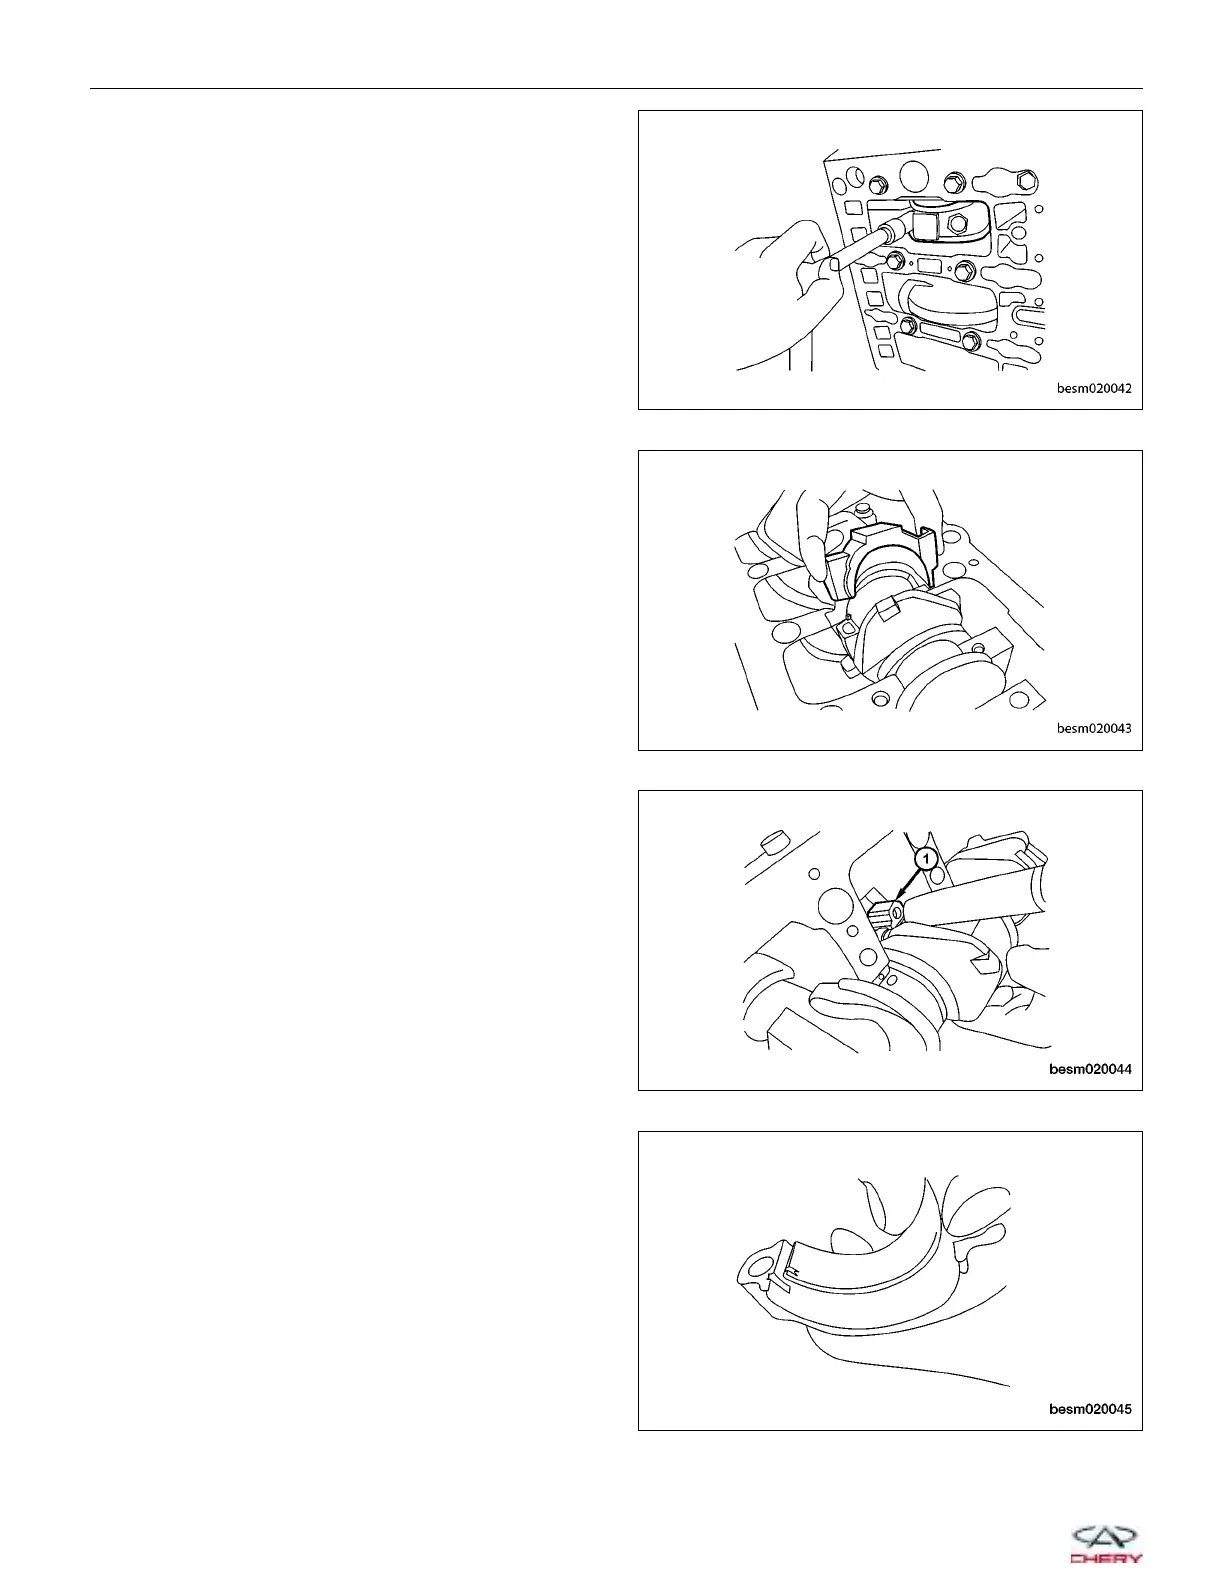
4. Remove the eight connecting rod retaining bolts.
5. Remove the connecting rod bearing cap.
6. Using a hammer handle or similar tool, push the
connecting rod / piston assembly (1) out through
the top of the cylinder block.
7. Remove the connecting rod bearings (See Con-
necting Rod Removal & Installation in Section 02
Engine).
CAUTION: When removing the connecting rod side bearings, note the installation position. Keep them in
the correct order.
ENGINE UNIT REPAIR
BESM020042
BESM020043
BESM020044
BESM020045
02–54
Chery Automobile Co., Ltd.