v2.13 Cleverscope CS300 Reference Manual
©Cleverscope 2004-2018 www.cleverscope.com Page 157
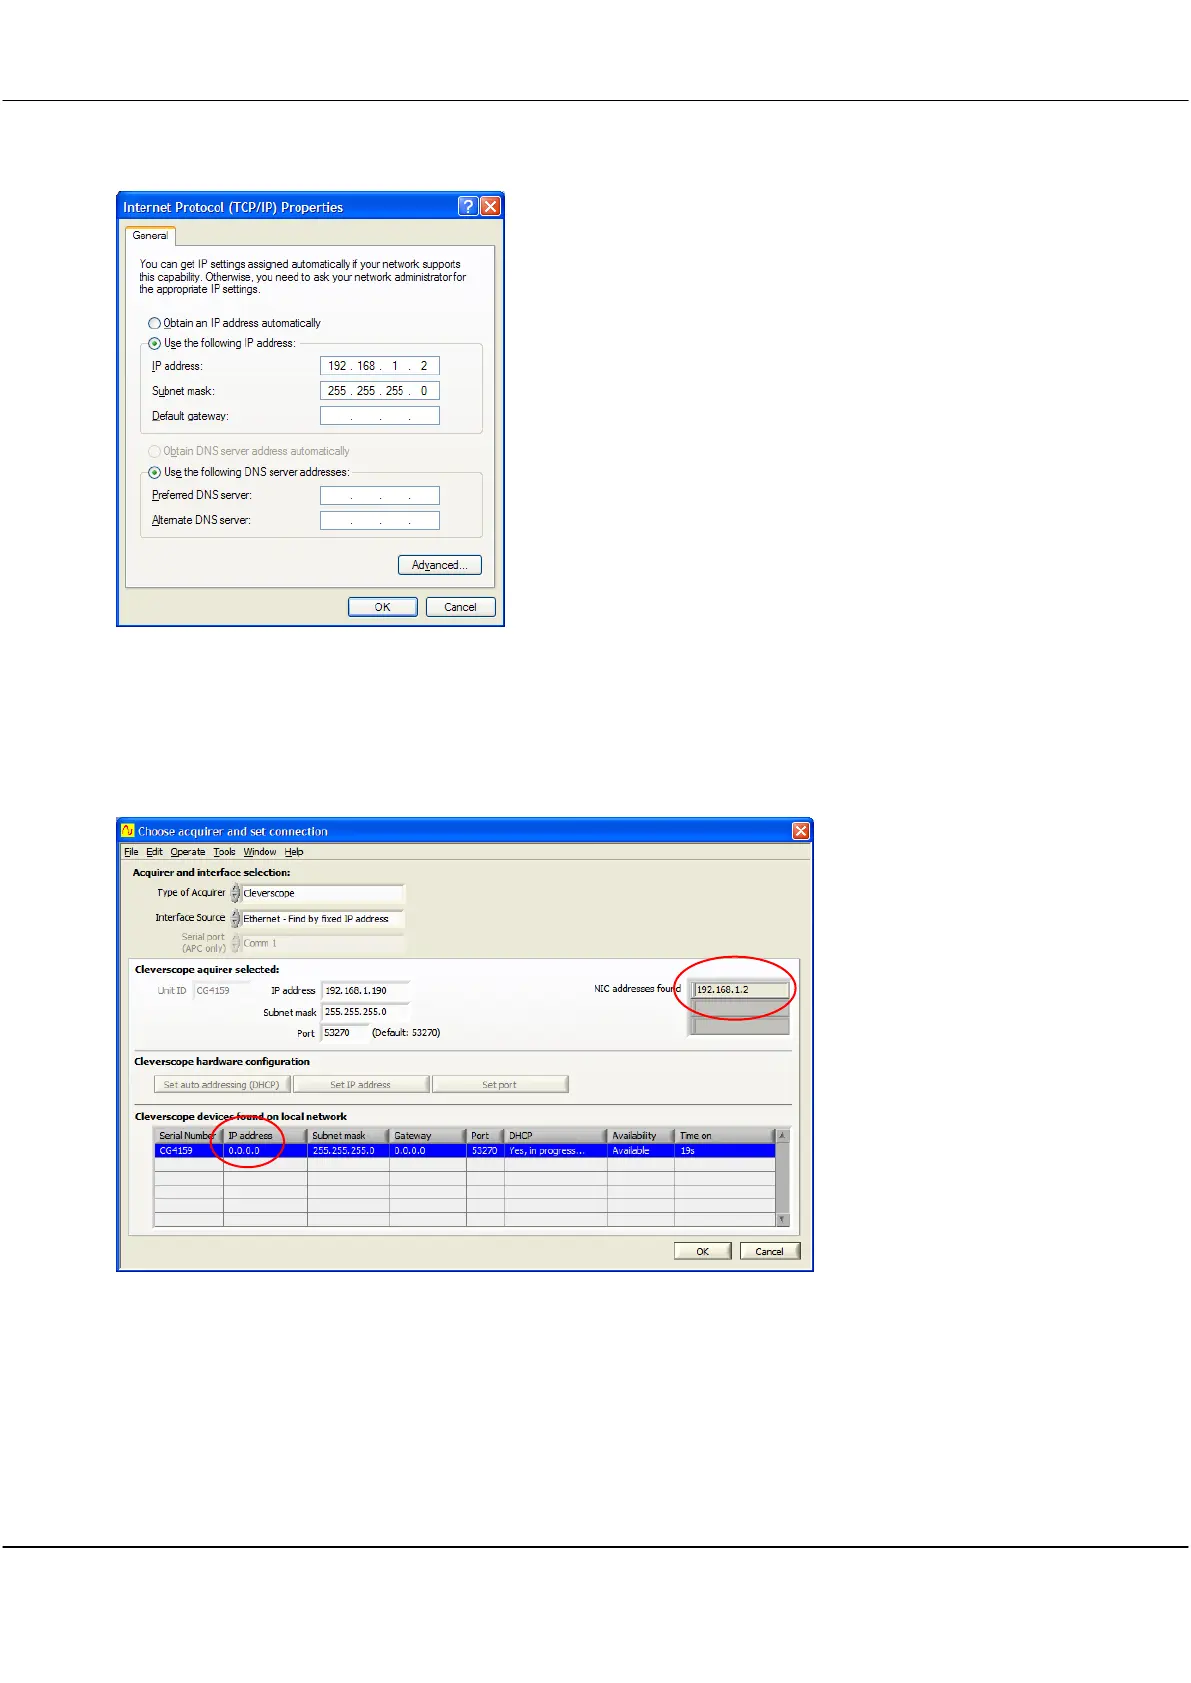
5 Now set the computer to use a fixed address
(not get the IP address automatically):
Click Use the following IP address, and type in the IP Address
that you want to use
Enter a Subnet mask that encompasses all units on your
subnet.
Use values shown in the picture if you are not sure:
e.g. IP Address 192.168.1.2 and
Subnet mask 255.255.255.0
Click OK, and close all the dialog windows.
Open the Cleverscope application:
On the Settings menu, click Choose Acquirer and set connection.
Connect the Cleverscope to the Laptop, and power up.
If the Cleverscope was setup for DHCP, it will not find an address, and you need to set it manually, so follow the
instructions below. You can tell that the Cleverscope was set for DHCP because the Cleverscope IP address is
returned as 0.0.0.0 as there is no DHCP server.
First click on the Cleverscope to connect to (even if there is only one), to select it - the line will become blue -
type the fixed IP address you want to give the Cleverscope into the IP address field in the Cleverscope acquirer
selected panel, and click the Set IP address button. In the example above we used 192.168.1.190 - it needs to
be different from the NIC address in the last digit.