Cleverscope CS300 Reference Manual v2.11
Page 162 www.cleverscope.com ©Cleverscope 2004-2015
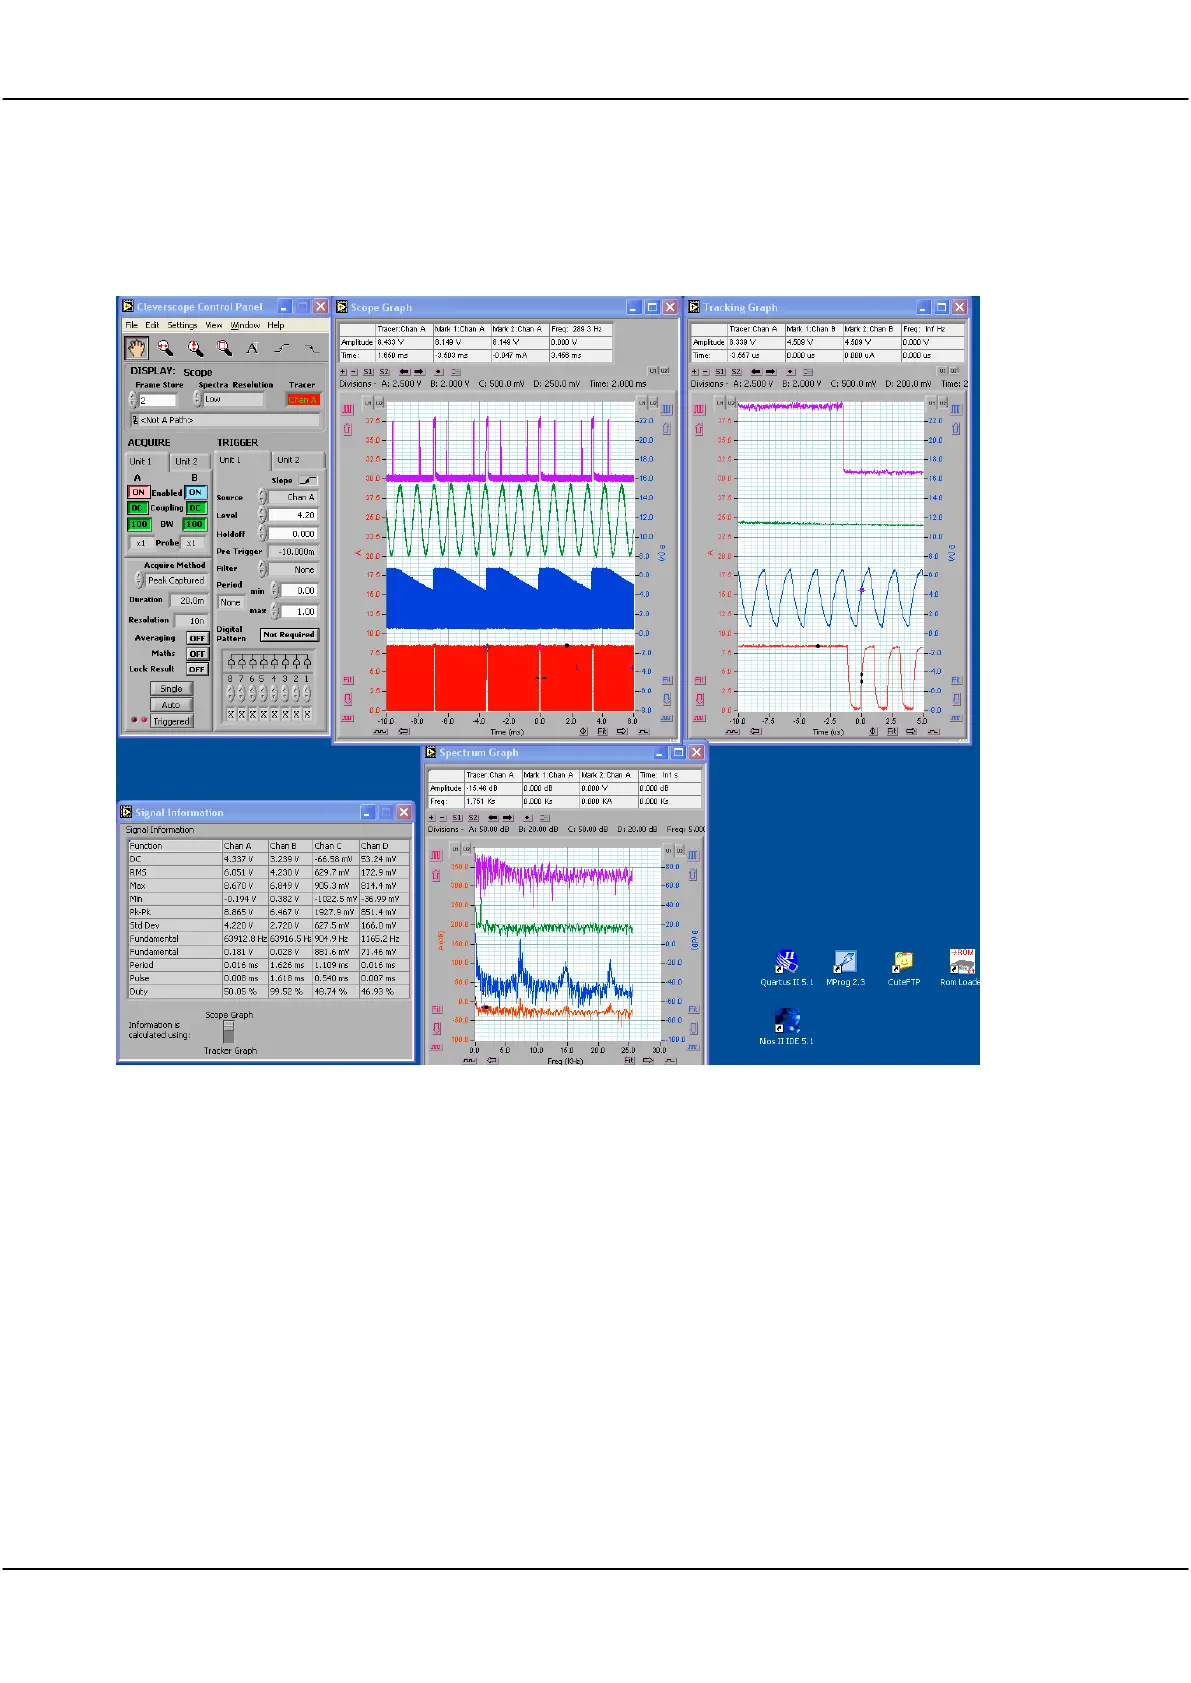
24.6 Run the Cleverscope4 Application
Double click on your Cleverscope 4 shortcut icon as normal. The 4 channel version should power up. Here is a
screen shot:
You will see that the control panel and graphs have tabs for both units. We’ve done it this way to make a one-
to one correspondence with the physical units. You can turn on or off channels, and select coupling and BW on
the Acquire Panel. You can select which unit triggers (only one unit can trigger at a time) by selecting the
trigger tab, and on the tab you can select which channel triggers, and the trigger spec as normal.
On a graph you can select which channel the axis refers to. On the left you have Channel A for unit 1 and 2, on
the right you have Channel B for unit 1 and 2. If you click on a graph, and use the Tab key, you can quickly
move from channel to channel, and the application will automatically show the correct axis.
In the information area the channels are called A, B, C and D. This can be a little confusing and we are work out
ways to make it clear.
You should find that most dialogs have tabs for the two units, and you can choose the appropriate unit to make
changes for.
The version of Cleverscope that formed the base for Cleverscope 4 is now quite old. We anticipate getting the
application up to the latest standard quite soon. There are still some defects in the application, and these will be
fixed.