v2.13 Cleverscope CS300 Reference Manual
©Cleverscope 2004-2018 www.cleverscope.com Page 15
3.6 Acquire a Signal for Display
Start the Cleverscope application software on the PC.
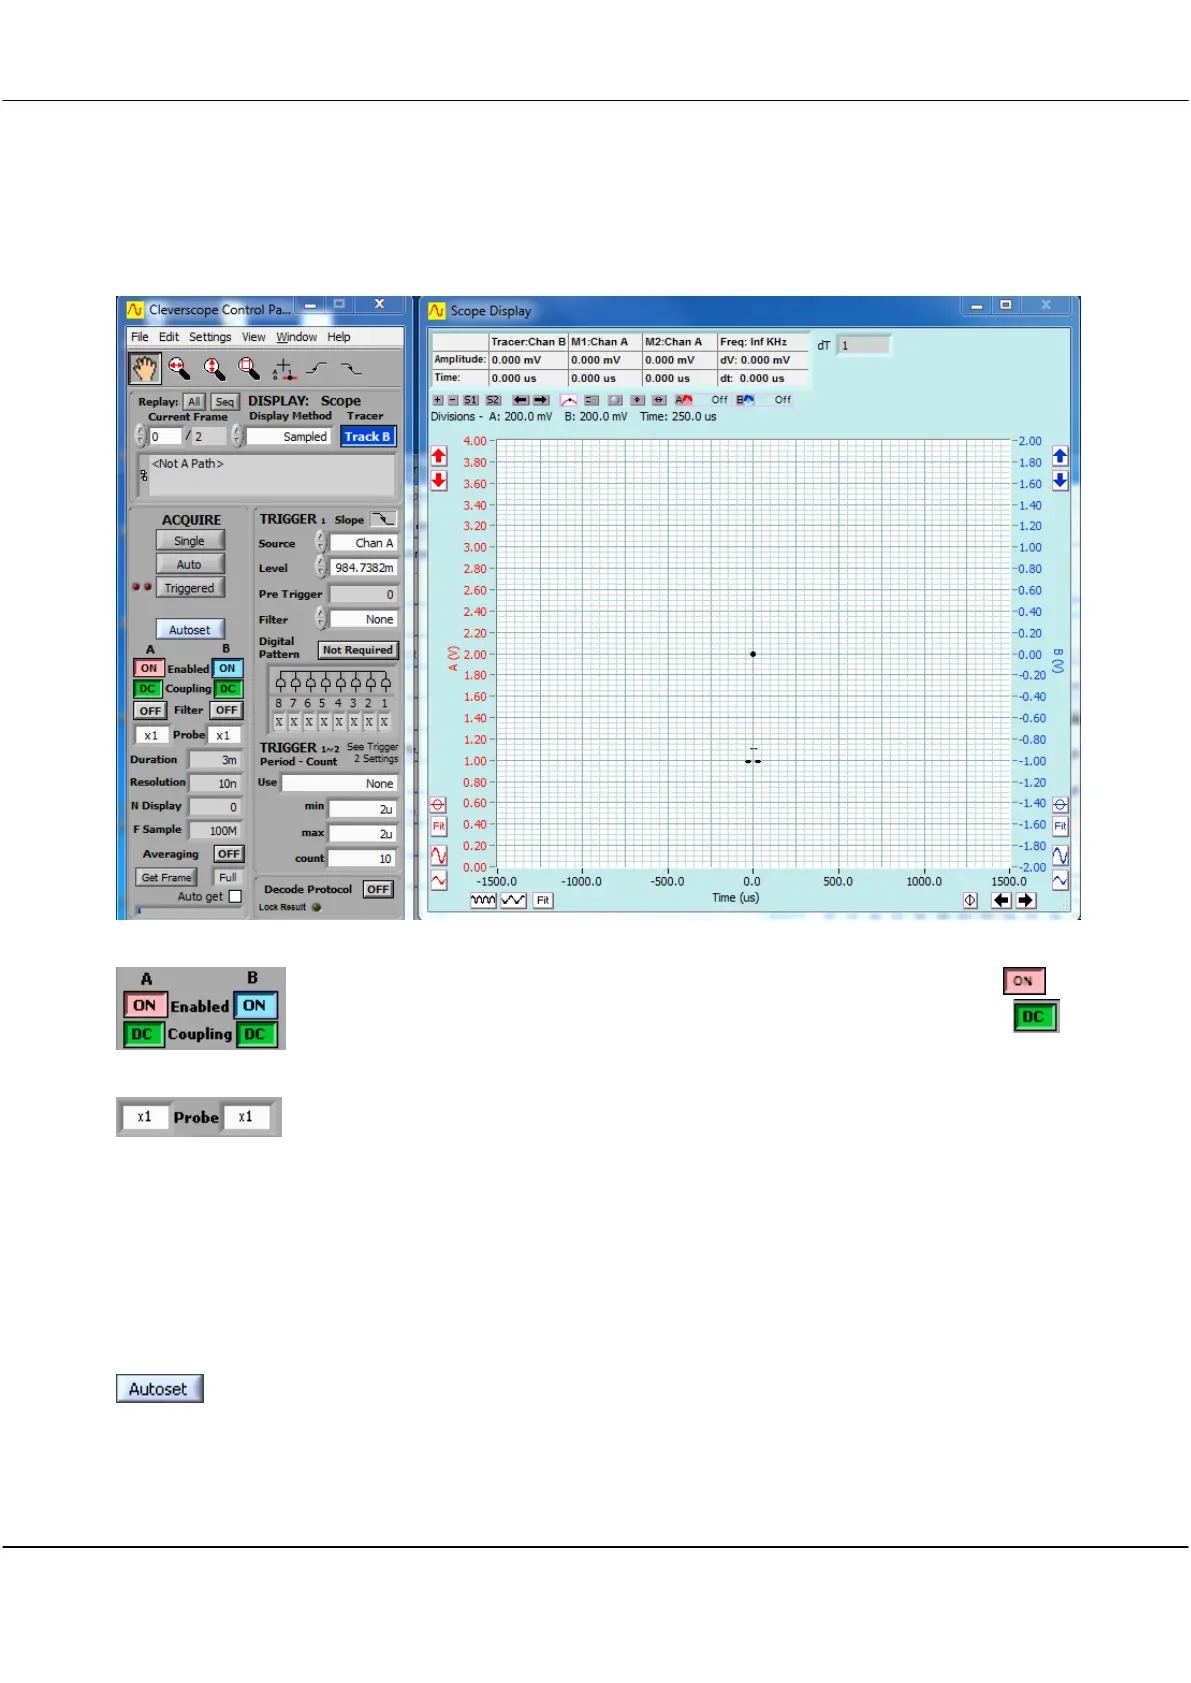
Cleverscope Displays on Start-up
Enable Channels A & B
Probe Attenuation
On the Cleverscope Control Panel
Click the Enabled buttons for both channel A and B so that they both display
Click the Coupling buttons for both channel A and B so that they both display
Check the probe attenuation are both set to x1.
Connect probes to Chan A and Chan B and, using the clip accessory, clip the probe tips to the Probe Comp pin
on the CAU front panel, the leftmost of the two pins.
Note: Probe Comp produces a 2v p-p square wave signal for probe frequency response compensation.
Clip the earth clips to the earth pin, the rightmost of the two pins.
Check the probe attenuation slider switch on the probe barrel is set to x1.
Click to automatically scale the Scope Display and automatically set the trigger settings
to match the signal you have connected.
Autoset may take a few moments to acquire the signal and work out the correct
display settings.
The result should be similar to the following: