v2.13 Cleverscope CS300 Reference Manual
©Cleverscope 2004-2018 www.cleverscope.com Page 19
Adjust the trigger level by dragging the line to the required point. A small Rising or
Falling edge symbol will appear on the graph. Click and drag the line to the required
voltage level.
You can also type the trigger value directly into the Level window. Here we have
entered 700 mV.
3.10 Adjusting the Scope Display
You can set up the acquisition manually to fine tune what Autoset has initially selected. Display controls are
placed on the on the sides and bottom of the Scope display.
Use the up ( ) and down ( ) vertical display buttons and the vertical expand ( )
and contract ( ) buttons for channel A to size the displayed waveform the way you
would like to see it.
As an example you could select 0.50 volts per major horizontal gridline as shown to the
left.
You can also over-type the end values of the displayed axis to change the axis as you
want. Value are in the current scale. If, for example, the left hand time axis displays
-1500, and the display units are us, you can overtype -3000 to change the left hand
end to -3000 us. Hit Enter to register the change.
Go to the Cleverscope Control Panel window.
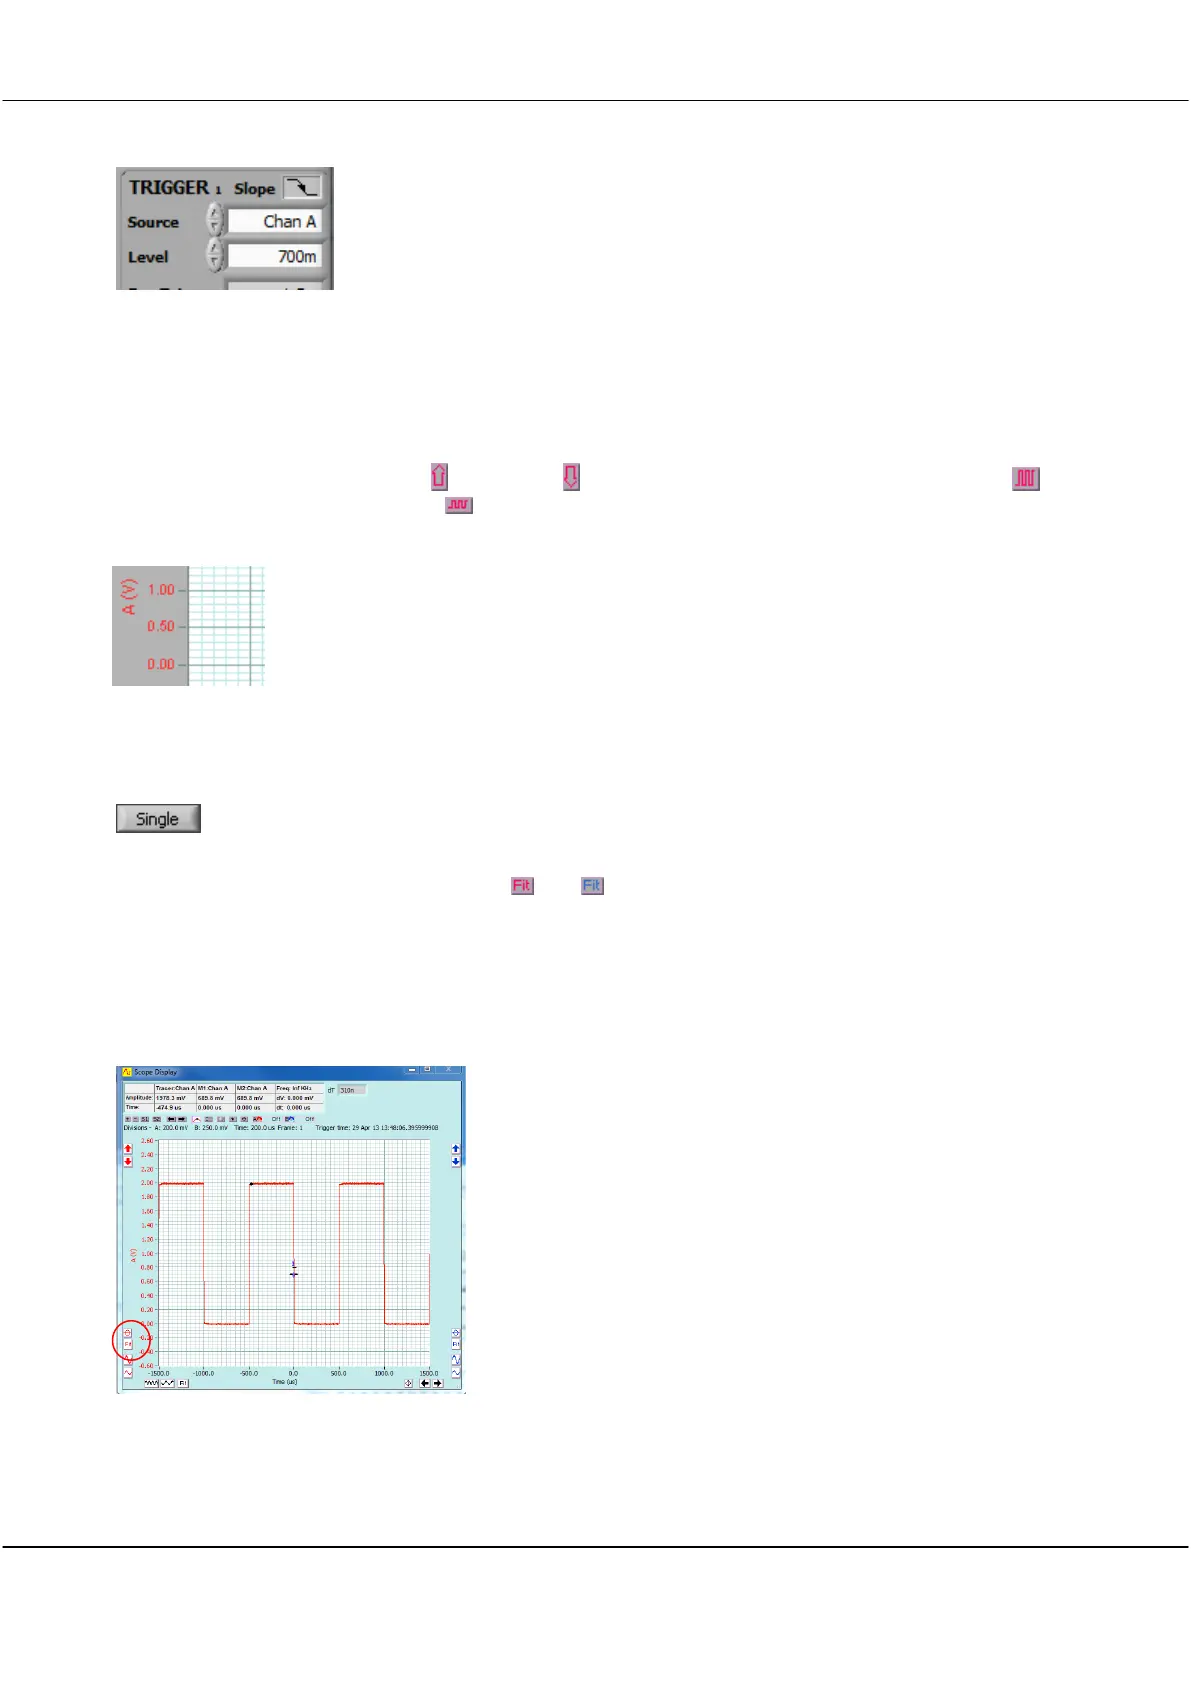
In the AQUIRE area, click the Single button to acquire a single frame of signal data.
The Scope Display will then display the acquired signal. In the example below, the the
trigger is at 700 mV.
The auto-fit buttons ( and ) for channel A and B can be used to bring the signal
traces into view. Cleverscope will apply the optimum vertical scaling and positioning for
the signal data.
For the vertical scale, the positioning and scaling of the signal trace with respect to time
can be altered using the horizontal display buttons
The screen at left shows the capture after the Channel A auto-fit
button was clicked.