User's Manual
296
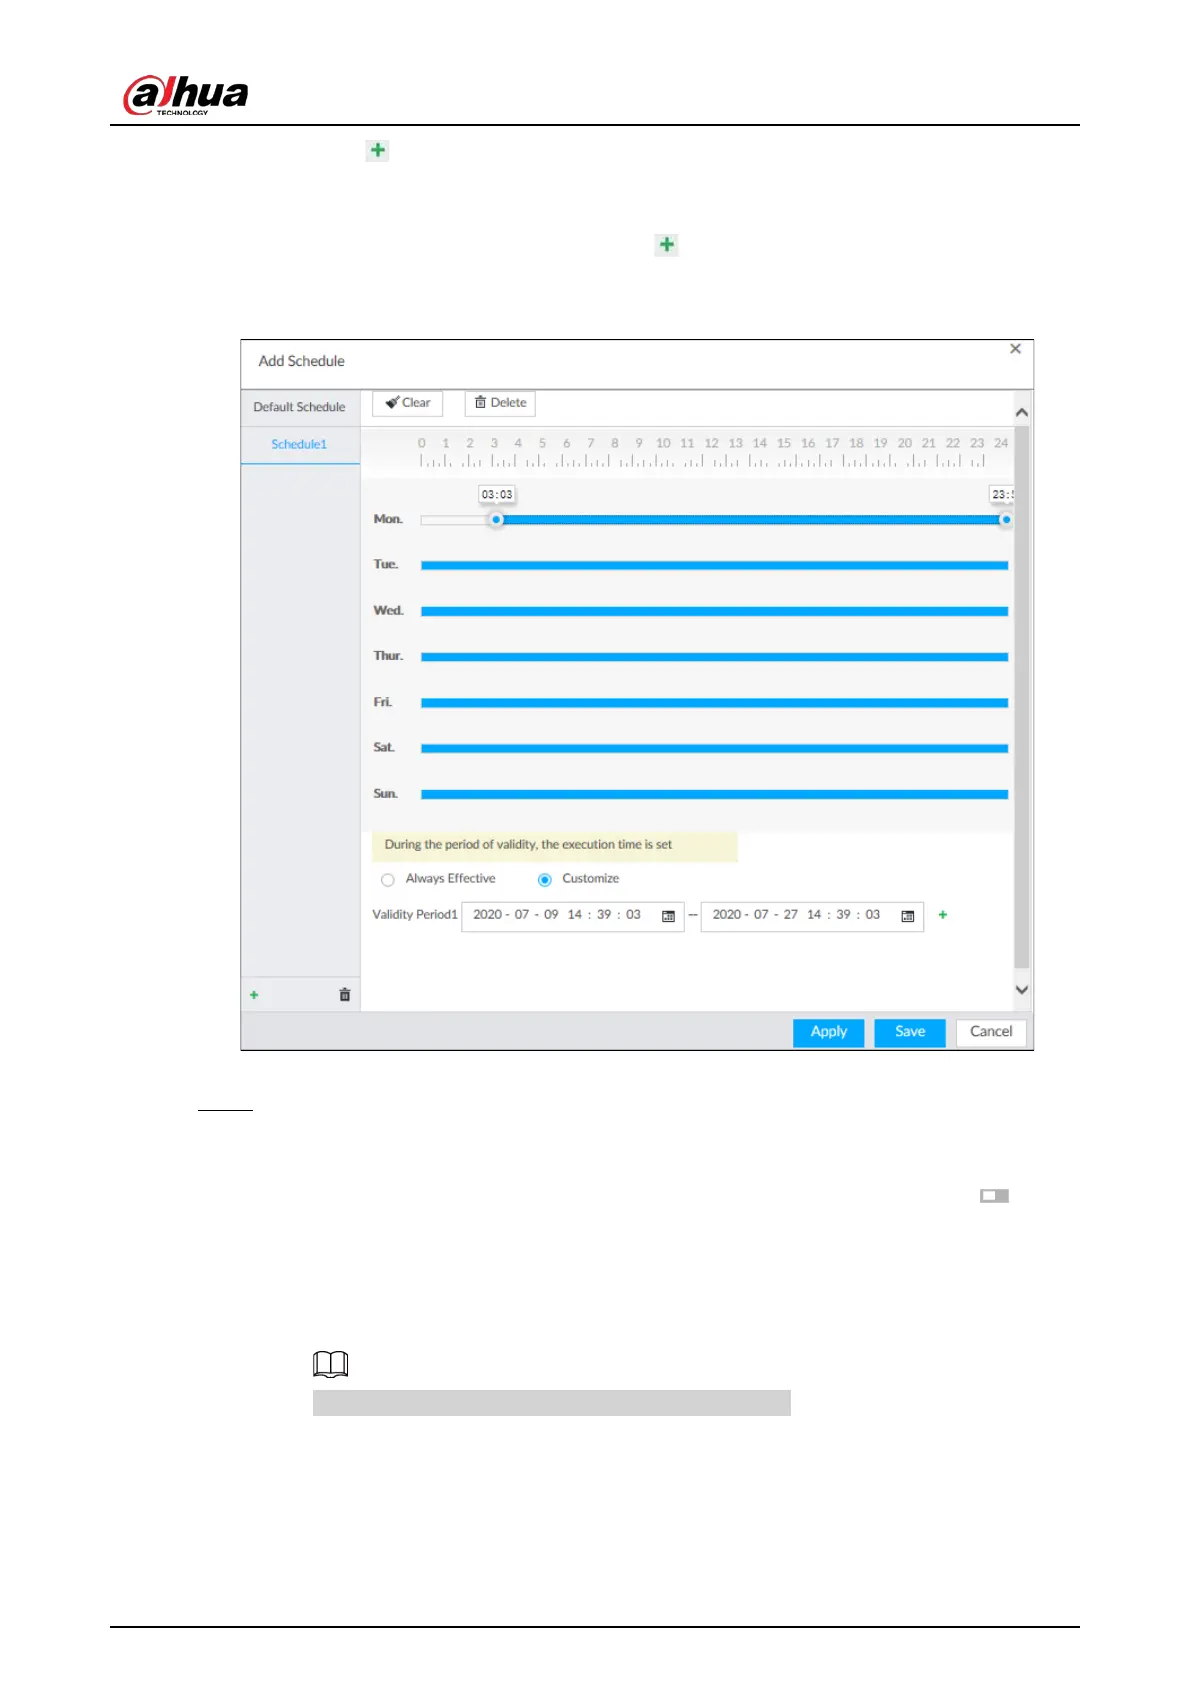
4. Click , name the schedule, select a type and then click OK.
5. Specify recording hours by dragging the sliders on the day bars.
●
Always Effective: Records according to the schedule.
●
Customize: Select this option, click to define the validity periods of the
schedule.
Figure 8-86 Add a schedule
6. Click Save.
Step 3 Set other parameters and then click OK.
●
Record Events: Record event videos.
●
Pre-record: The recording duration prior to the event.
●
ANR: Automatic Network Replenishment. When ANR is enabled (by clicking ) , the
Device will download videos recorded by IPC and stored on camera SD card during
network disconnection. Enter the time length of the video to be downloaded from IPC.
The Device will download only the defined length of video even if the disconnection is
longer.
Make sure that the IPC has an SD card and is recording.
●
Record Stream: Select stream types and recording modes.
●
Instant Record Duration: The duration of instant recording. After starting instant
recording on the
LIVE page, if you do not stop recording, it will automatically stops
after the defined duration.
 Loading...