User's Manual
294
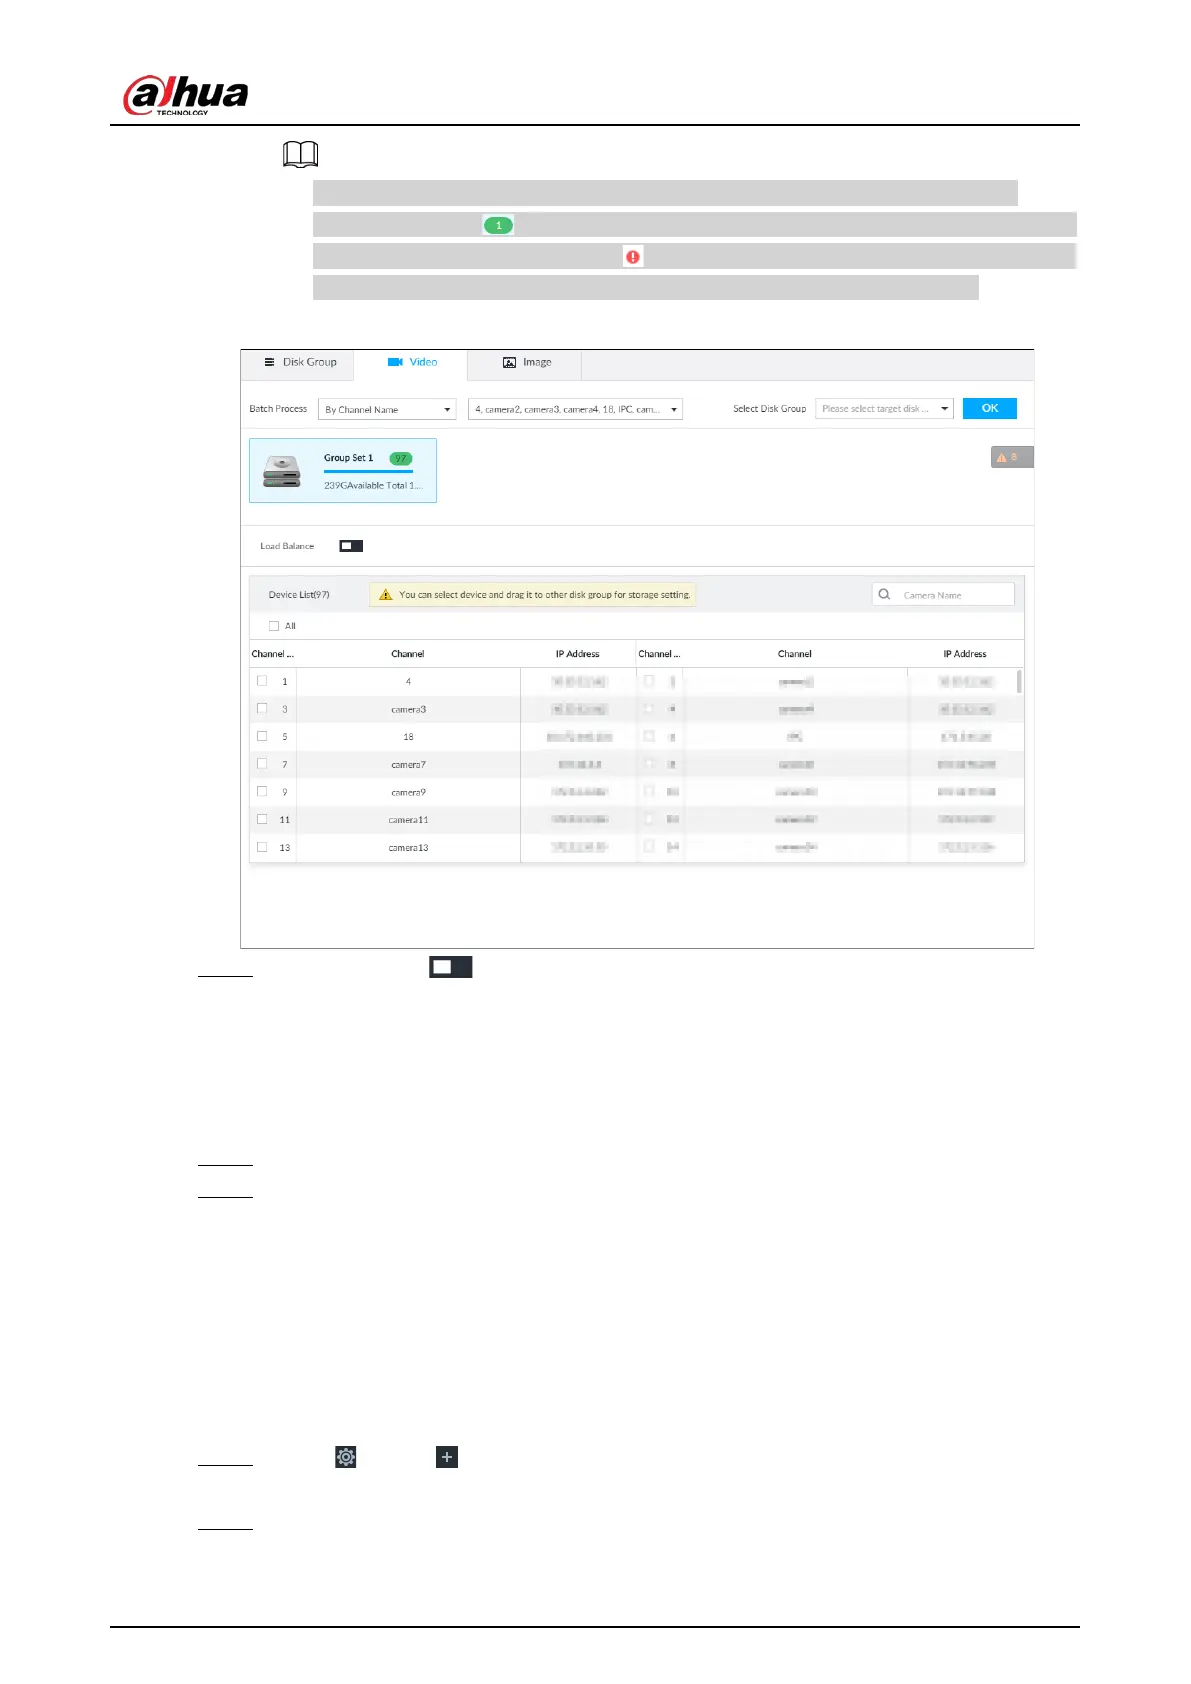
●
Only disk group with available HDD or RAID group or linked channel is displayed.
●
The value (such as ) next to the group name refers to the number of HDD and RAID
group in the disk group. If instead, is displayed, it means no available HDD or RAID
group in the disk group, but there is video or image stored in the disk group.
Figure 8-83 Device list
Step 3 (Optional) Click to enable load balance, and then the icon turns into blue. To disable
it, click it again, and then the icon turns into gray.
●
After load balance is enabled, if one disk group has no usable disk, the video of all
channels that belong to this disk group will be stored into all the usable disk groups.
●
When load balance is not enabled, if one disk group has no usable disk, the video of all
channels that belong to this disk group will be stored in another usable disk group.
Step 4 Select a channel from the device list, and drag the channel to the target disk group.
Step 5 Disk grouping takes effect immediately.
8.5.2.2 Recording Schedule
Configure recording modes and schedules for channels.
8.5.2.2.1 Recording Mode
Configure recording modes for channels.
Step 1 Click , or click on the configuration page, and then select
STORAGE > VIDEO
RECORDING > Schedule.
Step 2 Find the camera for which you want to configure a recording schedule, select the
recording methods for the stream types.
 Loading...