EasyManuals Logo

Epson AcuLaser CX11 User Manual

Epson AcuLaser CX11
494 pages
To Next Page IconTo Next Page
To Previous Page IconTo Previous Page
Page #347 background imageLoading...
Page #347 background image
Maintenance and Transportation 347
11
11
11
11
11
11
11
11
11
11
11
11
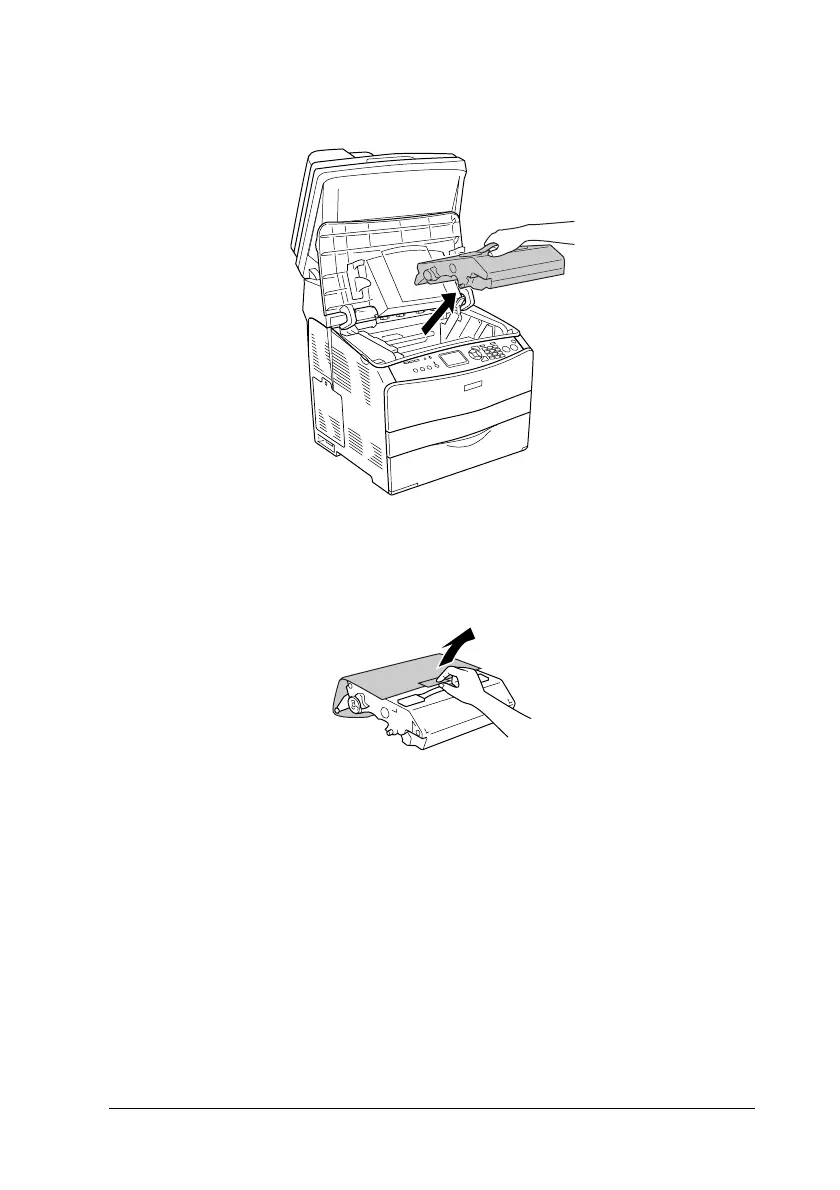
6. Remove the photoconductor unit.
7. Take the new photoconductor unit out of its package and
remove the protective sheet.
c
Caution:
Do not touch the belt on the top of the unit or the blue
photoconductor area. Otherwise, the print quality may
decrease.
When replacing the photoconductor unit, avoid exposing
it to light any longer than necessary.

Table of Contents

Other manuals for Epson AcuLaser CX11

Questions and Answers:

Question and Answer IconNeed help?

Do you have a question about the Epson AcuLaser CX11 and is the answer not in the manual?

Epson AcuLaser CX11 Specifications

General IconGeneral
BrandEpson
ModelAcuLaser CX11
CategoryAll in One Printer
LanguageEnglish

Related product manuals