110 Using the Printer Software with Windows
Setting up your printer as a shared printer
When the print server’s OS is Windows Me or 98, follow the steps
below to set the print server.
1. Click Start, point to Settings, then click Control Panel.
2. Double-click the Network icon.
3. Click File and Print Sharing on the Configuration menu.
4. Select the I want to be able to allow others to print to my
printer(s). check box, then click OK.
5. Click OK to apply the settings.
Note:
❏ When “Insert the Disk” appears, insert the Windows Me or 98
CD-ROM in the computer. Click OK, then follow the on-screen
instructions.
❏ When the prompt to restart the computer appears, restart the
computer, then continue with the settings.
6. Double-click the Printers icon on the control panel.
7. Right-click your product icon, then click Sharing in the menu
that appears.
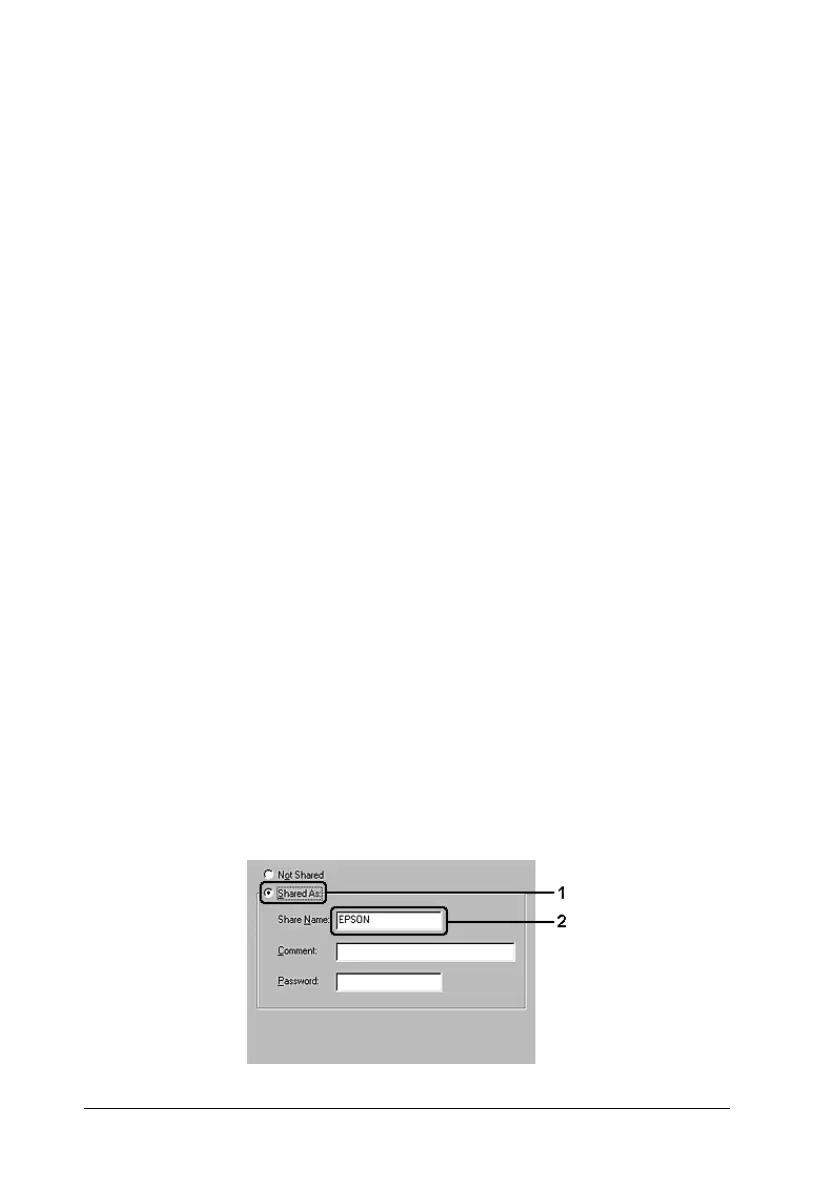
8. Select Shared As, type the name in the text box, then click OK.
Type a Comment and Password if needed.