117
Remote Viewing on Internet Explorer
• DDNS Address: The DDNS address must include http:// , the name of your DDNS URL,
followed by .myddns-flir.com, a colon, and then the HTTP port number of your DVR.
Example of a DDNS address
http://tomsmith.myddns-flir.com:80
DDNS Domain name created by you
Colon
HTTP Port number
http://
.myddns-flir.com
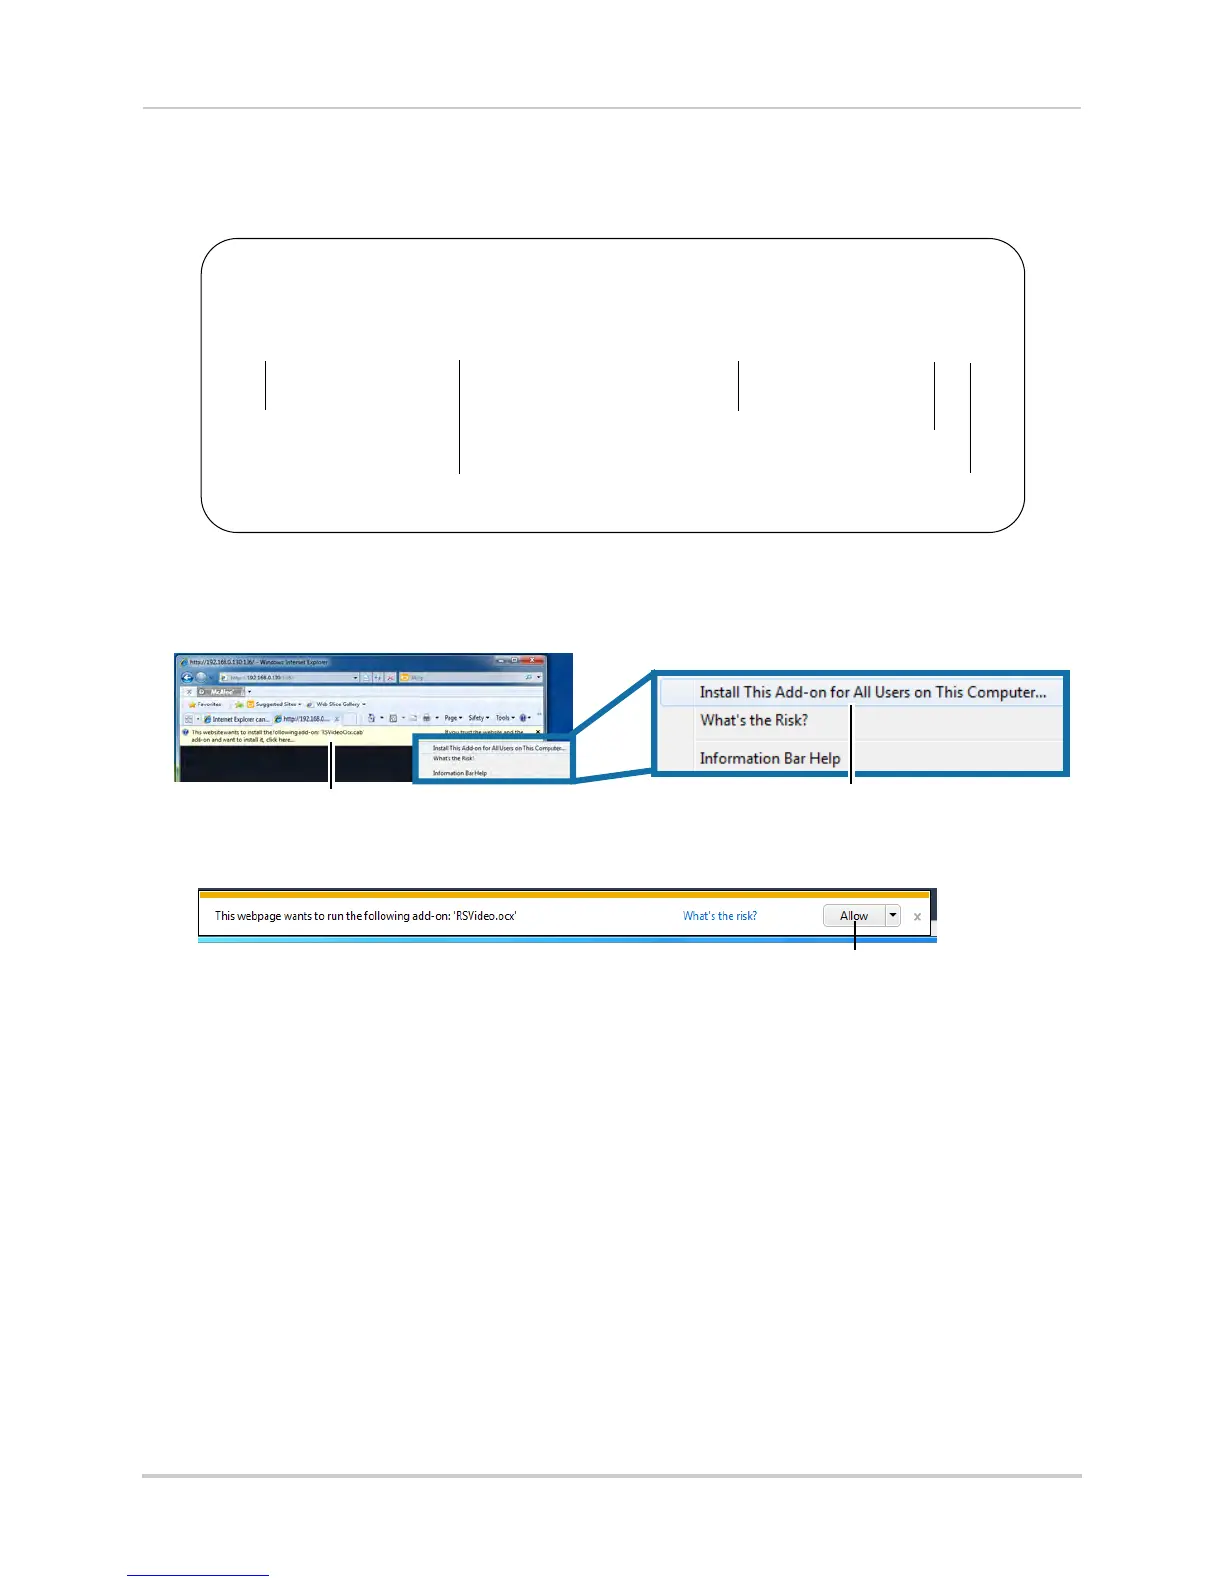
3 An attention bar prompts you to install ActiveX® plug-ins. You must install the ActiveX®
plug-in to connect to your DVR. Click inside the attention bar, and select Install this Add-on
for All Users on This Computer to install the plug-in.
Select Install this Add-on for All Users on This Computer
Click inside the attention bar
• If you are connecting using Internet Explorer 9 or 10, the attention bar appears on the bottom
of the screen. Click Allow to install the plug-in.
Attention Bar in Internet Explorer 9
Click Allow
4 Under User Name and Password, enter the DVR’s username and password. By default, the
username is admin and the password is 000000.
5 Click Login to l
og into the system. You will be prompted to change the password for your
system.
6 Enter a new 6 character password and click OK.
7 Enter the new password under Password and click Login
. Internet Explorer connects to your
DVR and streams live video from your cameras.
NOTE: Once logged in, the system interface is identical to the one used in the Client Software.
F
or details, see “Remote Viewing Interface” on page 60.

 Loading...