155
Appendix E: Replacing the Hard Drive
Appendix E: Replacing the Hard Drive
The system comes with a pre-installed SATA hard drive. You can expand the hard drive
capacity with a maximum of two 2TB 3.5" or 2.5" SATA hard drives (for a maximum storage
space of 4TB).
NOTE: The D3332 supports up to eight 2TB 3.5 SA
TA hard drives (for a maximum storage capacity
of 16TB). For D3332, you must use hard drives rated for 7200RPM or higher. Different
steps are required to install hard drives on the D3332. For details, see “Installing Hard
Drives (D3332)” on page 158.
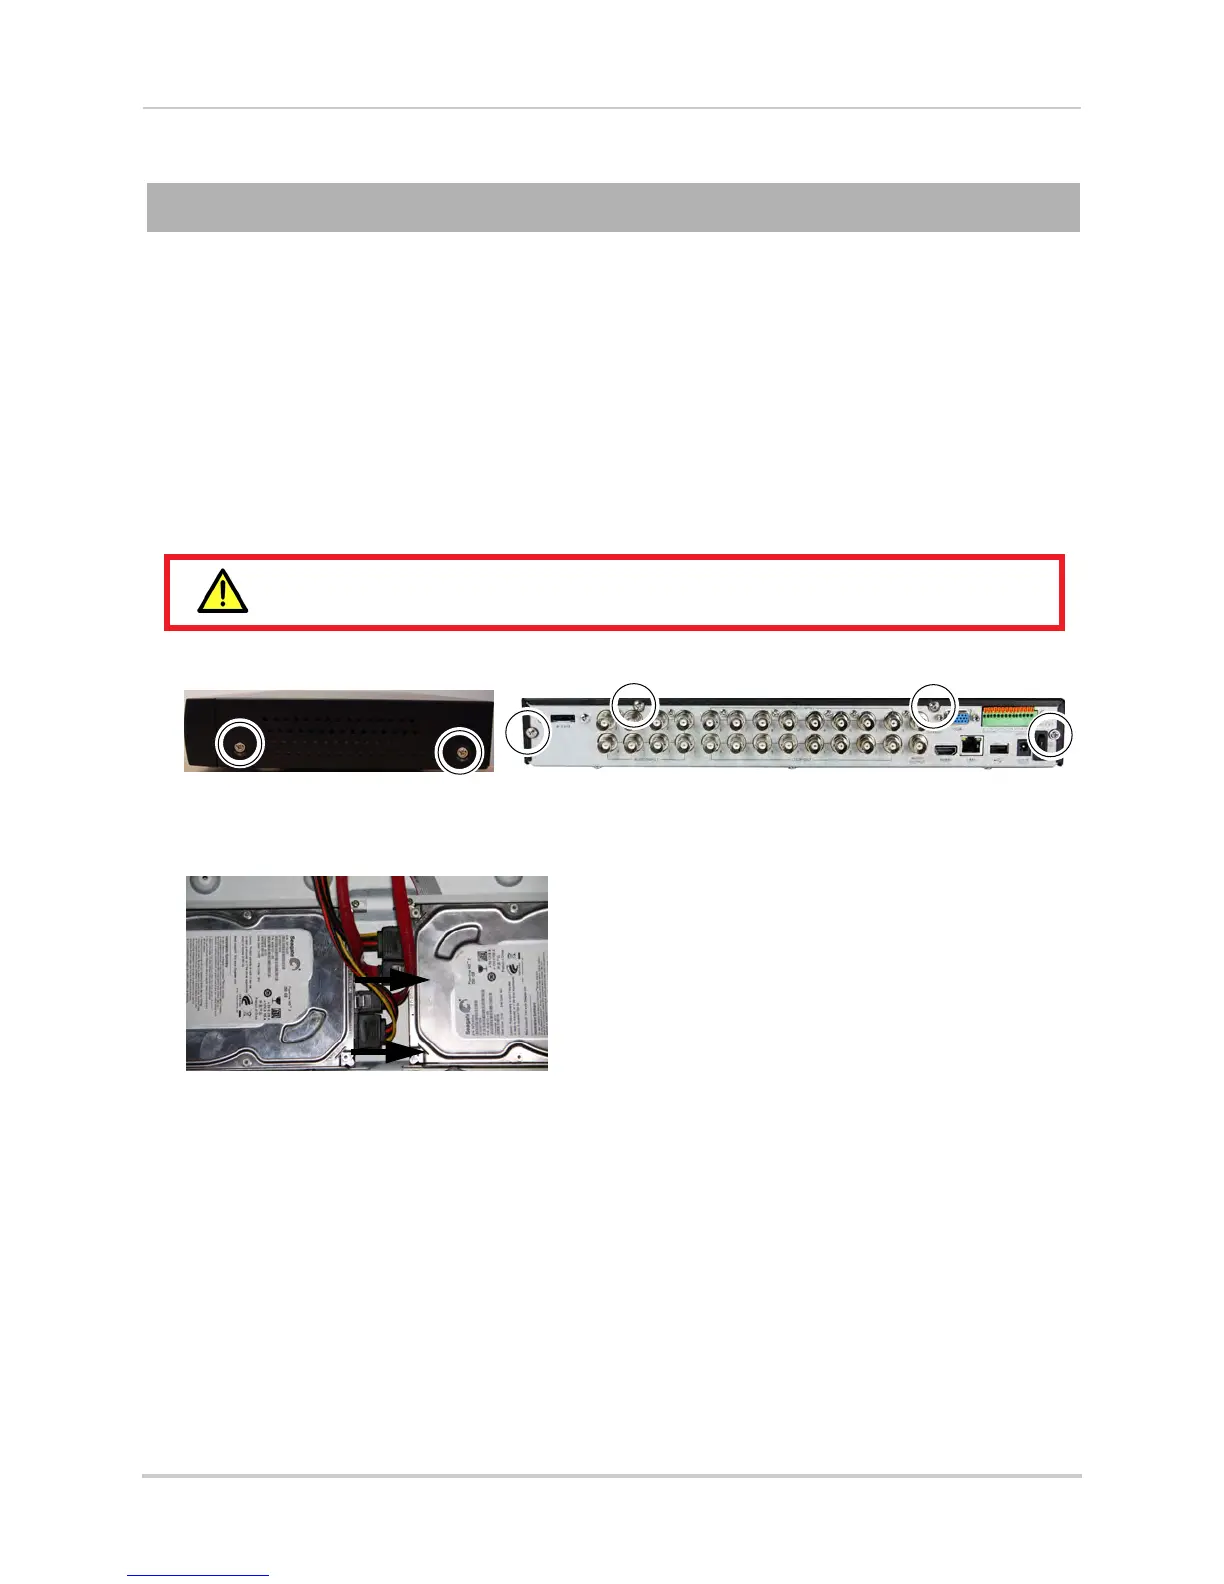
Removing the Hard Drive
Make sure that the power cable has been disconnected before changing the
hard drive.
1 Remove the screws from each side panel (x2) and rear panel (x4) of the cover.
2 Gently slide the cover away from the rear panel and lift off. Be careful of sharp edges.
3 Disconnect the power and data cables.
4 Next remove the hard drive from the housing:
• If your system has a 3.5" hard drive, remove the 4 screws holding the hard drive bracket and
remo
ve the bracket from the DVR. Remove the 4 screws securing the hard drive to the bracket

 Loading...