40
Using the Main Menu
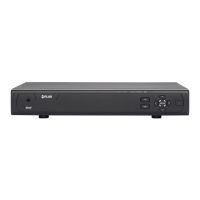
disabled for the selected hour when the
box is gray.
4 (Optional): Use the top Copy and Copy To
drop-down to copy the recording schedule
to a specific day or all days. Click Copy to
copy the schedule.
5 (Optional): Use the bott
om
Copy and Copy
To drop-down to copy the recording
schedule to a specific channel or all
channels. Click Copy to copy the schedule.
6 Click Appl
y
to save your settings.
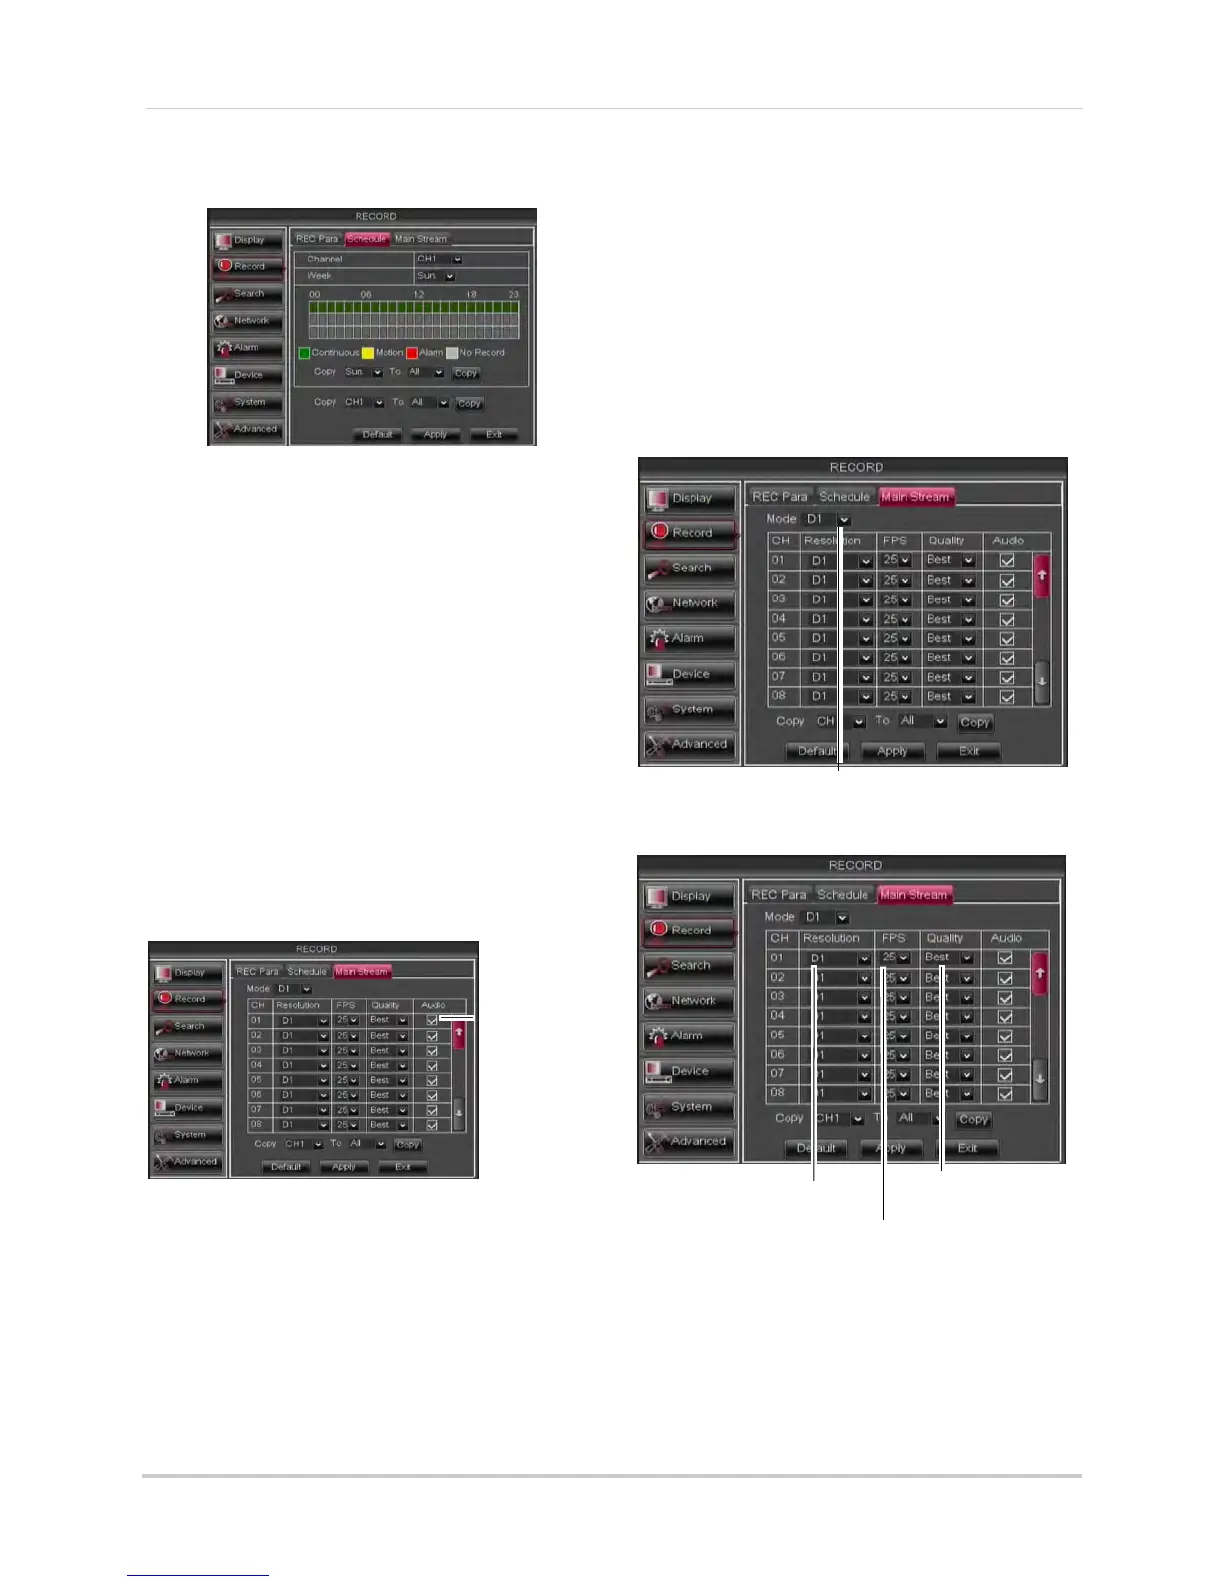
Enabling Audio Recording
Audio-capable cameras are required
(not included) for audio recording.
To enable audio recording:
1 Click the MainStream
tab.
Audio
checkbox
2 Beside the corresponding channel, select
or deselect the checkbox under Audio to
enable or disable audio recording.
3 Click Apply
to save your settings.
Configuring Recording Quality,
Resolution, and Video Frame Rate
You can configure the recording quality,
recording resolution and video frame
rate for each channel.
To change the recording quality,
recording resolution, and video frame
rate:
1 Click the MainStream
tab.
2 Under Mode, select D1 or 960H. 960H will
enable larger, wide-screen formats.
NOTE: If you change this setting, the DVR
will r
estart when you save changes.
Under Mode, select D1 or 960H
Frames per Second
Recording
Resolution
Recording quality
3 Under the Quality drop-down menu, select
from Good, Better, or Best to adjust the
quality of recordings on each channel.

 Loading...