19
Setting the Date and Time
It is highly recommended to set the date and time when first
setting up your system.
Inaccurate time stamps may render your footage unusable for
court evidence.
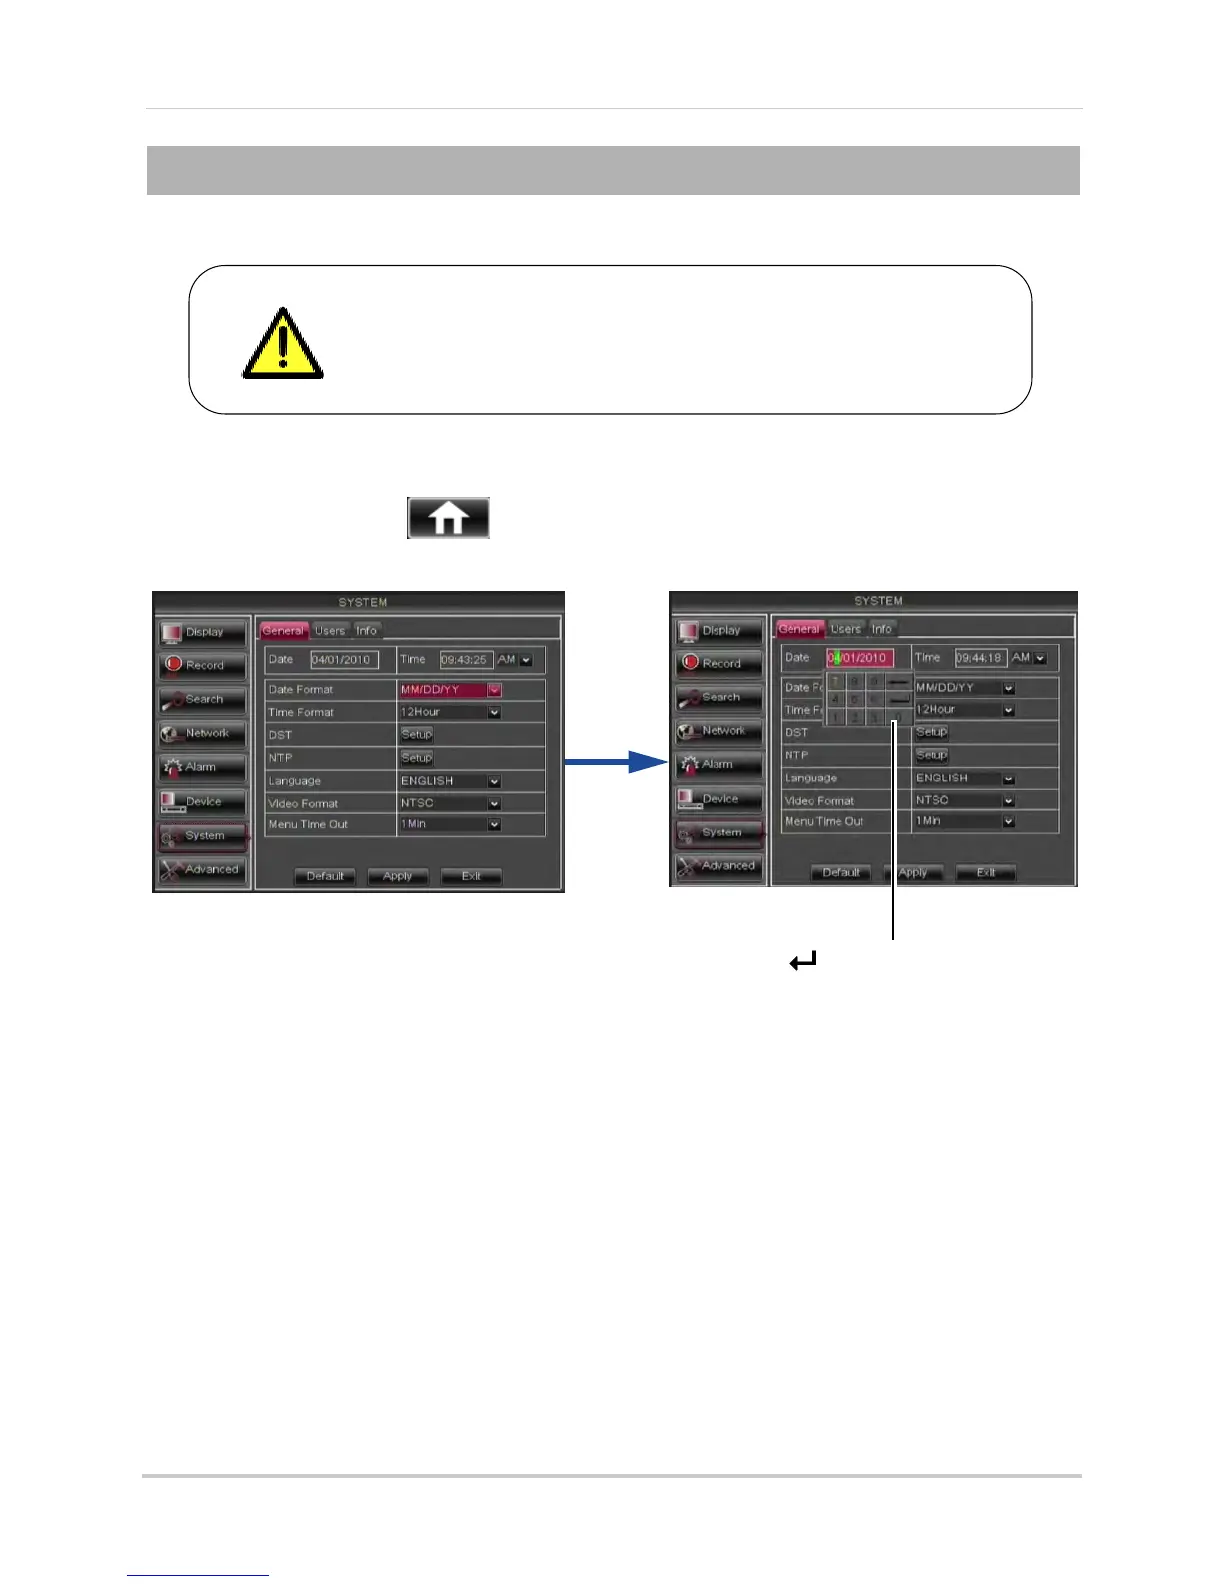
To set the date and time:
1 Right-click or mov
e your mouse to the bottom of the screen to open the Menu Bar and click
the Main Menu button (
).
2 Click System.
Press on the Mini-Keyboard after
you have entered the Date or Time
3 Configure the following:
• Date: Click inside the field and enter the month, dat
e, and year.
• Time: Click inside the field and enter the time.
•
(Optional) Date Format: Use the drop-do
wn menu to select MM/DD/YY or, DD/MM/YY, or
YY-MM-DD.
• (Optional) Time Format: Use the drop-do
wn menu to select 12HOURS or 24HOURS.
• (Optional) DST: Click the Setup button ne
xt to DST to configure automatic Daylight Savings
Time adjustments.
• (Optional) NTP: Click the Setup button ne
xt to NTP to synchronize your DVR’s time and date
with a Network Time Protocol (NTP) time server.
NOTE: A constant internet connection is required for the NTP server feature to function.
4 Click
Apply
to save your settings.

 Loading...