45
Using the Main Menu
2 Configure the following beside the desired
channel:
• Video: Sel
ect Enabl
ed or Disabled. If you
select Disabled, you will not be able to view
the channel when connecting remotely to
the system.
• FPS: Sel
ect the desired frames per
sec
ond.
• Bitrate: Select the desired video bitrate.
• Audio: Select or desel
ect the checkbox to
enable or disable the system from
streaming audio when viewing the system
remotely.
3 Click Appl
y
to save your settings.
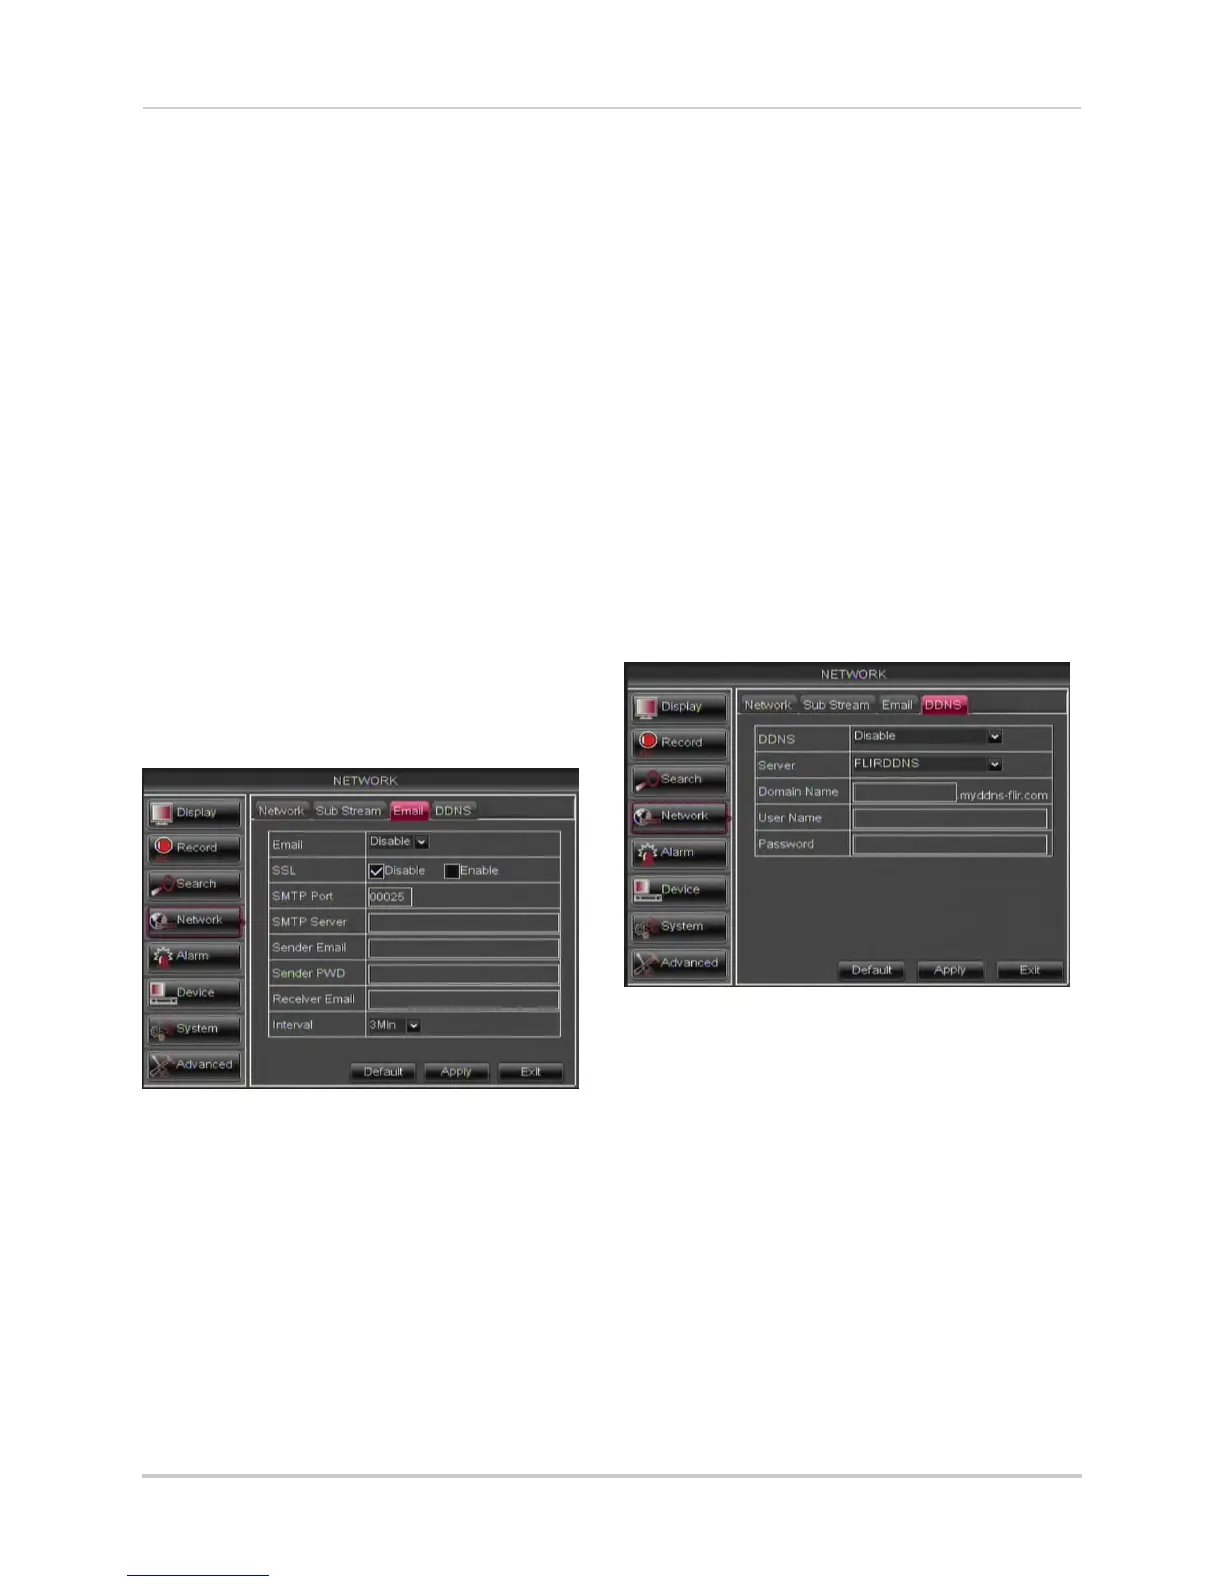
Setting up Email Notification
The system can send email notifications
when it detects motion or when an
alarm parameter triggers.
To set up email notification:
1 Click the Email t
ab in the Netw
ork menu.
2 From the Email drop-down menu, select
Enable.
3 Configure the f
ollowing:
• SSL: Sel
ect Enable or Disable to configure
Secure Socket Layer protocol.
• SMTP Port: Enter your SMTP address.
•
SMTP Server
: Enter your SMTP Server.
• Sender Email: Enter the sender email
addr
ess. This can be any address of your
choice.
• Sender Password: Enter your email
serv
er’s password.
• Receiver Email: Enter the recipient’s
email addr
ess.
• Interval: Ent
er the interval the DVR waits
before sending a new email notification.
4 Click Apply t
o save your settings.
Configuring DDNS settings
You must create a DDNS account and
enter your DDNS settings into the DVR
before you can remotely connect to your
system. For details on creating a DDNS
account, see “Setting up your DVR for
Remote Connectivity” on page 53.
To configure DDNS settings:
1 Click the DDNS t
ab.
2 Configure the following:
• DDNS: Select
Enable.
• Server: Select FLIRDDNS (def
ault).
• Domain Name: Enter the Domain name/
URL Reques
t you received in the email
after registering for DDNS.
• User Name: Ent
er y
our DDNS User Name.
• Password: Ent
er your DDNS Device
password.
3 Click Apply
to save your settings.
NOTE: Please allow 10~15 minutes for the
DDNS serv
ers to update with your
new DDNS address before
attempting to connect.

 Loading...