47
Using the Main Menu
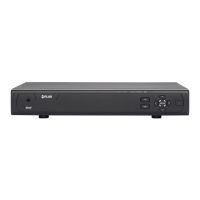
To configure the Alarm tab:
1 From the Alarm menu, click the Alarm
tab.
2 Configure the following:
• Alarm In: Select the channel y
ou wish to
configure.
• Alarm Type: Select the alarm type of the
de
vice. Choose from N/O (normally open),
N/C (normally closed).
• Alarm Out: Sel
ect the checkbo
x to enable
the system’s alarm block to trigger a
connected external alarm.
• Latch Time: Ent
er the dur
ation the alarm
continues to trigger after the event ends.
• Show Message: Sel
ect the checkbox if you
want the system to display a system
message when an alarm triggers.
• Buzzer: Sel
ect the checkbo
x to enable the
system to "beep" if an alarm triggers.
• Send Email: Select the checkbo
x if you
want the system to send email
notifications if an alarm triggers.
• P
ost Recording: Select the duration the
sys
tem continues to record as an event
after the alarm trigger ends. For example,
if you select 30s (30 seconds), the system
continues to record for 30 seconds after
the alarm trigger ends.
• F
ull Screen: Sel
ect the Full Screen check
box so that the system goes into full screen
mode when motion or an alarm trigger is
detected.
3 Click Appl
y
to save your settings.
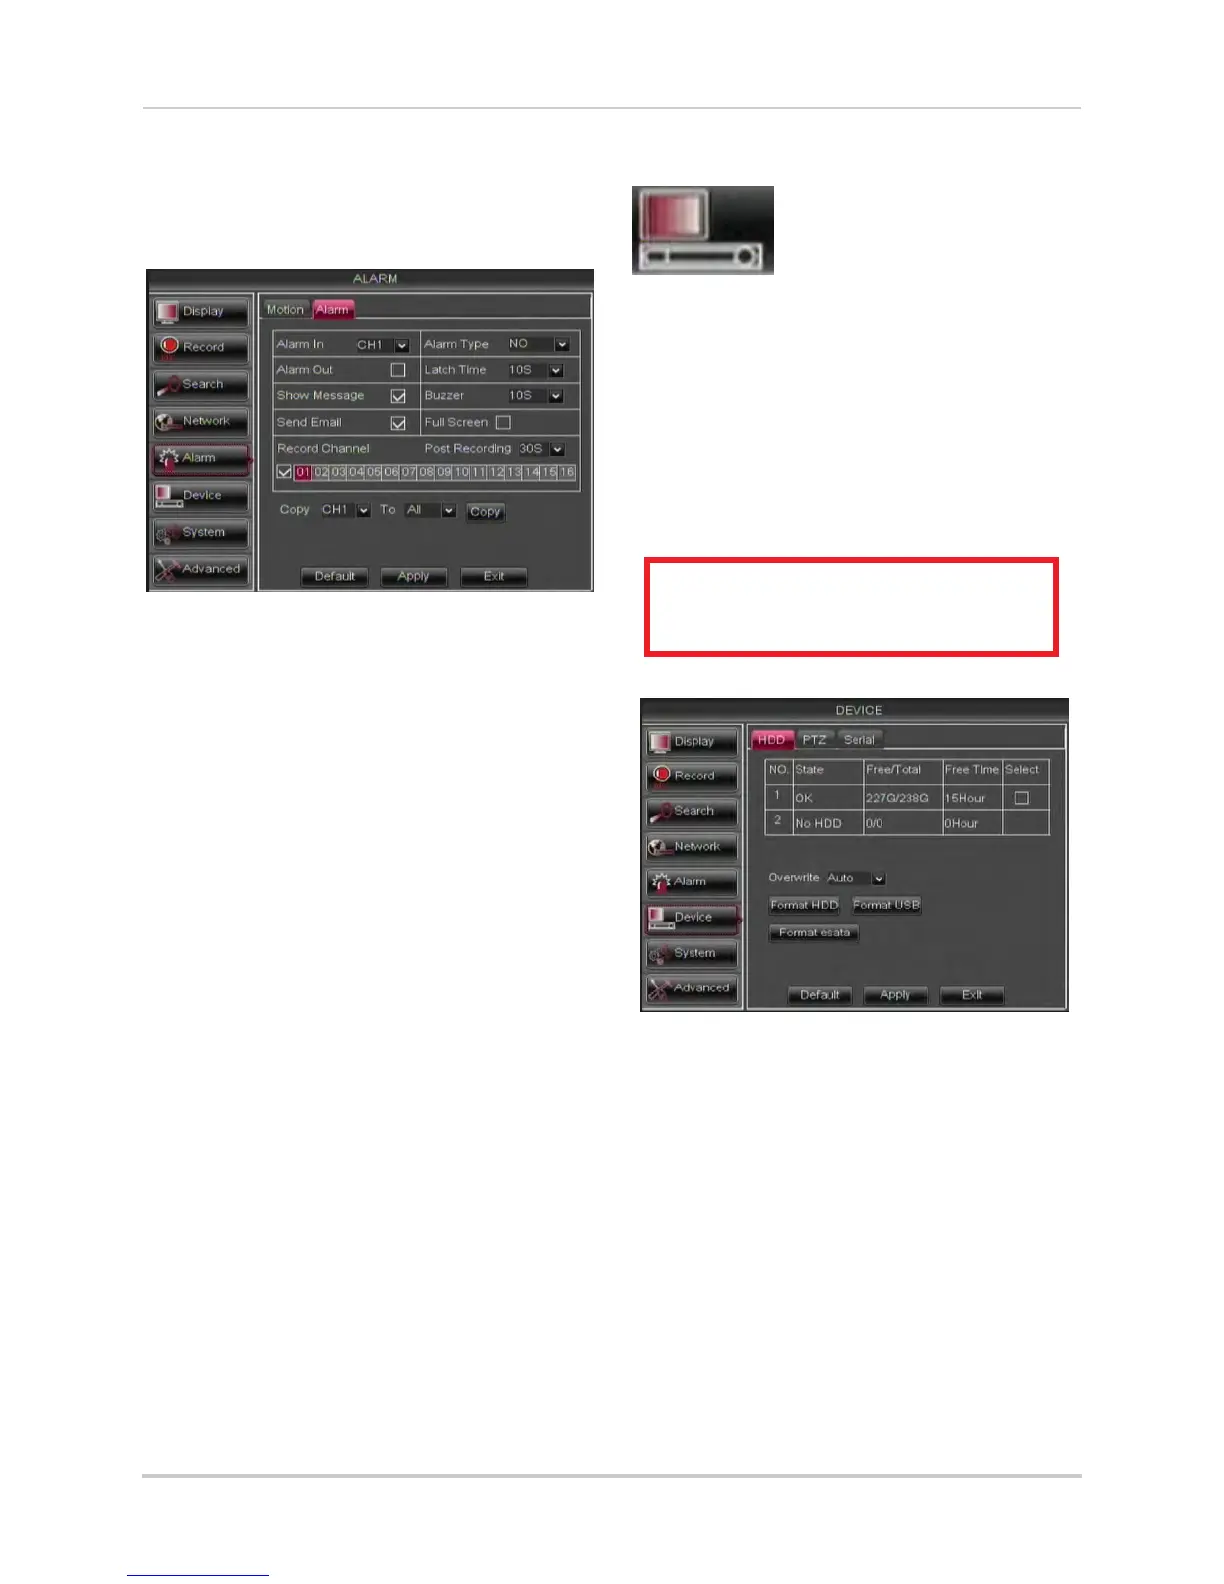
Device
The Device menu allows
you to configure hard drive
and PTZ settings and
format hard drives or a
USB flash drive (not
included).
• For details on connecting PTZ cameras
(not included), see “Appendix B:
Connecting a PTZ Camera” on page 147.
Configuring Hard Drive settings
To format the hard drive:
ATTENTION: Formatting the HDD
erases all data on the hard disk.
This step cannot be undone.
1 Select the HDD tab.
2 Click the checkbox under Select to choose
the drive you wish to reformat.
3 Click Format HDD.
4 When the warning window appear
s, click
OK. Wait for the system to format the hard
drive.
To set the hard drive recording mode
(loop recording or linear recording):
1 Sel
ect the HDD t
ab.
2 Select the checkbox beside the hard drive
you wish to configure.

 Loading...