STEP 7 INSTALL THE LOWER INFEED
CONVEYORS
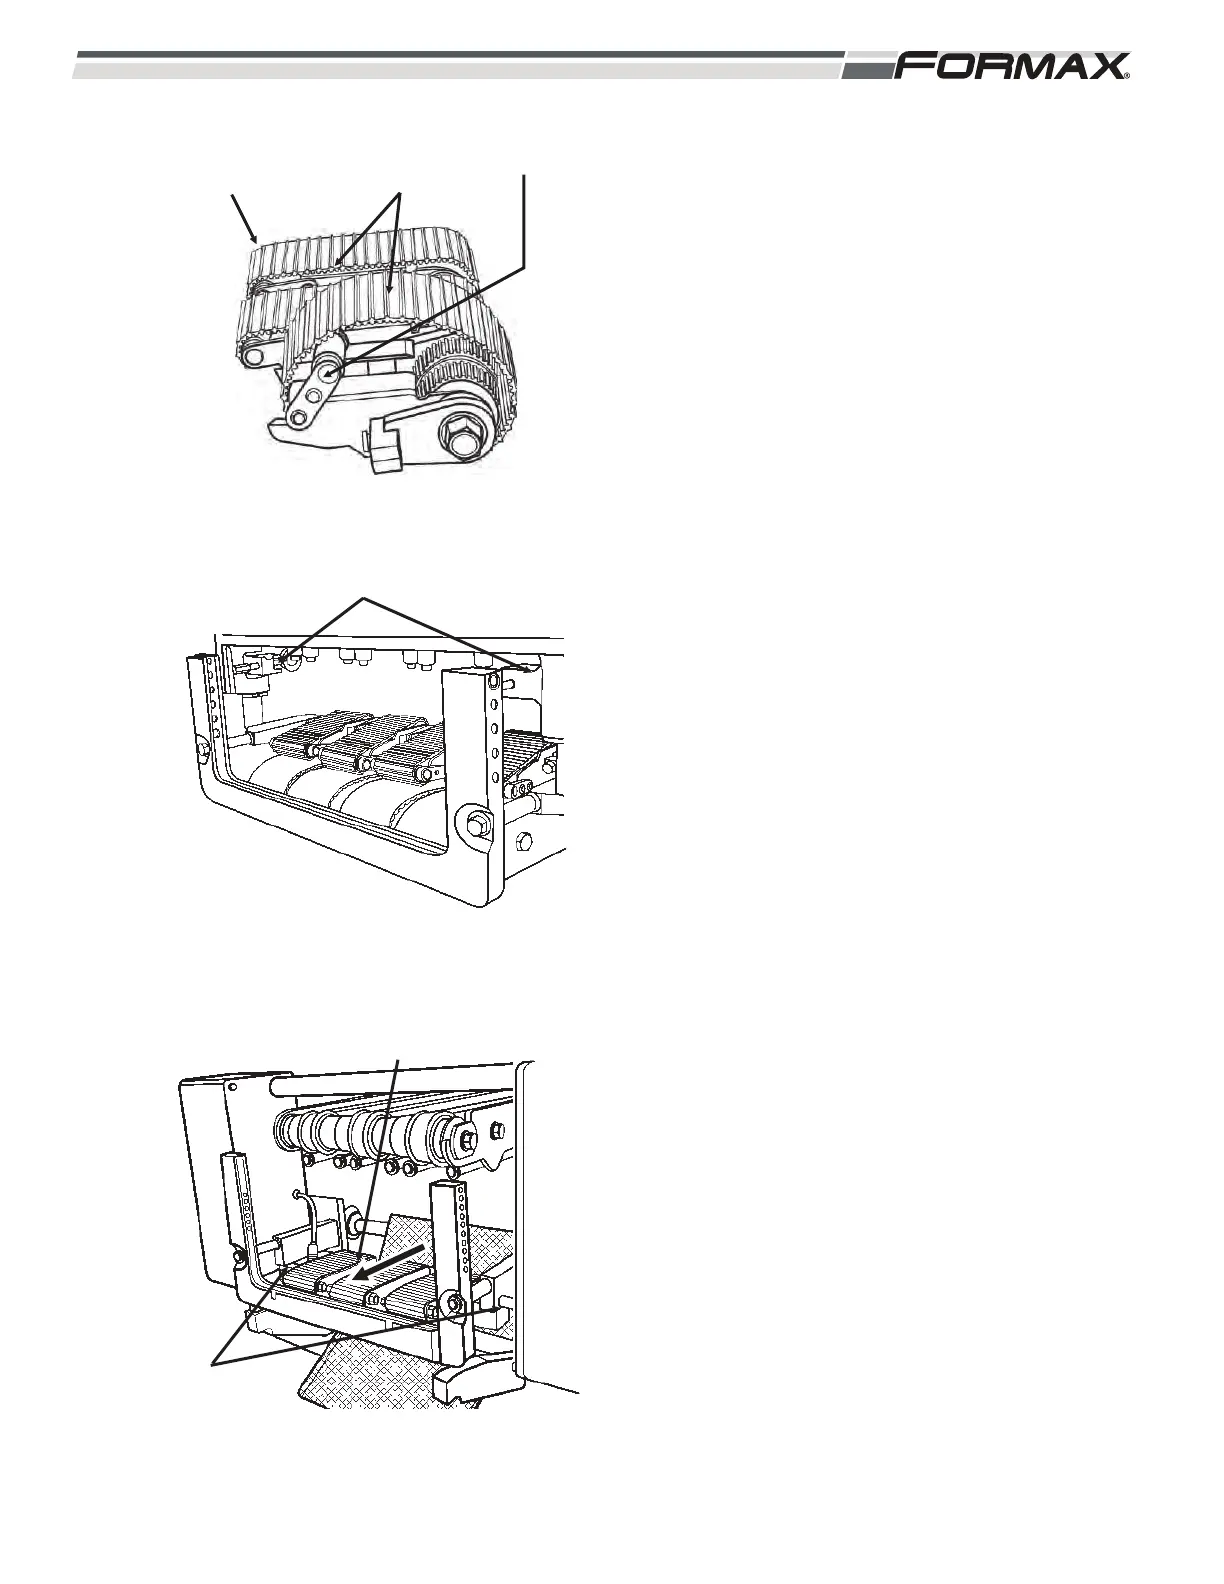
1. Install the Conveyor belts on the Lower
Infeed Assembly. (Illustration 35)
2. Pivot the Idlers “up” to tension the belts.
3. Install the Drive Couplers for the #1 and
#4 Infeed Conveyors. (Illustration 36)
4. Use 2 people and slide the Conveyor
assembly into the mounting brackets from
the rear. (Illustration 37)
5. Slide the #1 and #3 drive couplers out to
engage the drive shafts for the #1 and #3
Infeed Conveyors.
IMPORTANT!
It may be necessary to pivot the Idler Shafts
“down” and remove tension on the conveyor
belts, to turn the conveyor drive roller and
engage the drive coupling. Make sure to
re-tension the conveyor belts after the 2 drive
couplers and 2 drive shafts are in place.
6. Tighten the drive coupler retaining screws
to hold them in place. (Illustration 36)
031914 5-11
ILLUSTRATION 36
RETAINING
SCREWS
SLIDE ASSEMBLY
TO FORWARD
ILLUSTRATION 35
DRIVE COUPLERS
ILLUSTRATION 34
LOWER INFEED
ASSEMBLY
CONVEYOR
BELTS
IDLER