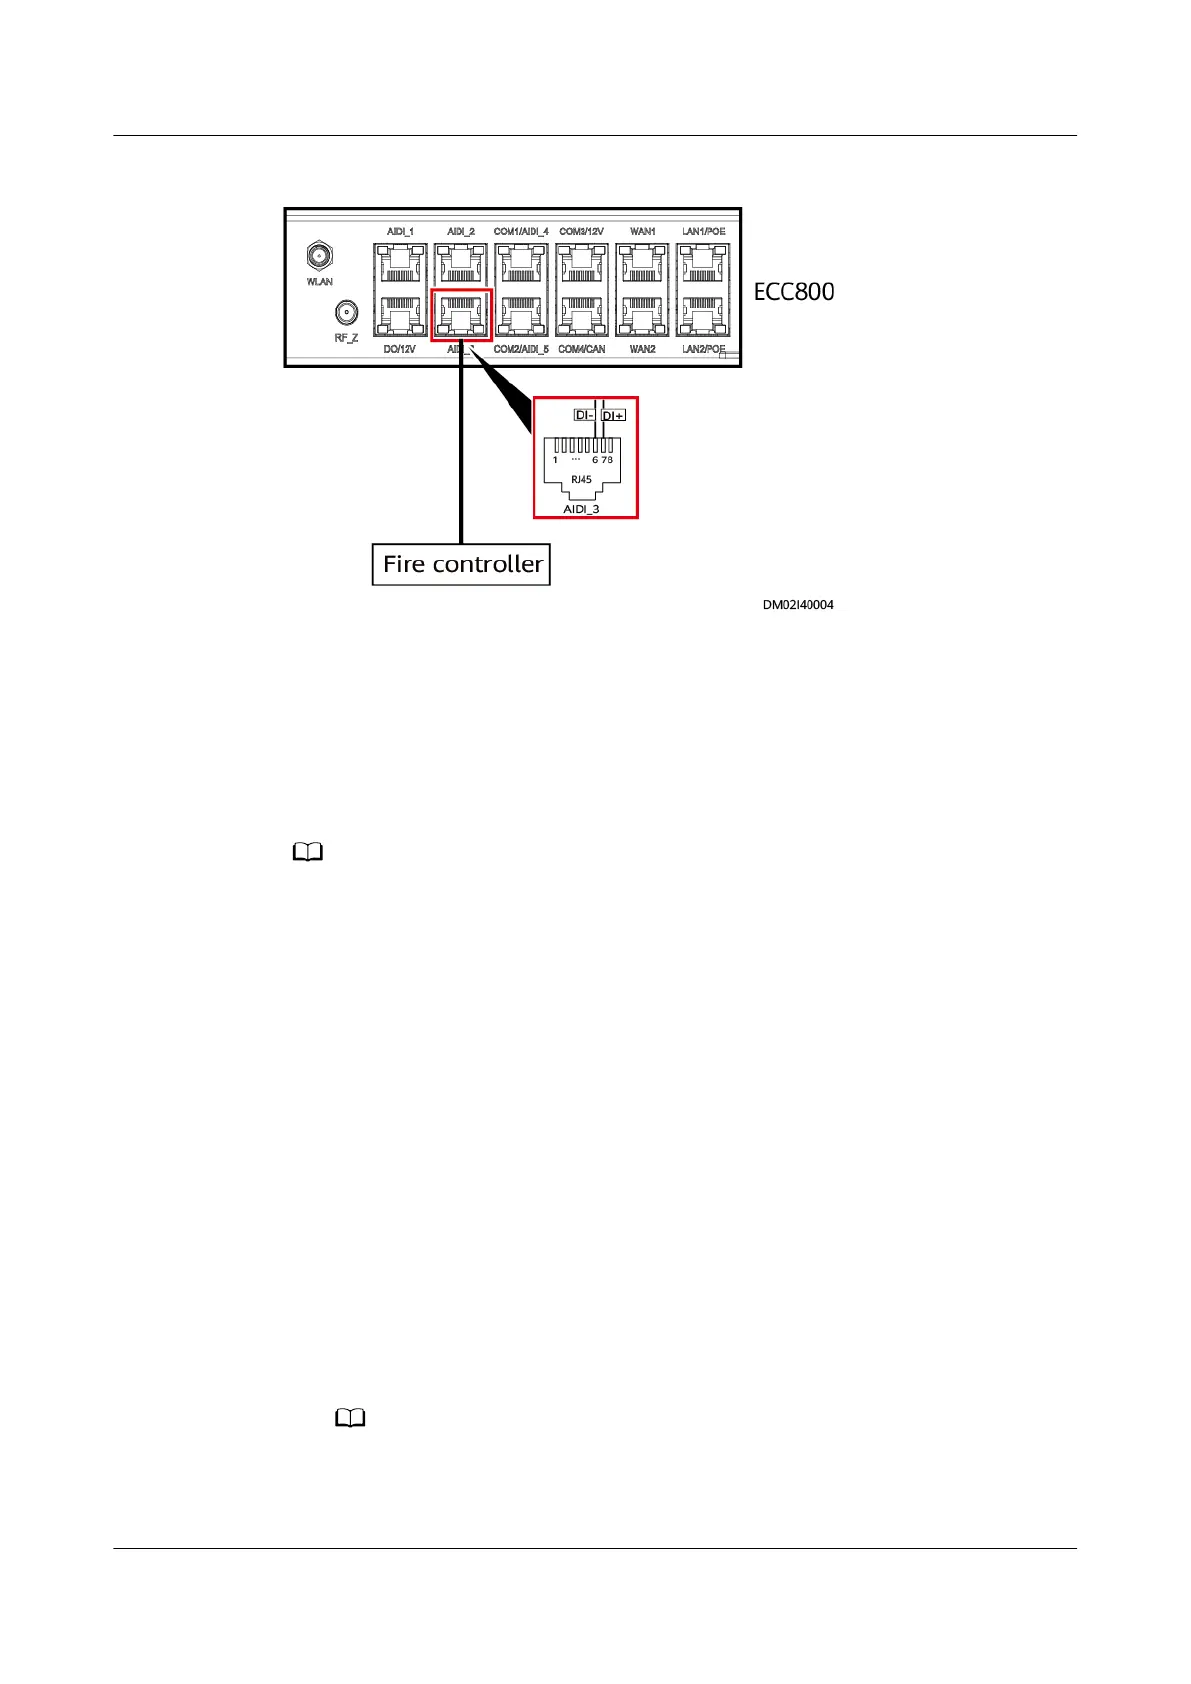
Figure 6-57 Installing cables between the re controller and ECC800-Pro
Step 2 Log in to the ECC800-Pro WebUI as an administrator.
Step 3 Choose System Settings > Linkage Control.
Step 4 Ensure that Enable linkage control function is Yes.
Step 5 On the Linkage Group tab page, set Link
re control with air conditioner o to
on.
Select Link re control with air conditioner o under Linkage Group. If its value is on, the
corresponding logic congurations under Linkage Logic List are available. If its value is o, the
corresponding logic congurations under Linkage Logic List are unavailable.
Step 6 Modify the AI/DI_3 signal name.
1. Log in to the ECC800-Pro WebUI as an administrator.
2. Choose System Settings > Signal Name Modify. The Batch Signal
Conguration page is displayed.
3. Set Device type to ECC800, set Device name to ECC800, and click OK.
4. On the query result tab page, set the new signal name of AI/DI_3 to Fire and
click Submit.
Step 7 Enable the AI/DI device.
1. Choose Monitoring > System > ECC800 > Running Parameters > AI/DI_3
Port Settings.
2. Set Fire sensor to Enable. Click Submit to access the AI/DI_3 setting page.
3. Select Fire sensor type and set it to Normal Open or Normal Close as
required.
After the corresponding AI/DI device is enabled, the AI/DI device type must be
consistent with the DO state.
ECC800 Data Center Controller
User Manual (for ECC800-Pro) 6 Feature Description
Issue 02 (2020-09-07) Copyright © Huawei Technologies Co., Ltd. 190