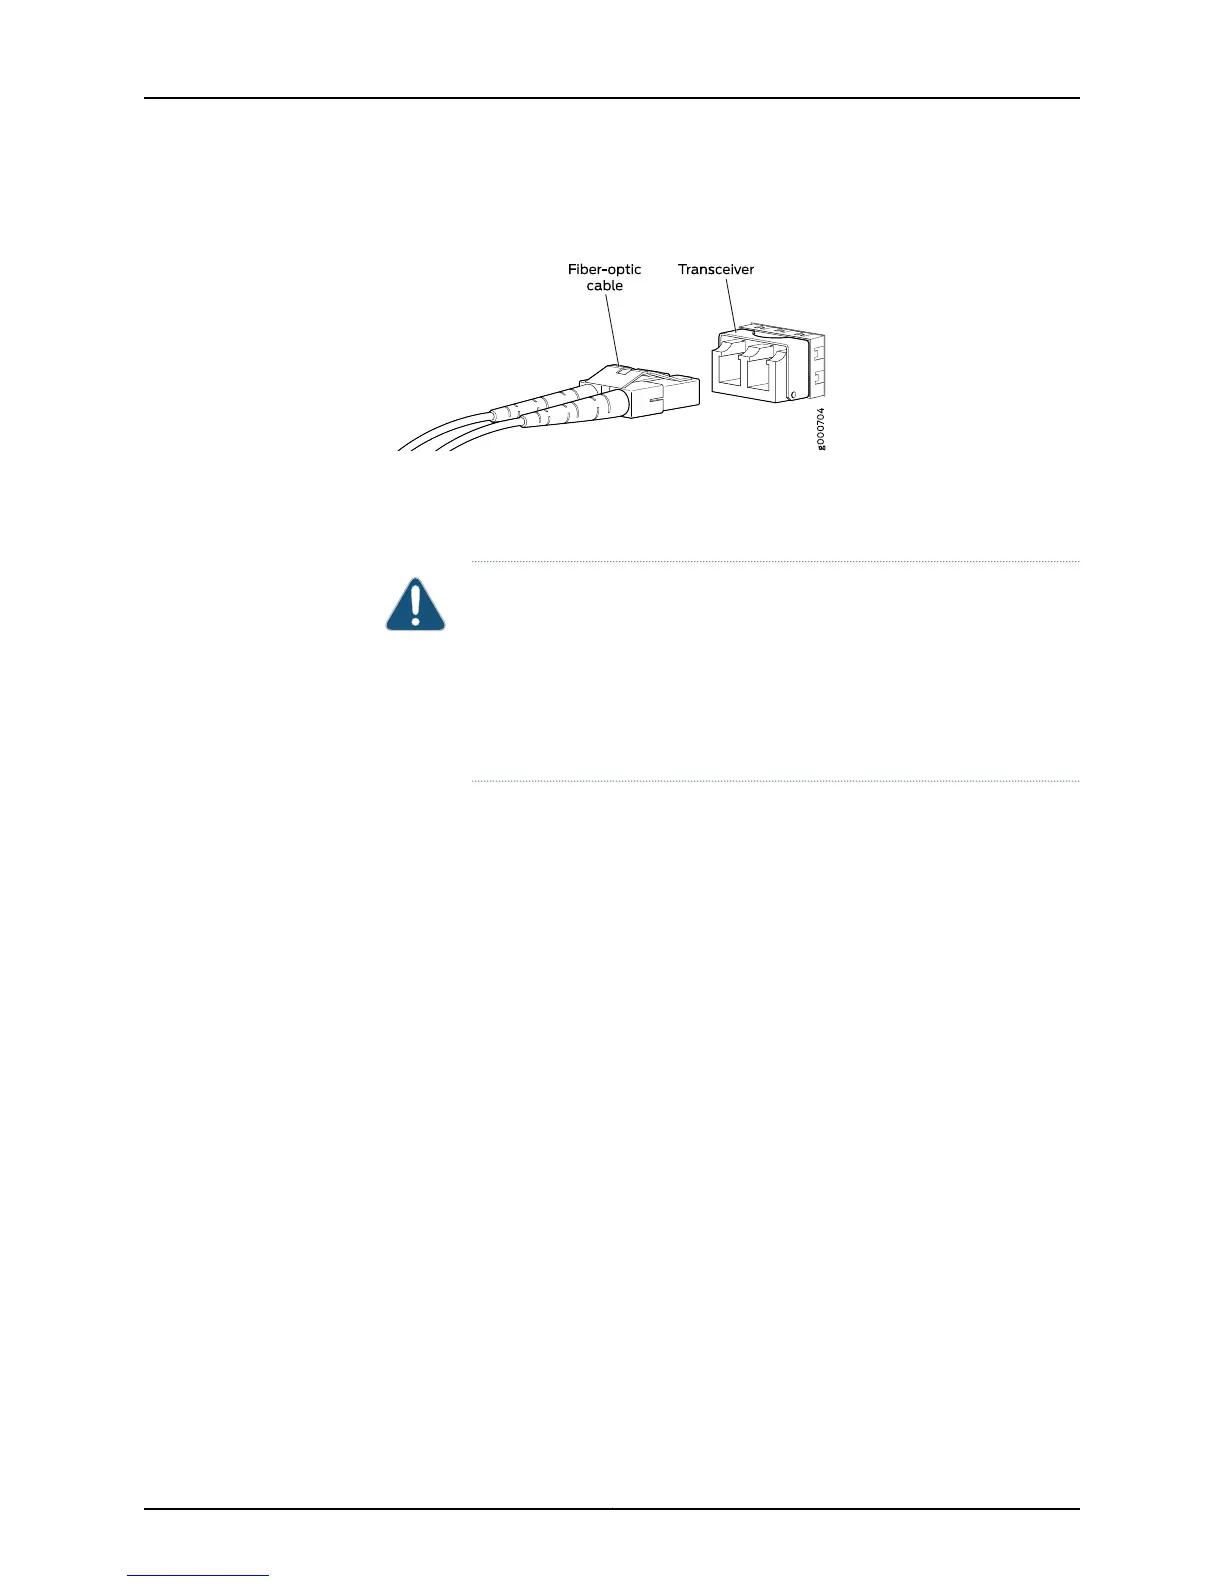
Figure 52: Connecting a Fiber-Optic Cable to an Optical Transceiver
Installed in a Switch
4. Secure the cables so that they are not supporting their own weight. Place excesscable
out of the way in a neatly coiled loop. Placing fasteners on a loop helps cables maintain
their shape.
CAUTION: Do not bend fiber-optic cables beyond their minimum bend
radius.An arcsmallerthan a few inches in diameter candamage the cables
and cause problems that are difficult to diagnose.
Do not let fiber-optic cables hang free from the connector. Do not allow
fastened loops of cables to dangle, which stresses the cables at the
fastening point.
Related
Documentation
• Disconnecting a Fiber-Optic Cable from a Switch on page 222
• Installing a Transceiver in an EX Series Switch on page 215
• Maintaining Fiber-Optic Cables in Switches on page 223
• Pluggable Transceivers Supported on EX Series Switches
• Installing a Transceiver in an OCX1100 Switch
• Pluggable Transceivers Supported on OCX1100 Switches
175Copyright © 2015, Juniper Networks, Inc.
Chapter 14: Connecting the Switch to the Network




 To Next Page