Figure 62: Installing a 10GBASE-T Expansion Module in an EX4550-32T
Switch
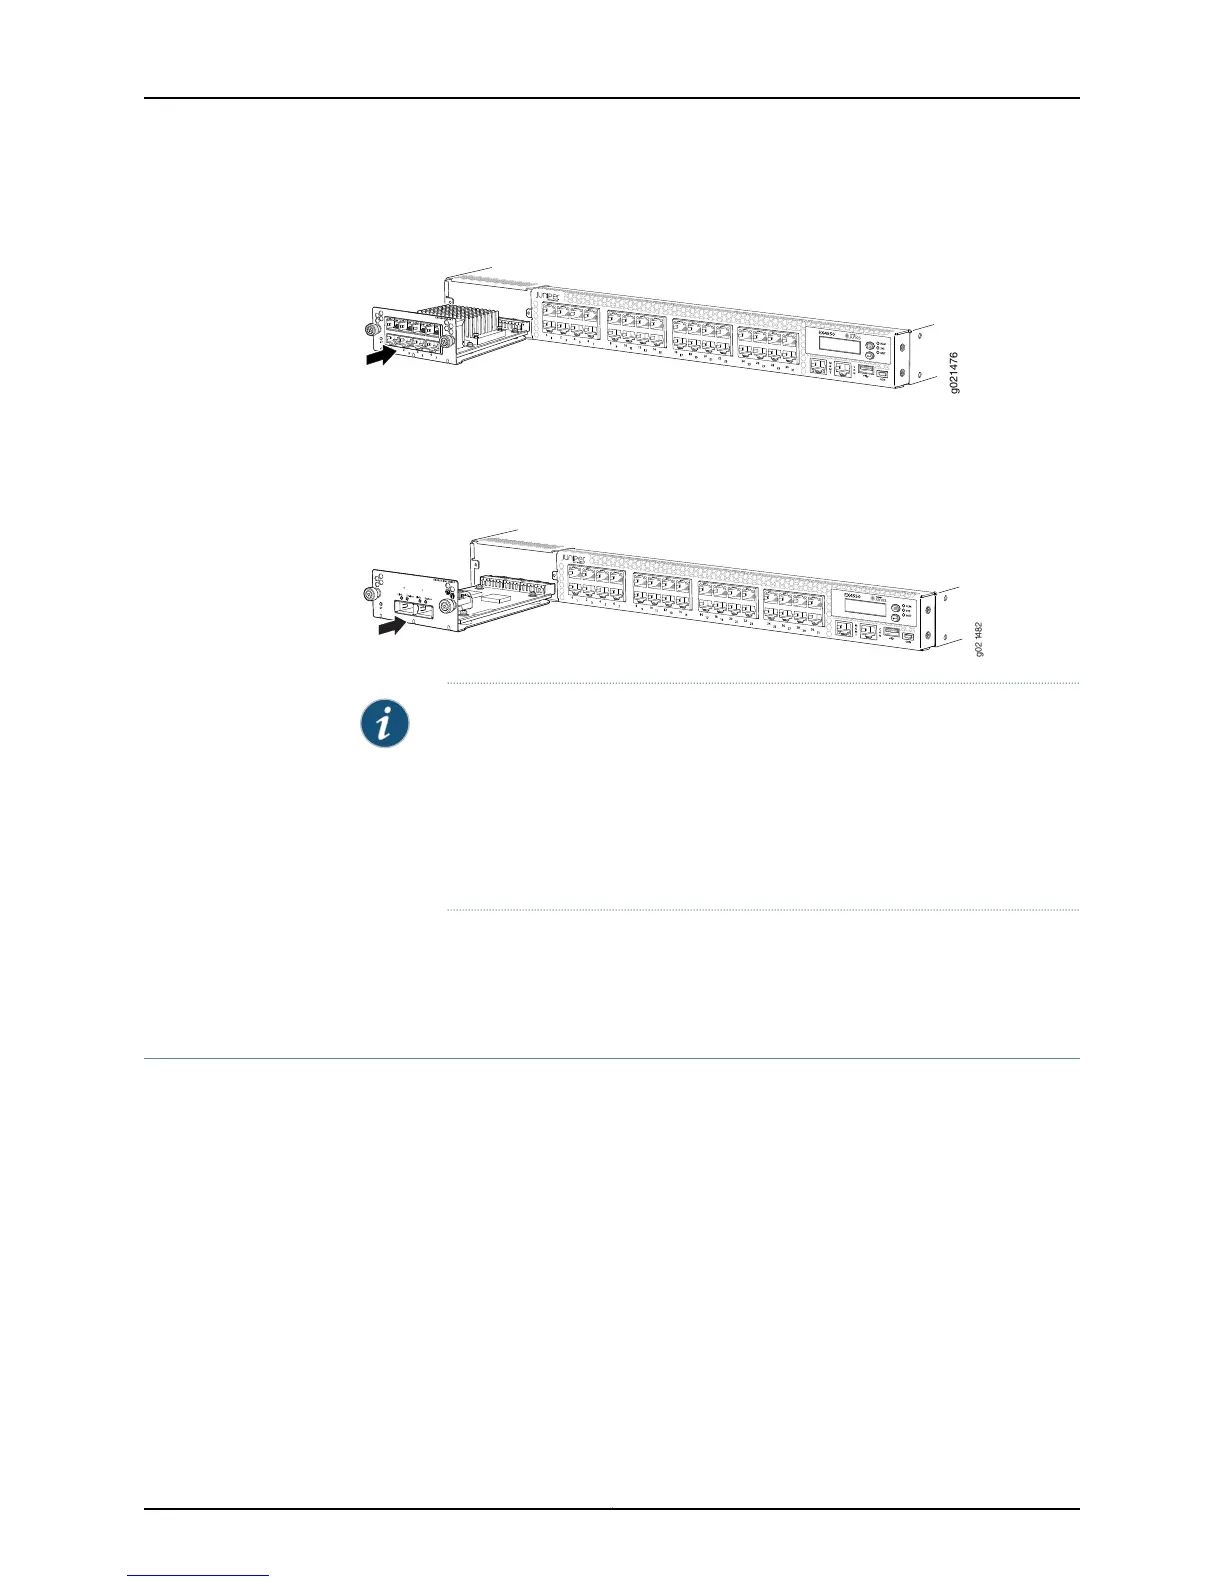
Figure 63 on page 211 shows how to install a QSFP+ expansion module on the front panel
of an EX4550-32T switch.
Figure 63: Installing a QSFP+ Expansion Module in an EX4550-32T Switch
NOTE: If you have a Juniper J-Care service contract, register any addition,
change, or upgrade of hardware components at
https://www.juniper.net/customers/csc/management/updateinstallbase.jsp .
Failure to do so can result in significant delays if you need replacement parts.
This note applies if you change the type of power supply or add a new type
of expansion module. It does not apply if you replace these components with
the same type of component.
Related
Documentation
Removing an Expansion Module from an EX4550 Switch on page 211•
• Installing and Removing EX4550 Switch Hardware Components on page 155
Removing an Expansion Module from an EX4550 Switch
The expansion modules in EX4550 switches are hot-removable and hot-insertable
field-replaceable units (FRUs): You can remove and replace them without powering off
the switch or disrupting switch functions.
Before you begin removing an expansion module from the switch:
•
Ensure that you have taken the necessary precautions to prevent electrostatic discharge
(ESD) damage (see “Prevention of Electrostatic Discharge Damage” on page 287).
•
If there are any transceivers installed in the expansion module, remove them before
you remove the expansion module. For instructions on removing transceivers, see
“Removing a Transceiver from a Switch” on page 217.
Ensure that you have the following parts and tools available:
211Copyright © 2015, Juniper Networks, Inc.
Chapter 18: Replacing Expansion Module