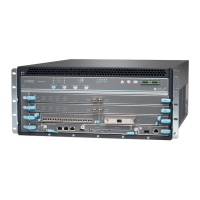
Table 52: List of Interface Cards for Upgrade
Replacement Cards for UpgradeCards to Replace
SRX5K-MPC and MICsSRX5K-40GE-SFP
SRX5K-MPC and MICsSRX5K-4XGE-XFP
SRX5K-MPC and MICsSRX5K-FPC-IOC
SRX5K-RE-1800X4SRX5K-RE-13-20
SRX5K-SCBESRX5K-SCB
SRX5K-SCB3SRX5K-SCBE
•
Verify that both services gateways in the cluster are running the same Junos OS versions; release
12.1X47-D15 or later for SRX5K-SCBE with SRX5K-RE-1800X4 and 15.1X49-D10 or later for
SRX5K-SCB3 with SRX5K-RE-1800X4. For more information on cards supported on the services gateways
see Cards Supported on SRX5400, SRX5600, and SRX5800 Services Gateways.
For more information about unified in-service software upgrade (unified ISSU), see Upgrading Both
Devices in a Chassis Cluster Using an ISSU.
To perform an ISHU:
1. Export the configuration information from the secondary node to a USB or an external storage device.
For more information about mounting the USB on the device, refer to KB articles KB12880 and KB12022
from the Knowledge Base.
2. Power off the secondary node.
See, “Powering Off the SRX5400 Services Gateway” on page 207, Powering Off the SRX5600 Services
Gateway, or Powering Off the SRX5800 Services Gateway.
3. Disconnect all the interface cards from the chassis backplane by pulling them out of the backplane by
6” to 8” (leaving cables in place).
4. Replace the SRX5K-SCBs with SRX5K-SCBEs, or SRX5K-SCBEs with SRX5K-SCB3s and
SRX5K-RE-13-20s with SRX5K-RE-1800X4s based on the chassis specifications.
5. Power on the secondary node.
See:
274

 Loading...