WARNING: Do not look directly into a fiber-optic transceiver or into the ends
of fiber-optic cables. Fiber-optic transceivers and fiber-optic cables connected
to a transceiver emit laser light that can damage your eyes.
CAUTION: Do not leave a fiber-optic transceiver uncovered except when you
are inserting or removing cable. The safety cap keeps the port clean and prevents
accidental exposure to laser light.
6. Arrange the cable to prevent it from dislodging or developing stress points. Secure the cable so that it
is not supporting its own weight as it hangs to the floor. Place excess cable out of the way in a neatly
coiled loop.
CAUTION: Avoid bending a fiber-optic cable beyond its minimum bend radius.
An arc smaller than a few inches in diameter can damage the cable and cause
problems that are difficult to diagnose.
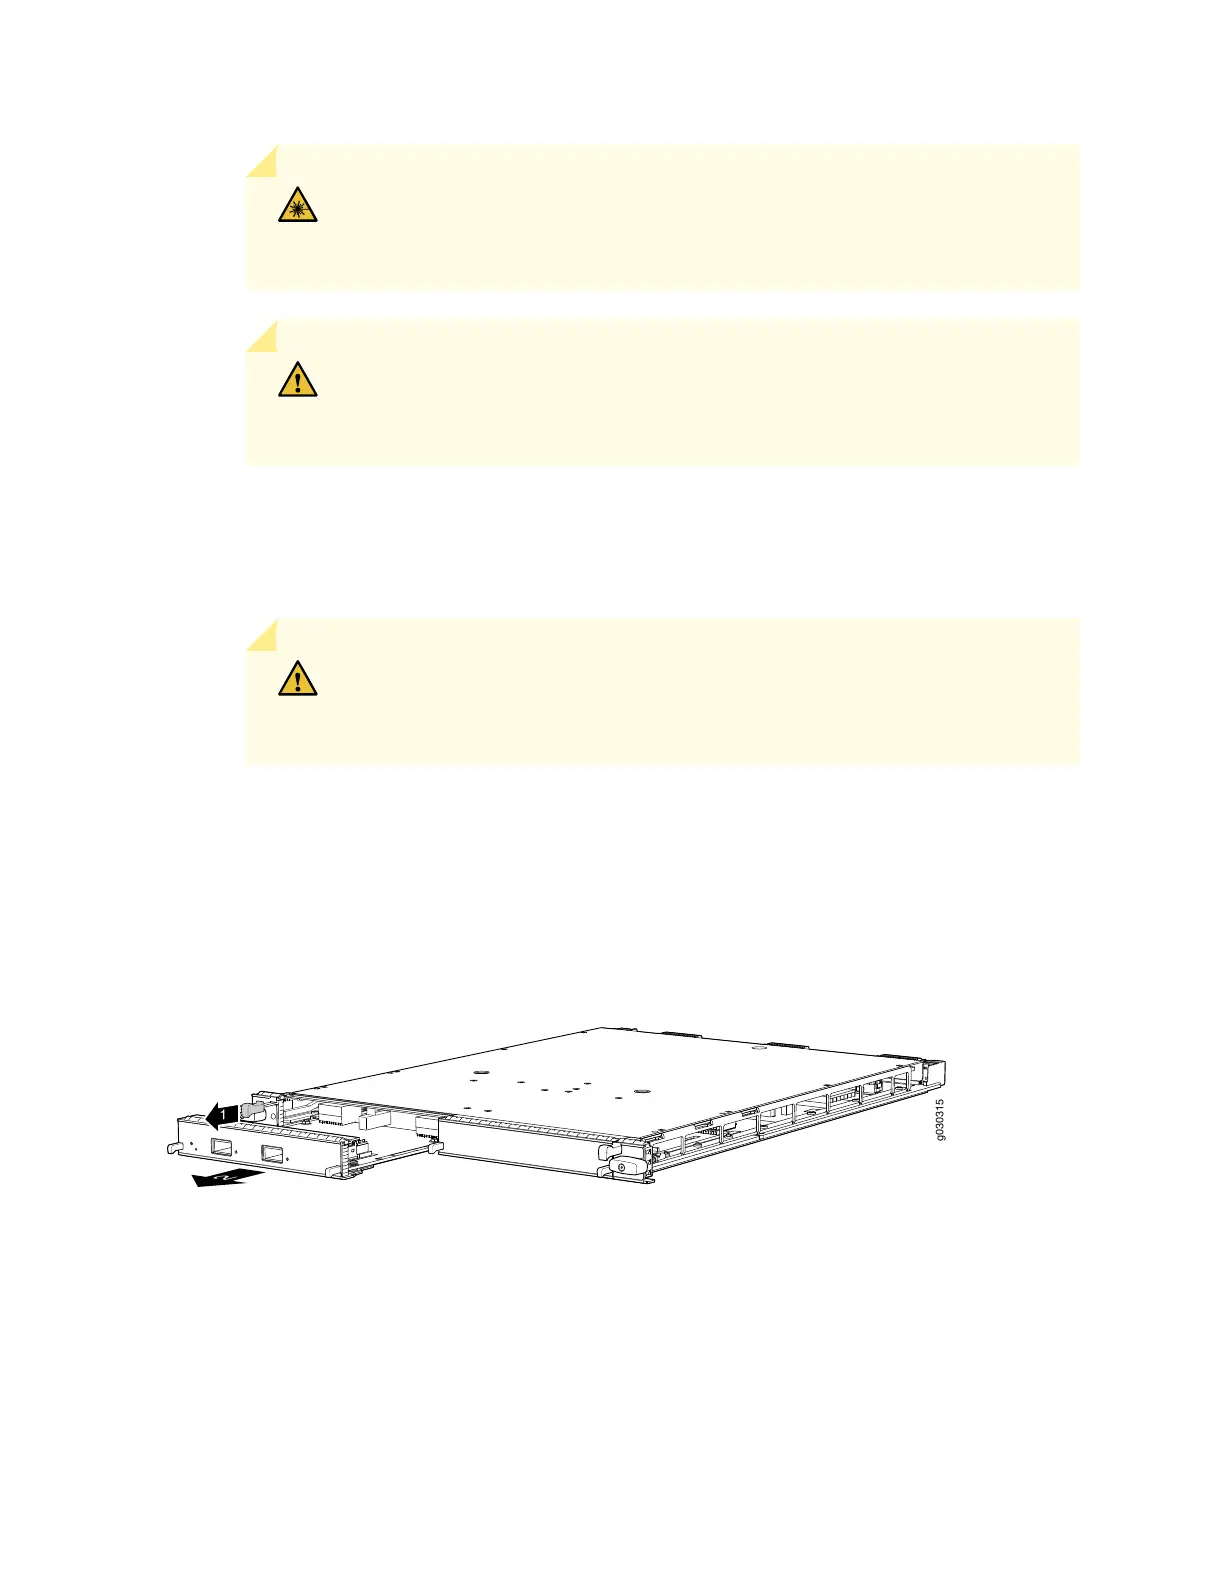
7. On the MPC, pull the ejector knob that is adjacent to the MIC you are removing away from the MPC
faceplate. The ejector knob is located between the MIC and the rotational knob that retains the MPC
in the services gateway card cage. Pulling the ejector knob unseats the MIC from the MPC and partially
ejects it. See Figure 114 on page 287.
Figure 114: Removing a MIC
8. Grasp the handles on the MIC faceplate, and slide the MIC out of the MPC card carrier. Place it in the
electrostatic bag or on the antistatic mat.
9. If you are not reinstalling a MIC into the emptied MIC slot within a short time, install a blank MIC panel
over the slot to maintain proper airflow in the MPC card cage.
287

 Loading...