Section 4 – CRANE OPERATION Mini-Crawler Crane M A E D A
4-62 1/2019 MC285C-3
4. Press the Hook Stowage/Boom Stowage
Switch on the Home screen on the monitor.
Fig. 4-169
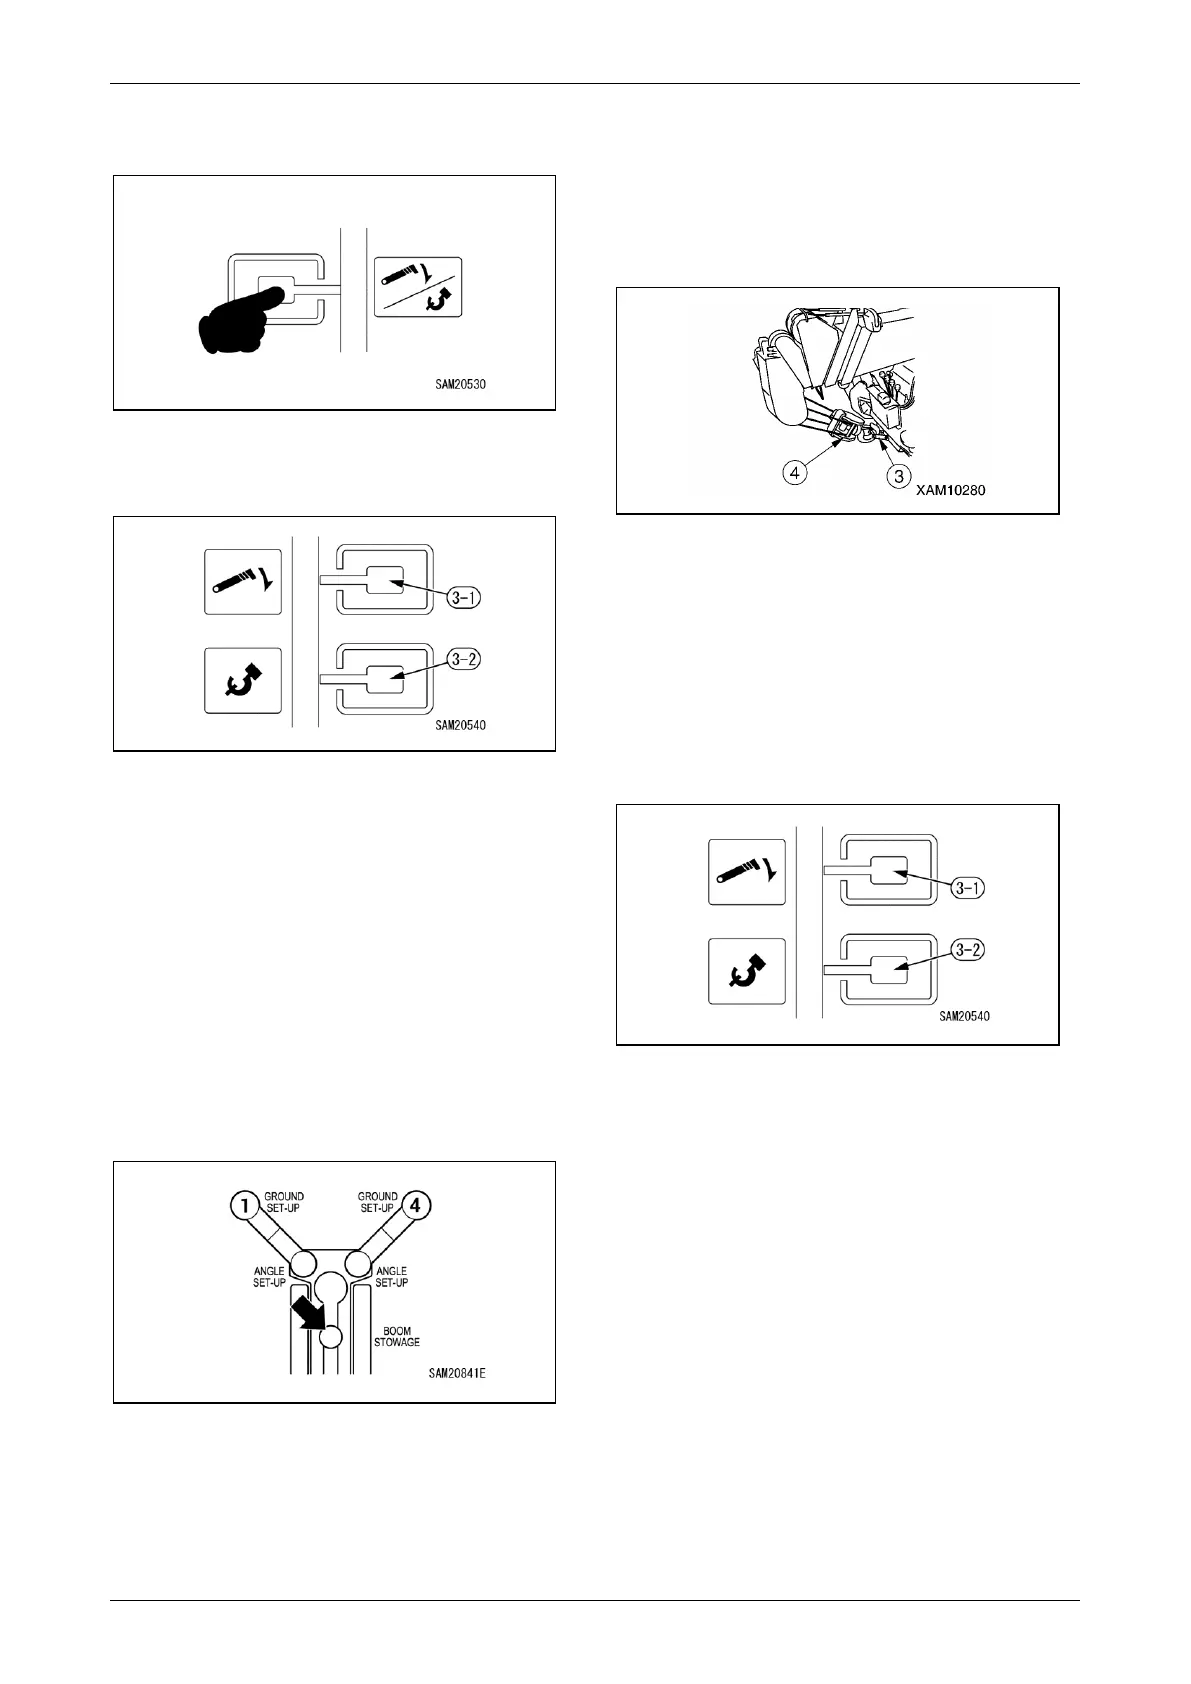
5. Press the Boom Stowage Switch (3-1) to fully
lower the boom.
Fig. 4-170
NOTICE:
• Pressing the switch will not stow the boom
unless the boom has been lowered and
automatically stopped.
• Continue pressing the switch until the boom is
fully stowed.
6. Check to confirm that the Boom Stowing Light
is lit in green.
If the light is lit in yellow or flashing red, the
boom has not been fully stowed. Check by
adjusting the slewing angle position and
boom angle.
Fig. 4-171
Steady green: Boom stowed
Steady yellow: Only stowed at slewing position
Flashing red: Not yet stowed in slewing position
or boom fully lowered position
7. Adjust the hook position by raising or
lowering it. Engage the hook portion of the
hook block (4) on the hook hanger (3).
Once the hook block (4) engages the hook
hanger (3), wind up until it is stopped by the
over winding detector.
Fig. 4-172
8. Press the Hook Stowage/Boom Stowage
Switch again on the Home screen on the
monitor.
9. Press the Hook Stowage Switch (3-2) on the
monitor and stow the hook.
Hook Stowage is complete when the hook
block is engaged to the hook hanger and the
slack in the wire rope has been taken up.
Fig. 4-173
NOTICE:
• Pressing the switch will not stow the hook unless
the hook block is overwound.
• Continue pressing the switch until the hook is
fully stowed.