M A E D A Mini-Crawler Crane Section 4 –INSTALLING AND REMOVING THE ELECTRIC UNIT
1/2019 MC285C-3 4-123
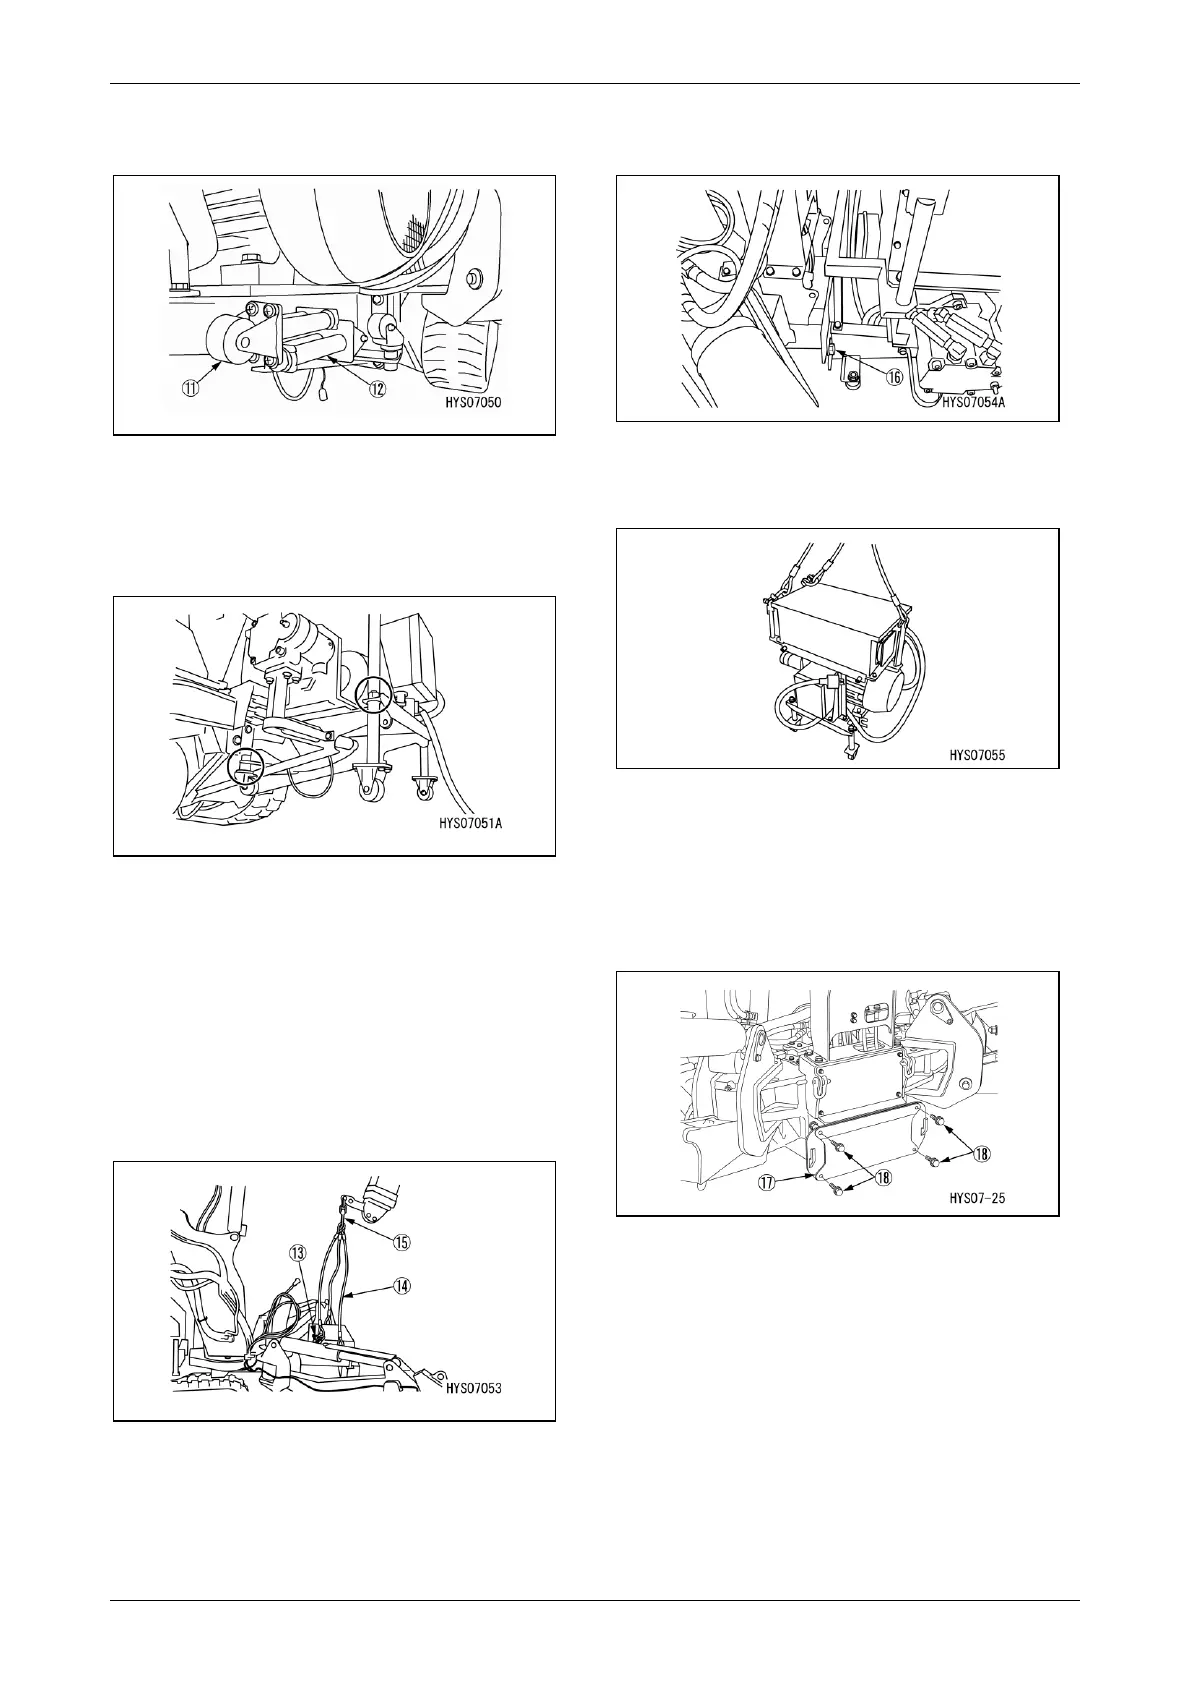
7. Unscrew the nuts (two each) on the casters
(11) (12), then remove the casters.
Fig. 4-327
8. Attach the detached casters at the positions
indicated in the figure below and secure with
nuts.
Mount all casters facing downward.
Fig. 4-328
9. Attach the shackle (13) to the three holes in
the hoisting bracket. Attach the hoisting
attachment (14) to the hook (15) and hoist.
NOTICE: Hoist until the hoisting attachment is
under slight tension.
If the tension on the hoisting attachment is
excessive, damage may result. If the tension is
too low, the machine may fall when you remove
the electric unit.
Fig. 4-329
10. Remove the four bolts (16) connecting the
electric unit to the machine main unit.
Fig. 4-330
11. Gradually lower the electric unit to the
ground.
Fig. 4-331
12. Attach the cover (17) to the location where
the electric unit was removed using the four
bolts (18).
NOTICE: it the cover if the electric unit will be
removed for extended periods.
Fig. 4-332
Reinstalling the Electric Unit
1. Reinstall the electric unit in the reverse
sequence to the removal procedure.
CAUTION: Before securing the electric unit to
the machine main unit with the bolts, use the
crane to raise or lower the electric unit to
adjust the hole positions carefully.
For more information on bolt tightening
torques, see “Standard Tightening Torque List”
on page 5-11.