CYLINDER BLOCK/CRANKCASE
Page 4B-1590-857046R1 NOVEMBER 2001
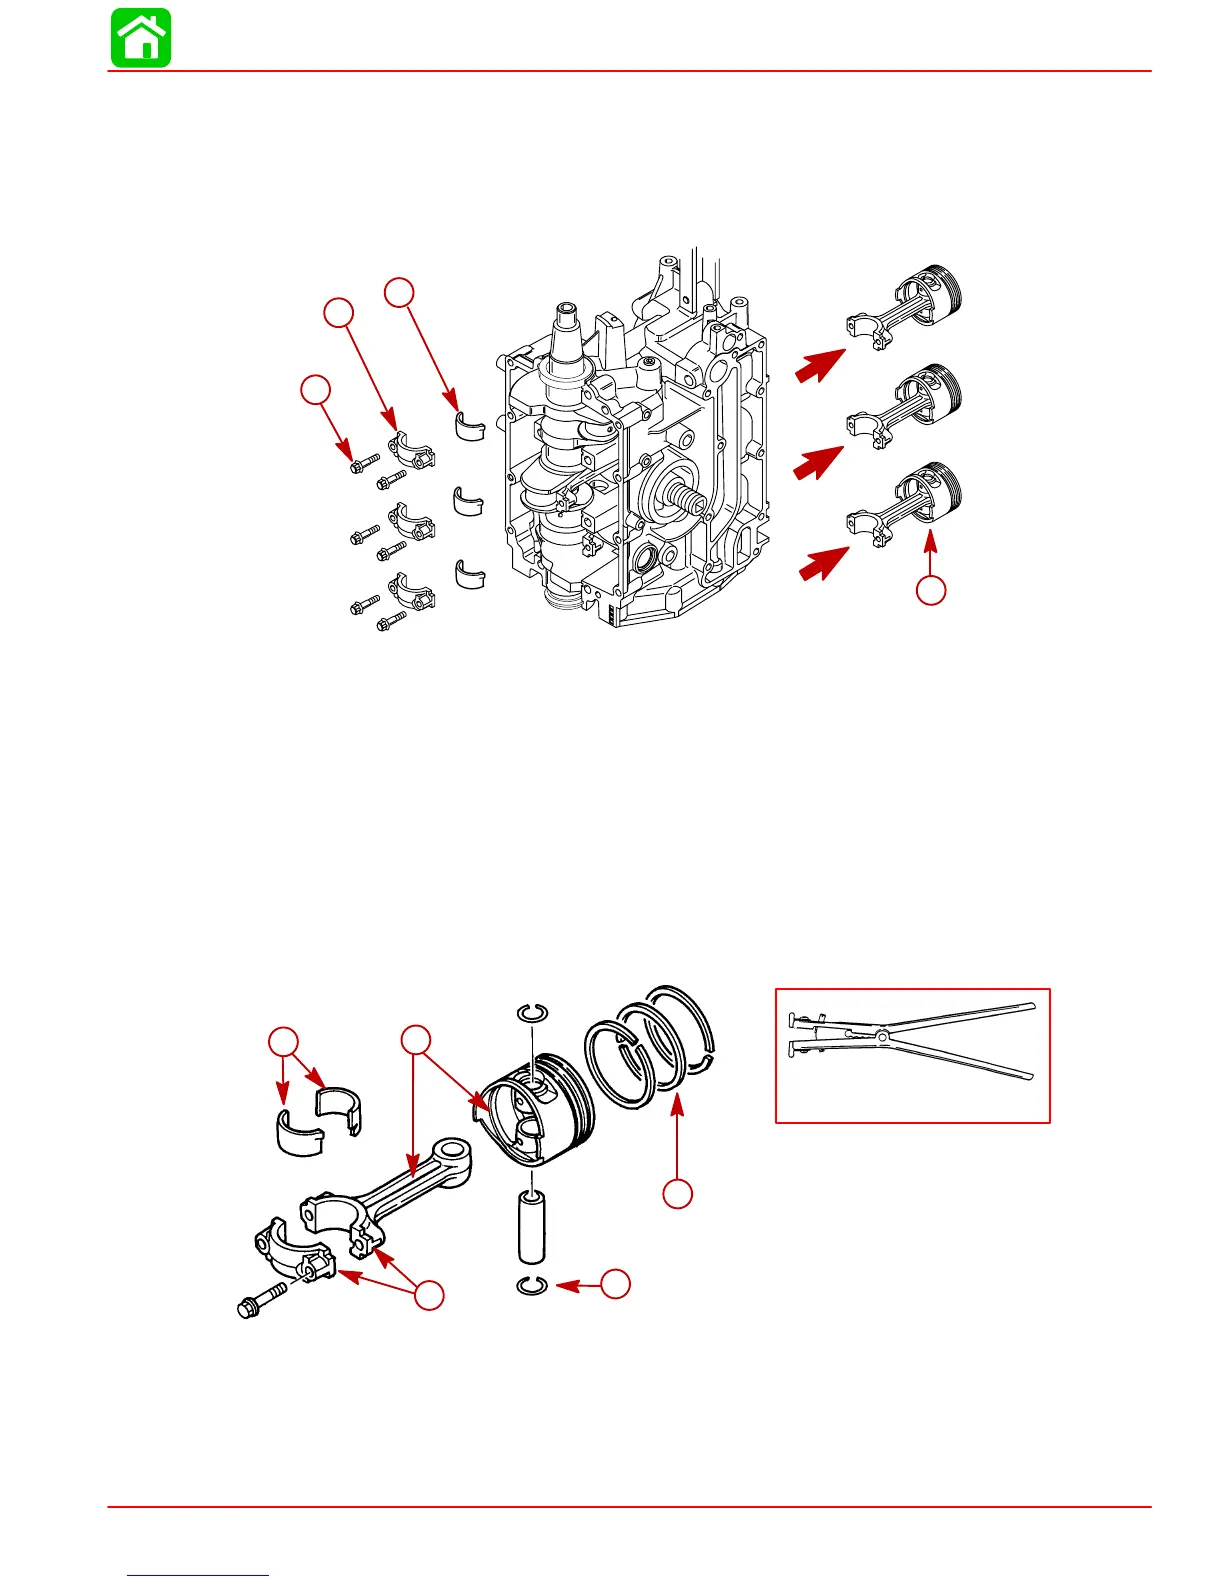
3. Use a 5/16 in. 12 point socket and remove connecting rod bolts and caps.
NOTE: Each connecting rod , cap and bearing are a matched set. They must not be inter-
changed.
4. Remove carbon ridge from the cylinder bore using a burr knife. Push out the connecting
rod/piston assembly. Keep each piston, connecting rod, and cap together as an assembly.
56876
a
b
c
d
a-Connecting Rod Screw (6)
b-Connecting Rod Cap (3)
c-Connecting Rod Bearings
d-Connecting Rod/Piston Assembly (3)
NOTE: Scribe the cylinder number (1 thru 3) on the inside of each piston and connecting
rod so they can be reinstalled in their original location.
5. Disassemble piston/connecting rod assembly. Remove circlips with a needle nose pliers.
6. Remove piston rings. Use piston ring expander tool 91-24697 to prevent rings from
breaking during removal.
NOTE: If reusing rings, mark their location (piston #1, #2, or #3) for correct installation.
53824
a
b
d
c
91-24697
e
a-Circlips
b-Connecting Rod and Cap
c-Scribe the Cylinder Number Here
d-Connecting Rod Bearings
e-Piston Rings
 Loading...