Software Setup/Adding the filters
MAINTENANCE
1-28
Page
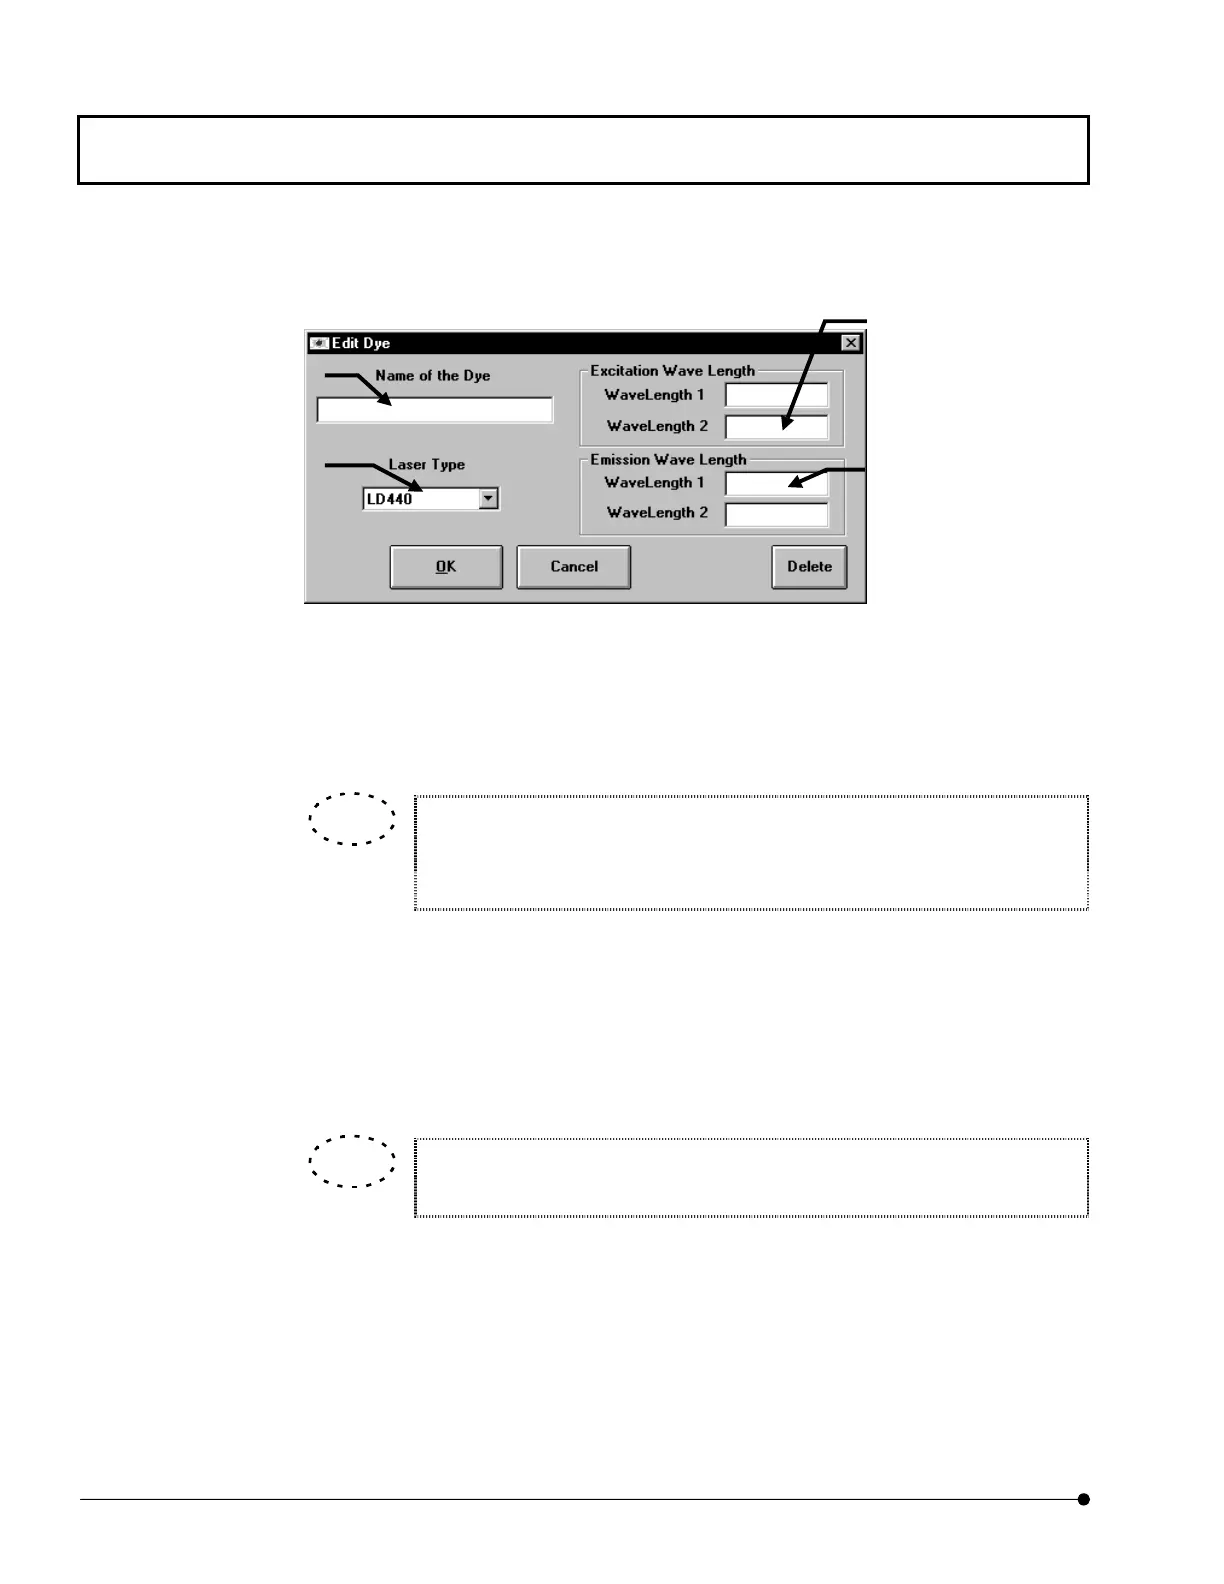
4. In the [Dyes on your Samples] list, double-click “Double click here to make a new Dye”.
The [Edit Dye] dialog box appears.
5. Enter the dyeing method name (CFP in this example) in the [Name of the Dye] text box.
6. Select the laser to be used (LD440 in this example) from the [Laser Type] drop-down
list.
It is required that the LD440 laser has been set as one of the laser types to be
used in advance. If ”LD440” is not displayed, open the [Laser Equipment] panel
and check the [LD440] checkbox.
7. Enter the excitation wavelength value (480 in this example) in the [WaveLength 1] text
box in the [Excitation Wave Length] group box.
8. Enter the emission wavelength value (505 in this example) in the [WaveLength 1] text
box in the [Emission Wave Length] group box
In case of single excitation double emission, also enter an emission wavelength
in the [WaveLength 2] text box.
9. Click the <OK> button to close the [Edit Dye] dialog box.
10. Click the <Save New Setup> button to close the [FLUOVIEW Setup] dialog box.
[Name of the Dye] text box
Enter the dyeing method name.
[Laser Type] drop-down list
Select the laser to be used.
[Emission Wave Length]
group box
Enter the emission
wavelength.
In case of single excitation
double emission, also enter a
wavelength in the
[WaveLength 2] text box.
[Excitation Wave Length]
group box
Enter the excitation
wavelength.
TIP
TIP

 Loading...


