211 / 374
SOCT User Manual Version 10.0 rev. A
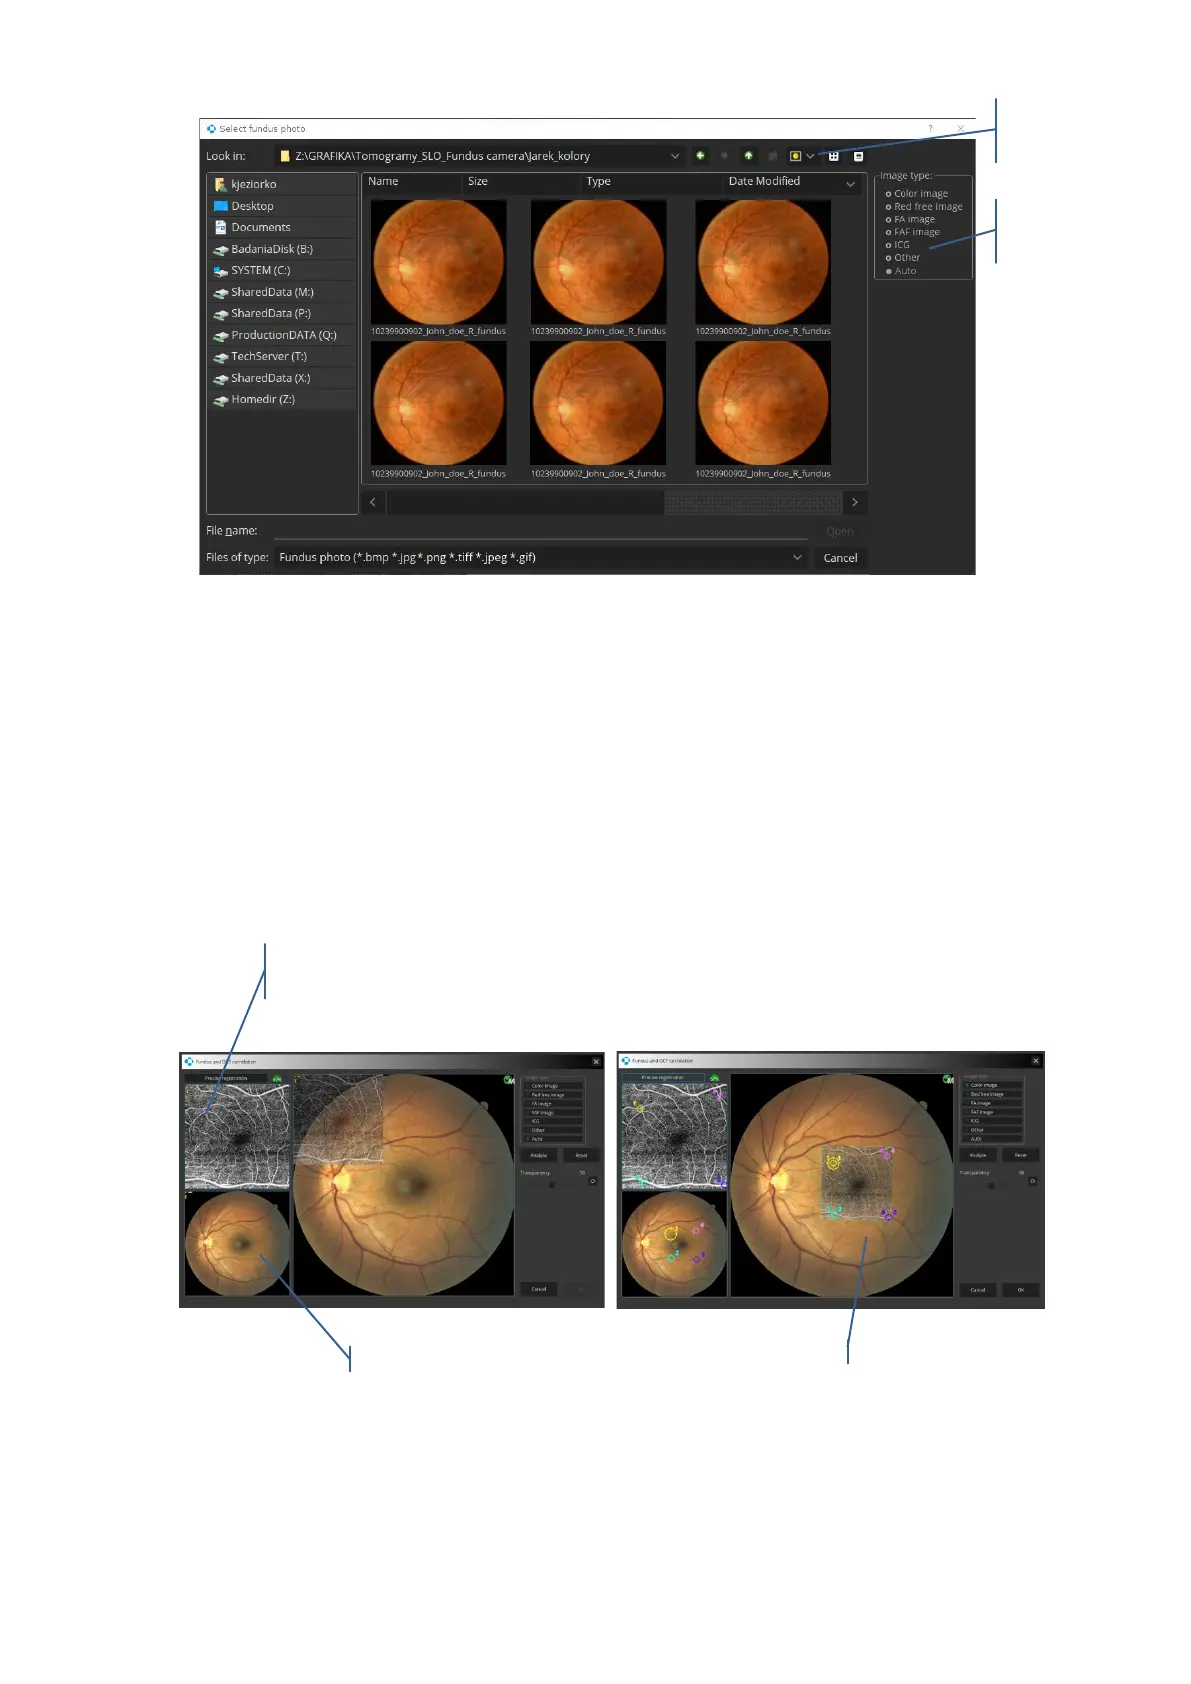
3 The user can indicate the type of the fundus photo which is to be imported in the
[Image type] selection field on the right side of the window. Indicating the type of the
image allows the system to apply an image-optimized correlation algorithm.
4 Once the desired file has been selected, click [Open]. A Fundus and OCT correlation
window will now open. At this point, place the markers on any characteristic points of
the retina i.e. blood vessels on both fundus(1) and retinal*(2) image previews. Right-
click anywhere to view more options such as to reset all markers. Use standard controls
to zoom and move the previews.
4 Verify whether selected points are placed precisely on both previews. Right-click a
point to remove it. Closing the window will not import the photo and discard any
 Loading...