79 / 374
SOCT User Manual Version 10.0 rev. A
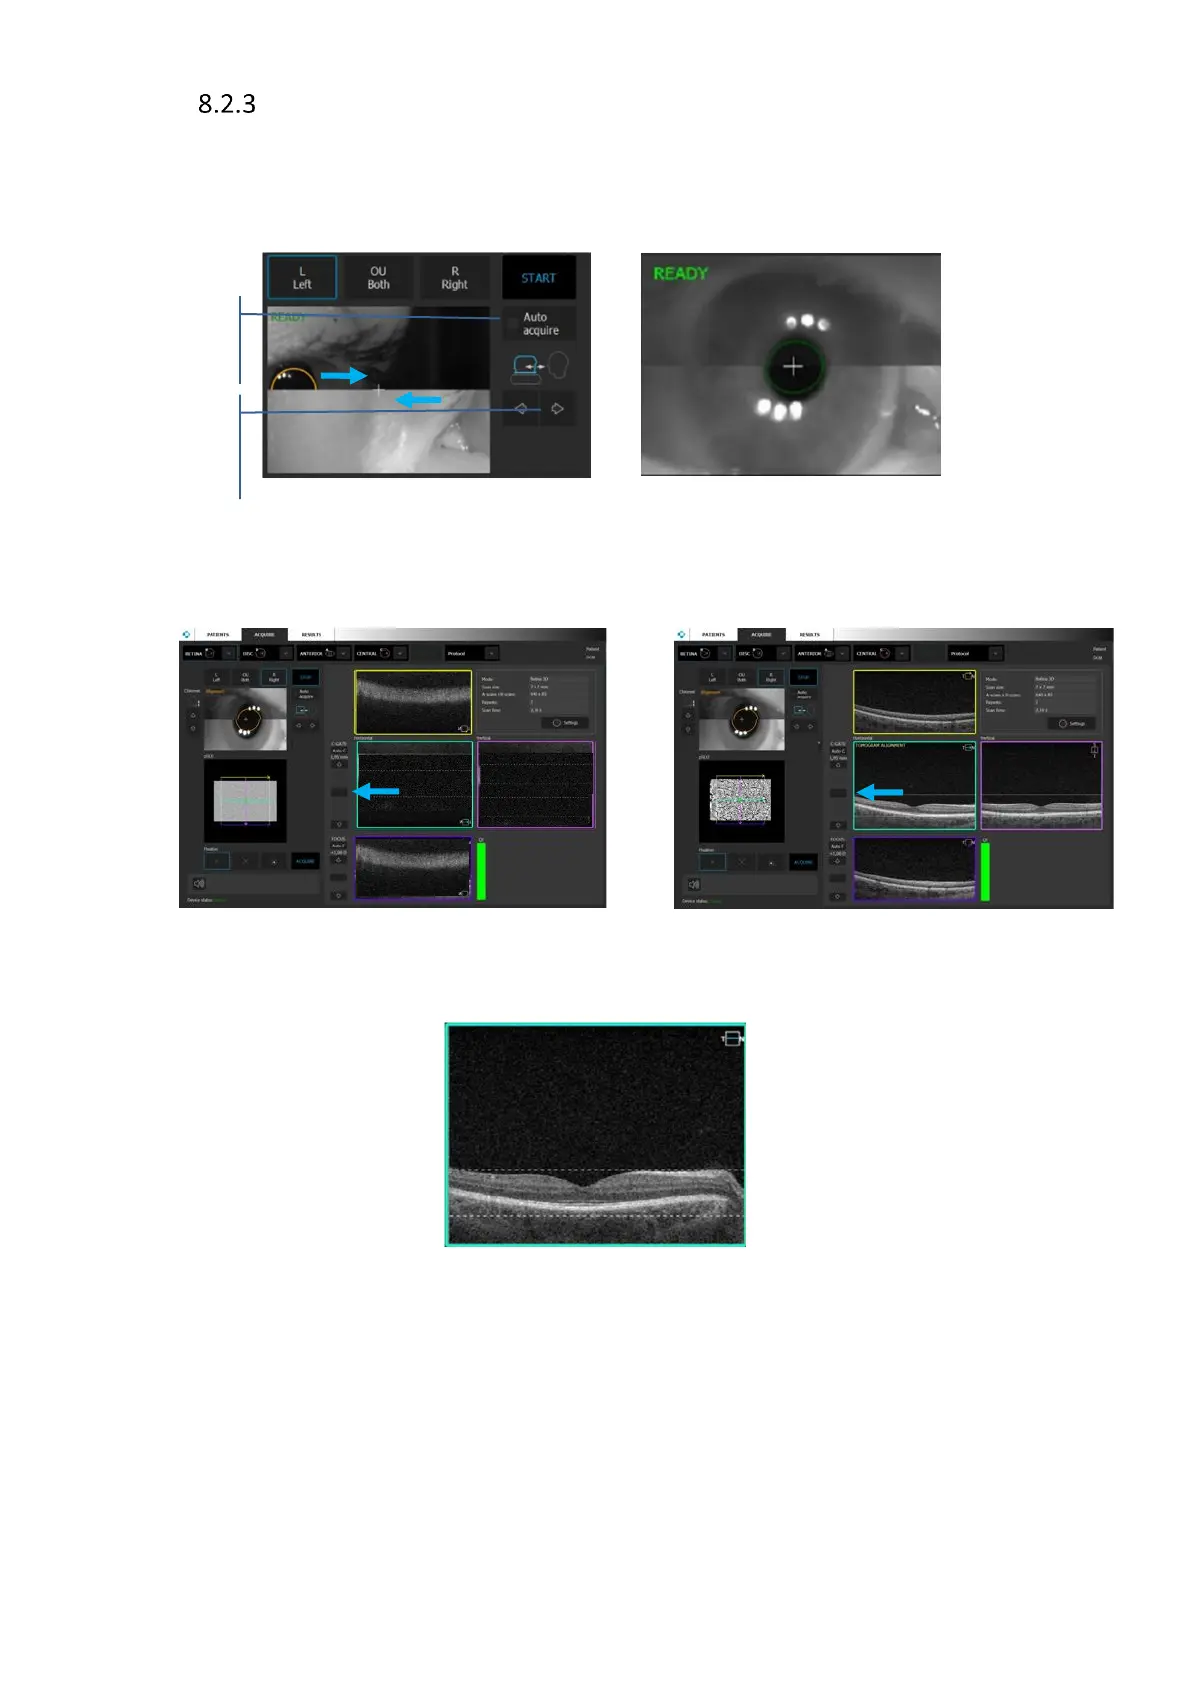
Manual mode
1. Uncheck [Auto Acquire]
2. Align the pupil position. Move forward until both images create one. Then press the center
of the pupil to align the lens across the center of the pupil.
Figure 35. Manual examination mode
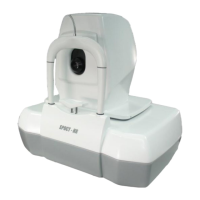
3. OCT signal should already appear in tomogram preview. Adjust C Gate manually by moving
the sliding bar or use [Auto C] button or scrolling mouse wheel on the tomogram.
Figure 36. Manual examination process. Scan optimization and tomogram position alignment
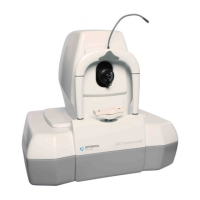
4. In case QI and position of the tomogram is proper proceed to point 6.
Figure 37. Proper position and the quality of the tomogram
5. Manually optimize signal (low saturation, shadows on edges), and if required change the
scanned area e.g. peripheral area.
• Move the position of the internal fixation target. Ask the patient to follow the
fixation target, compensate shadow. The OCT cross-section should be visible in OCT
live preview window. Drag the retina to move tomogram preview to correct position.