210 / 374
SOCT User Manual Version 10.0 rev. A
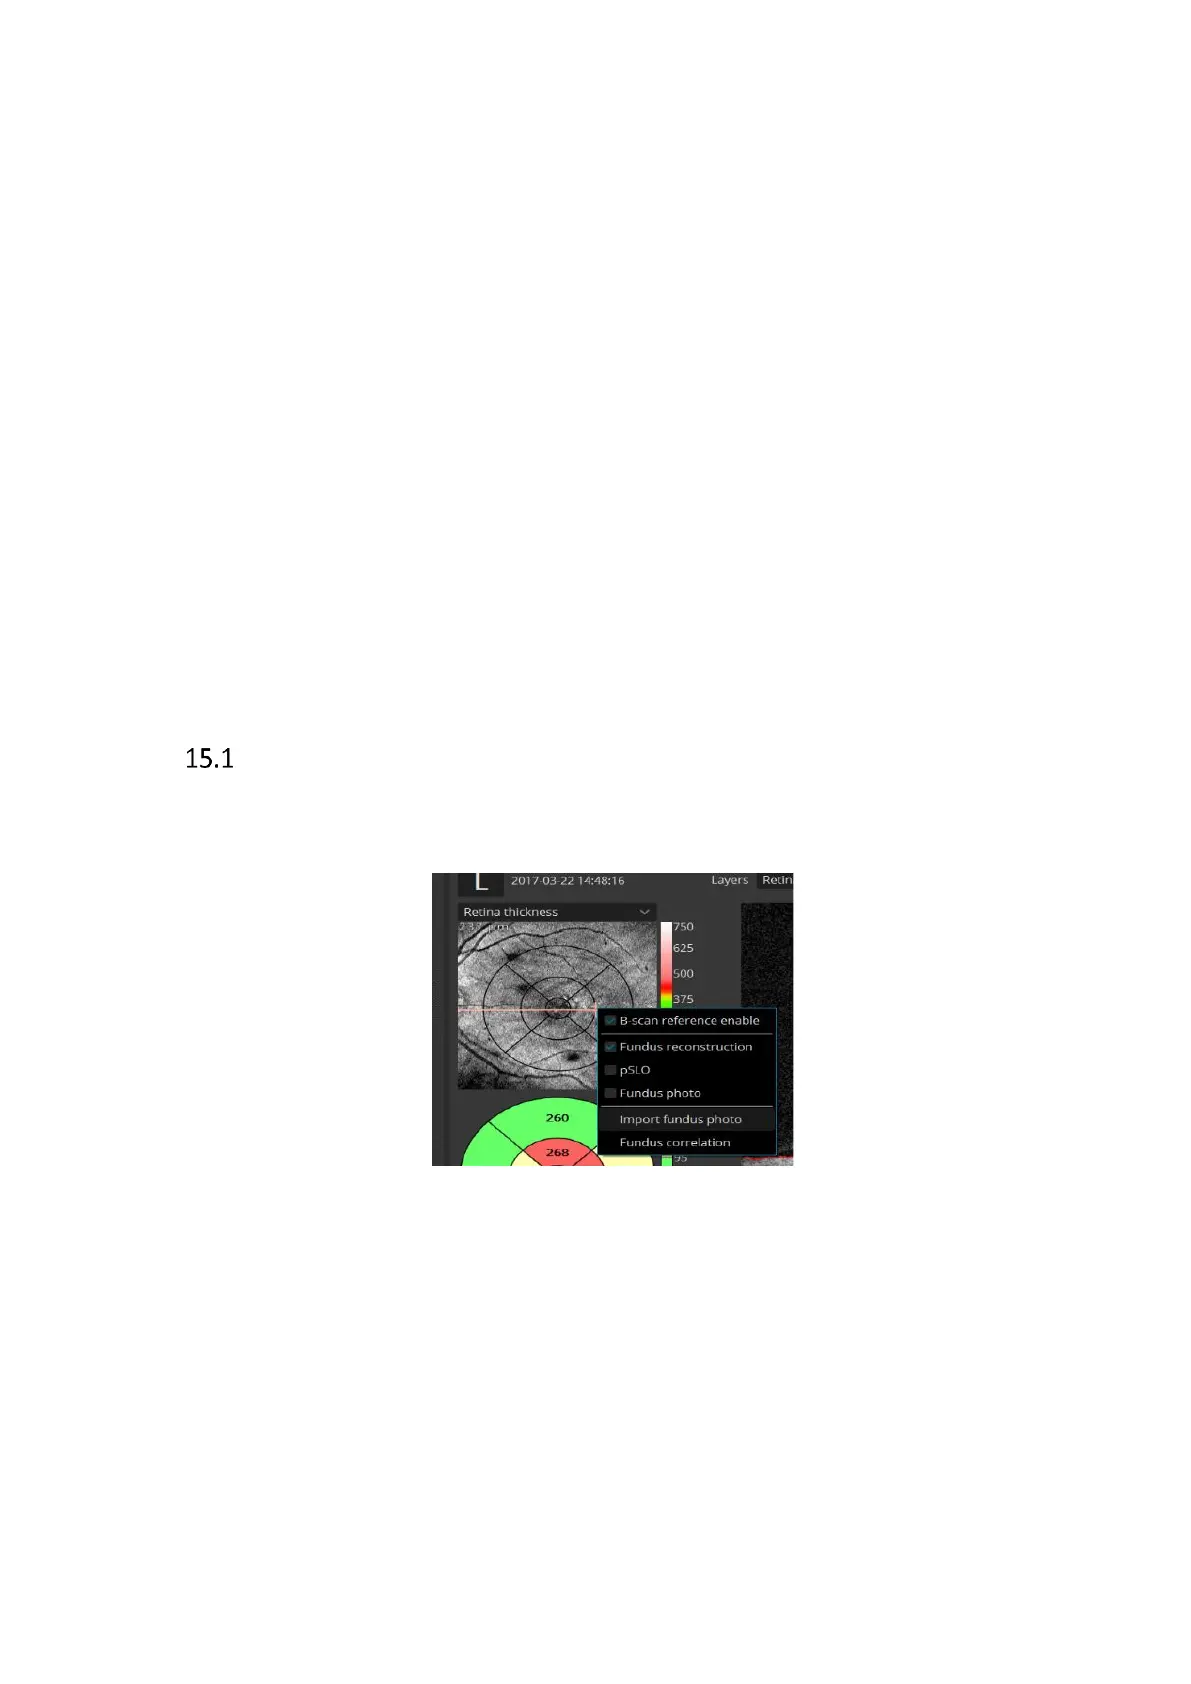
15 SELECTING FUNDUS PHOTO
Fundus images captured by another device such as SLO or retinal camera, can be imported
and shown instead of fundus reconstruction images. Retinal image can be added to the
posterior scans.
Allowed image formats are .png, .tiff, .jpeg, .gif, .bmp and .jpg. When a retinal image is
imported image is added to the visit as separate exam or can be displayed for reference image
instead of fundus reconstruction.
The right-click context menu is available in the following views:
• Retina 3D Single
• Retina Raster Single
• Retina B-scan Single
• Retina Cross Single
• Retina Radial Single
• Retina Angio Single
• Disc Radial Single
• Disc Raster Single
• Disc Angio Single
• Central 3D Single
• Central Raster Single
• Central B-Scan Single
Adding fundus photo to the examination.
1 Right-click on the fundus reconstruction image and select [Import Fundus photo...]
from the context menu.
2 In the window that opens, select a fundus photo to import. Directories from which
photos should be displayed can be easily changed in the [Look In] field. In case of a
directory with many files, use the View selection menu to see previews smaller or
larger. See below.

 Loading...