3.1 Connection over Wire-pressed Terminal Cable
3-3
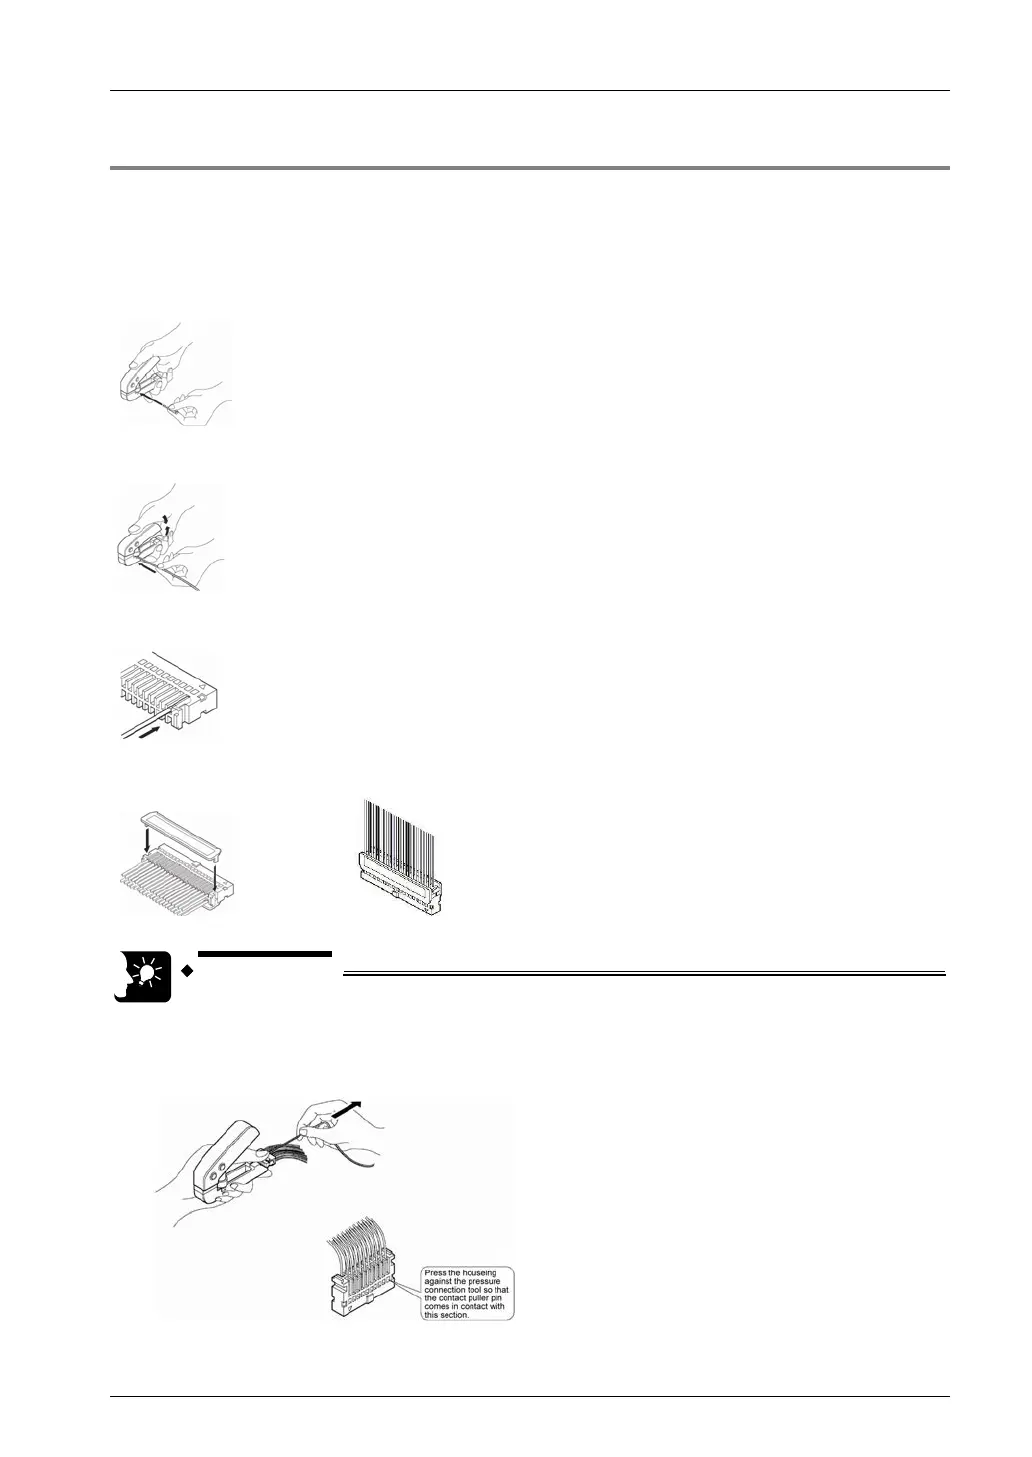
3.1.2 Assembly of Connector for Wire-pressed Terminal Cable
The wire end can be directly crimped without removing the wire’s insulation, which saves
wiring effort.
(Procedure)
1. Bend the contact back from the carrier, and set it in the pressure connection tool.
2. Insert the wire without removing its insulation until it stops, and lightly grip the tool.
3. After press fitting the wire, insert it into the housing.
4. When all wires have been inserted, fit the semi-cover into place.
• Contact puller pin to redo wiring
If there is a wiring mistake or the wire is incorrectly pressure-connected,
use the contact puller pin provided with the fitting to remove the contact.
Phone: 800.894.0412 - Fax: 888.723.4773 - Web: www.clrwtr.com - Email: info@clrwtr.com