Previous Page Table of Contents Section Contents
Back
Index Next Page
LIFEPAK 20/20e Defibrillator/Monitor Replacement Procedures
Front Case (continued)
Front Case Installation
To install the front case assembly:
1. Connect the W14 Printer Flex Cable to the A05 UI PCB at J34.
2. Connect the W25 Speaker Harness Extension Cable to the W02 Speaker
Assembly.
Note: Reconnect the
SPEED DIAL cable if it was disconnected during the
disassembly process.
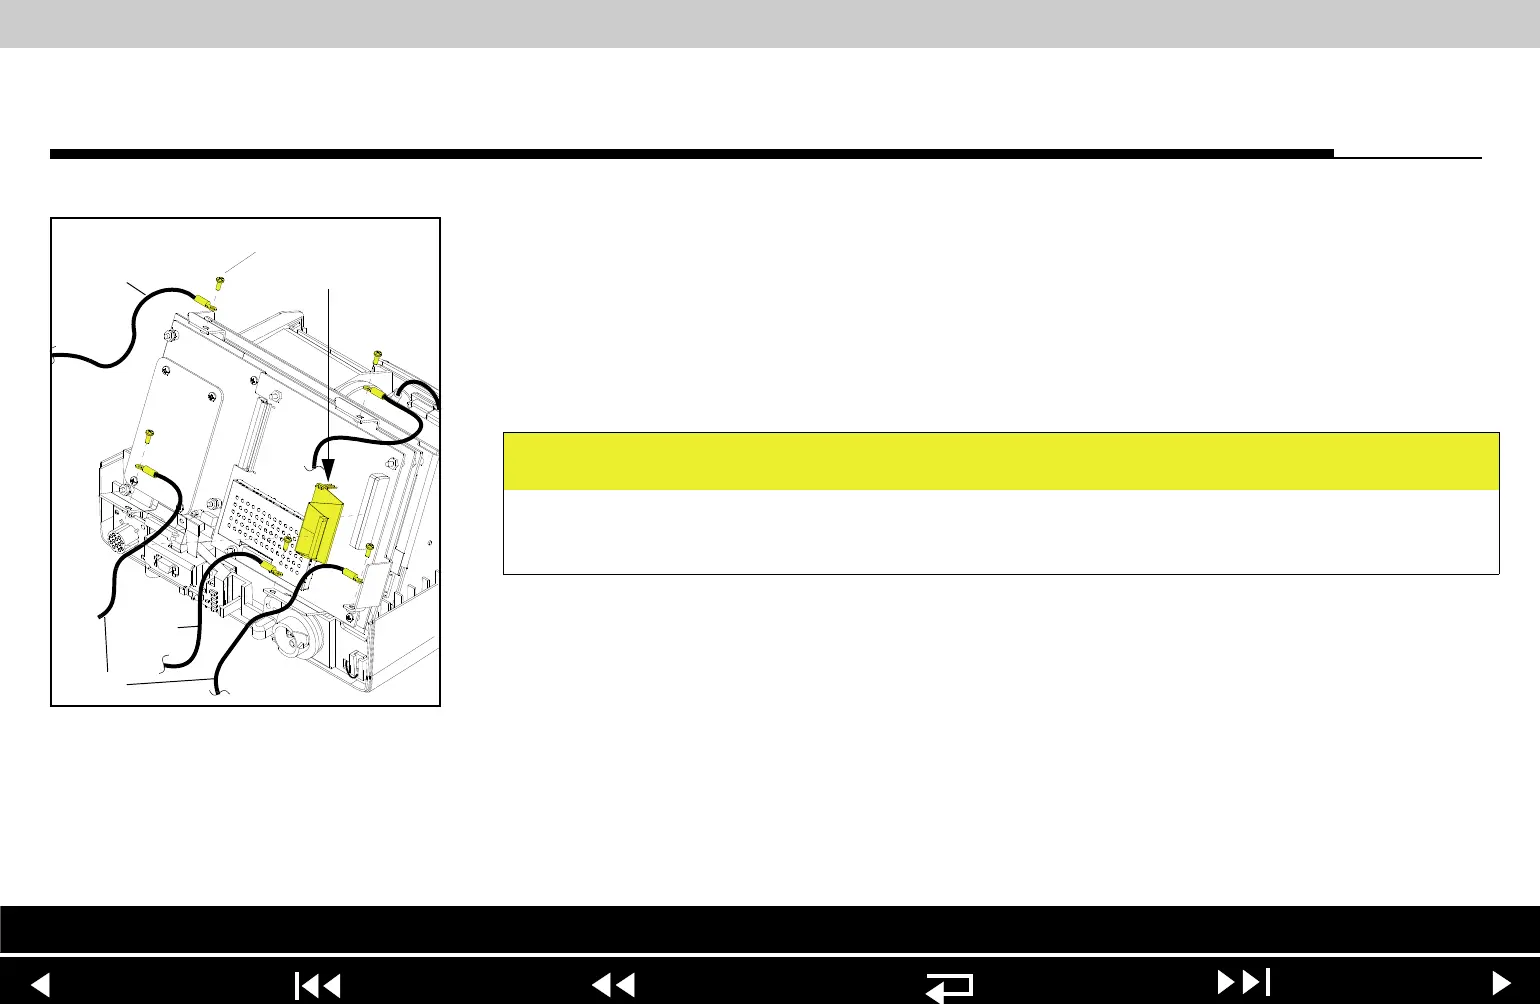
3. Install the two grounding harnesses (221) by connecting the bottom left and
right corners of the A05 UI PCB to the PCB support bracket, using two new
screws (173); torque to 6.8 in-lb. Refer to Grounding Harness Orientation
for grounding harness placement.
4. Install the grounding harness (219) by connecting the bottom center of the
A05 UI PCB to the boardstack system shield, using a new screw (173);
torque to 6.8 in-lb.
CAUTION
Possible component damage. The grounding harnesses must be installed at
precise angles to avoid damaging device components.
Parts List Interconnect Front Case View Rear View Main Assemblies
9-35