Previous Page Table of Contents Section Contents
Back
Index Next Page
LIFEPAK 20/20e Defibrillator/Monitor Replacement Procedures
Bottom Case (continued)
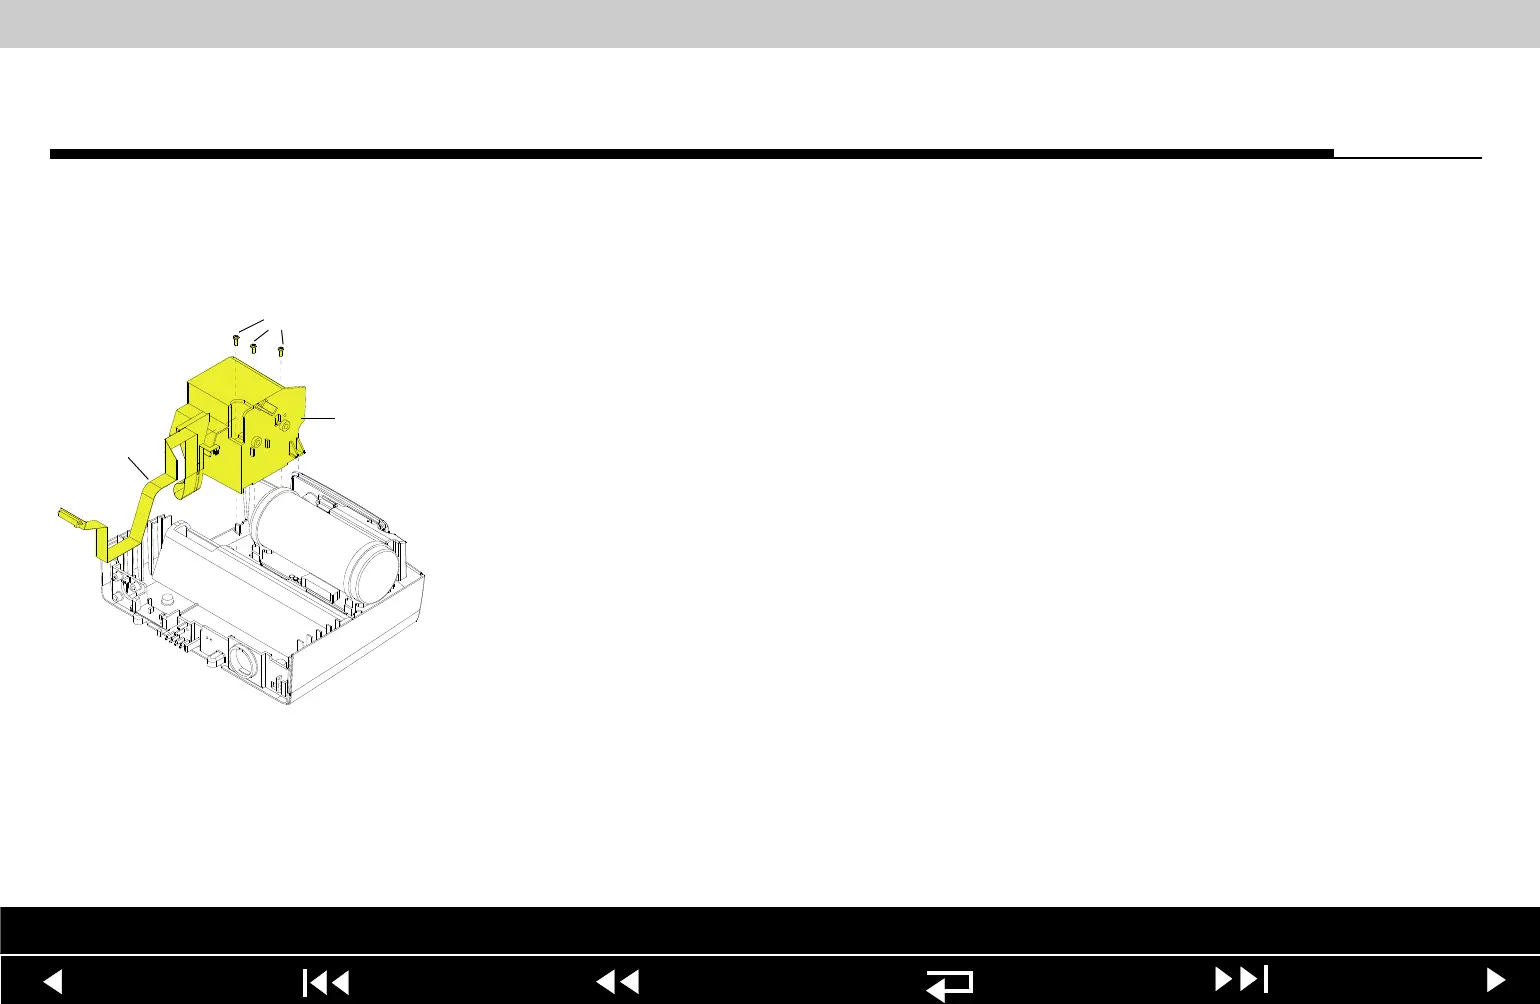
A12 Printer Module
Installation
Note: If installing the A12 Printer only, start at step 9.
To install the printer module:
1. Slide the W14 Printer Flex Cable under the W06 ECG Cable and position the
printer cable along the right side of the guide on the bottom case.
2. Insert the printer cable connector and the 4-pin power cable connector
through the large slot in the shroud.
3. Insert the 4-pin power connector through the small slot in the shroud.
4. Connect the 4-pin power connector to the A03 Power Module at J45,
ensuring that the connector is positioned correctly.
5. Position the printer shroud (89) in the bottom case.
6. Install three new 4-40 0.312 screws (173) into the bottom of the printer
shroud; torque to 6.8 in-lb.
Parts List Interconnect Diagram Module View Connectors View Main Assemblies
9-119