Previous Page Table of Contents Section Contents
Back
Index Next Page
LIFEPAK 20/20e Defibrillator/Monitor Replacement Procedures
Bottom Case (continued)
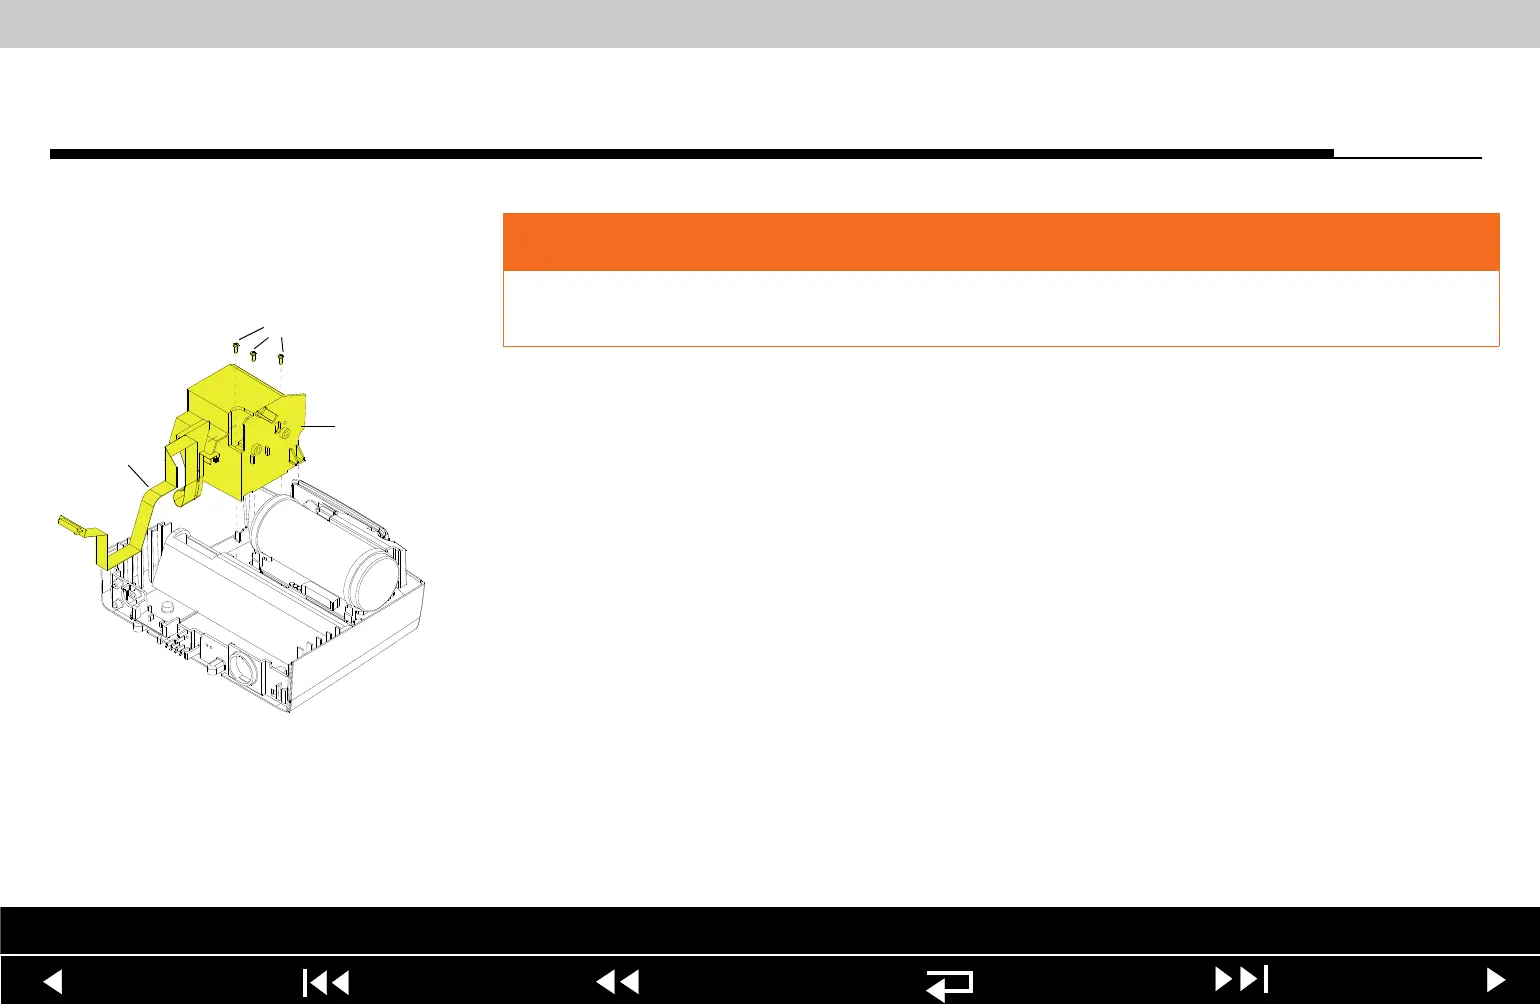
A12 Printer Module
Removal
To remove the A12 Printer Module assembly and shroud:
Note: If Printer shroud or W14 Printer Flex cable is remove, the following
assemblies will require disassembly:
– A07 Battery
– Top case
– Front case
– Boardstack
1. Open the printer door and remove the printer paper roll.
2. Loosen the two captured screws located inside the printer on the rear wall.
3. Carefully pull the A12 Printer out of the printer shroud (89).
4. Disconnect the W14 Printer Flex Cable from the printer at printer
connection J1.
WARNING
SHOCK HAZARD. Carefully follow disassembly instructions to avoid a shock or
causing damage to wires during disassembly.
Parts List Interconnect Diagram Module View Connectors View Main Assemblies
9-117